12 Creative Backyard Play Areas Kids Love
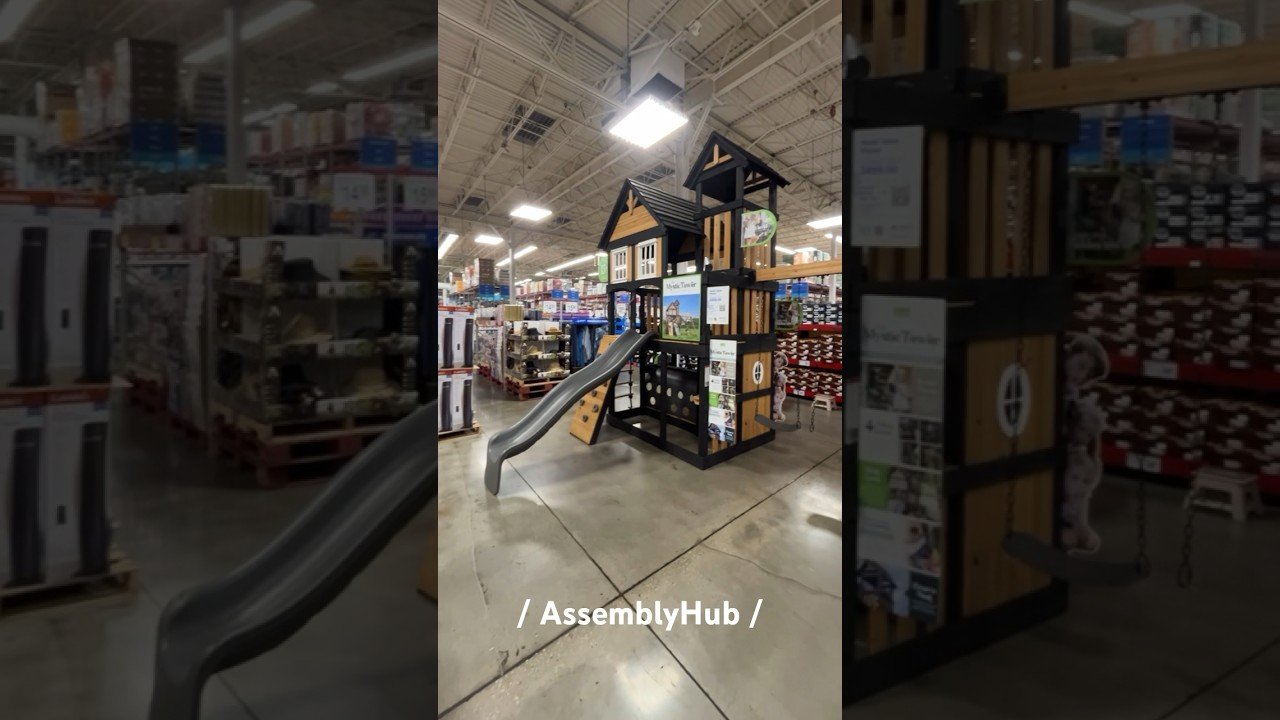
Backyard Play Areas work best when you start with the child who will use them, not the catalog. A giant swing set can overwhelm a small yard, while a tiny jungle gym bores a 10-year-old. The goal is to match the equipment to the situation.
Safety comes first. In our research, the biggest mistakes happen before installation even begins. ASTM F1148, the home playground equipment standard, calls for a clear six-foot fall zone around every structure.
As of 2026, that requirement is still the starting point for a safe install.
Quick Answer
Best backyard play areas match the kids' ages, your yard, and your budget. Plan the fall zone first. Choose safety surfacing before equipment.
Call 811 before you dig. Then build for the next five years.
That process sounds simple, but most parents miss one of those steps. They buy a playset first and then try to make the yard fit around it. The better road is the reverse: measure, decide, buy, and install.
Backyard Play Areas: What to Build When Every Yard Is Different
Image source: YouTube / AssemblyHub (YouTube thumbnail (fair-use with source credit))
Every backyard has a personality. A flat lawn, a sloping hill, and a narrow side yard each improve a different plan. The process isn't complicated, but it is conditional.
You want a build that matches the space you already own.
Why the Best Play Area Depends on Your Yard, Age Range, and Budget
Age drives safety. Yard shape drives cost. Budget decides whether you get a full playset, a single swing, or a natural playscape.
Get those three conditions sorted before you buy anything.
For example, a toddler needs low decks and soft surfaces. A ten-year-old wants height and upper-body work. Put a toddler unit in a yard with no shade and you'll see it used during the first hour only.
Put a high deck in a narrow side yard and it can create a safety hazard.
This is why we like to start with three questions. Answer them in order, and the right piece becomes obvious.
The First Question: What Ages Are You Designing For?
The best backyard play area for a toddler is different from the design for an older child. Age controls the height, the climbing difficulty, and the speed of the play.
Toddler Play Areas (Ages 1 to 3)
For this age group, the ground level ahead of height.
- Keep the deck under 20 inches.
- Use a low platform, a gentle slide, and bucket swings.
- Add a playhouse or simple sensory panels.
- Avoid overhead monkey bars and steep slides.
Toddlers fall fast and often, and they don't know their limits yet. Compact pieces work well. A small two-foot-high platform with a slide can be enough for an afternoon of play.
Early Elementary Play Areas (Ages 3 to 7)
Ages 3 to 7 give you more flexibility. Kids in this range want to climb and swing. They can handle a little height but still need adult supervision.
- Choose a deck height of 4 to 5 feet.
- Add belt swings, a small climbing wall, and a slide.
- Include a garden bench or covered cave for them to hide in.
- A tire swing can work well if you have the clear.
This is the sweet spot for a compact playset. It handles climbing, swinging, sliding, and imaginative play all at the same time. If you have two kids in this range, a modular playset is easy to justify.
Older Kids (Ages 7 to 12)
Older kids don't use the same layout. They want speed, height, and social play.
- A 6-foot deck with a taller slide works better.
- Monkey bars, overhead ladders, and rings add indie swings.
- A climbing wall or a trampoline can hold their attention.
- A tire swing or a swinging rope gives them a challenge.
At this stage, the equipment must hold more weight. Look for structures rated for 150 pounds or more. Also, inspect climbers like climbing domes because they absorb more impact.
The Second Question: What's Your Yard Shape and Slope?
Yard shape and slope decide what physically fits. A flat, open lawn is the easiest. A sloping backyard changes the project entirely.
Flat and Open Yards
If you have a large, flat area, look for a playset with a big footprint. You can choose a full-size A-frame with several stations. Place it in the outer center of the yard, away from fences and trees.
- Make sure the ground is level and free of roots.
- Add a 6-foot fall zone around all sides.
- Choose a unit with a high-weight capacity.
Flat yards give you a standard rectangular layout. The main risk is thinking you have more space than the fall zone allows. A 6-foot swing set arc needs a zone of about 12 feet on each side.
Narrow Side Yards
If your space is long and narrow, don't try to squeeze in a wide swing set walk. Instead, choose a vertical route. Climbing structures, monkey bars, and single slides all work well in a tall, narrow footprint.
- Use a wall-mounted climbing wall if your fence allows.
- Go for a compact climbing dome or a horizontal fort.
- Avoid equipment that spreads out to tidy.
A narrow side yard can actually be a great play zone when you think in terms of height, not footage. You'll want to leave a center corridor for movement.
Sloped or Uneven Terrain
This is the trickiest one. If your yard has any slope, you must start with a stable flat platform. Digging into the hill for a play area creates a responsibility for drainage and erosion.
- Use a retaining wall to create a level base.
- Run gravel or drainage under the structure to avoid puddles.
- Consider mountain-side designs like a rock climbing boulder or a slide for use on the slope.
A slope doesn't have to be removed. You can turn it into a natural feature. A cool way to use the grade is a tunnel slide that follows the hill.
The Third Question: What's Your Budget and DIY Comfort Level?
Money matters, but so does your time. A kids' wooden playset for $1,200 still needs assembly, for the rest, surfacing, and accessories. A low-budget package can work if you are comfortable with basic tools.
A custom build can cost much more but can simpler and longer.
| Option | Typical Price | DIY Skill Level | Lifespan |
|---|---|---|---|
| Budget playset kits | $300 to $1,500 | Moderate | 5 to 8 years |
| Premium wood or vinyl sets | $1,500 to $5,000 | High, or hire a pro | 10 to 15 years |
| Custom natural playscape | $1,000 to $15,000 | Expert or contractor | Varies |
Budget Kits Under $1,500
You can still get a solid swing set to use for a $500 to $800 range. They usually have a tower, slide, and a few swings. Go for pine or cedar frames and use metal brackets.
You'll need to treat the wood every year.
A budget kit is a good entry point if you are ready for an afternoon build. This could also happen if you have a small yard and want something simple. If you want a backyard do-it-yourself experience without fully customing from scratch, this is the place to start.
If this route matches, you might also want to add a few patio or landscape ideas around the side of the set. A small decorative stone patio brings visual detail without a total rebuild.
Premium Wood and Vinyl Sets
This tier gets you a better deck area, a stronger frame, and usually better safety hardware. You should see cedar or pressure-treated pine instead of cheap plywood. Vinyl sets never splinter and let you do a more modern look.
Premium kits take long to install. Allow a full weekend with two people. Some stores offer a professional installation, which can add $200 to $500 to the final price.
Custom or Natural Playscapes
If you have a landscape or a DIY passion, this is the path. Use logs, timber, boulders, and quilts to create elevated platforms or climbing experiences. The quality is unique, but the safety details must be handled carefully.
You need to correctly anchor and ensure there are no sharp edges or pinch points.
This works well if you want your play area to disappear into the garden, seeing as landscaped outdoor extension. If you're into large backyard project creation, you'll get a lot of satisfaction from planning it yourself.
The Decision Branch: Full Playset vs Standalone Pieces vs Natural Playscape
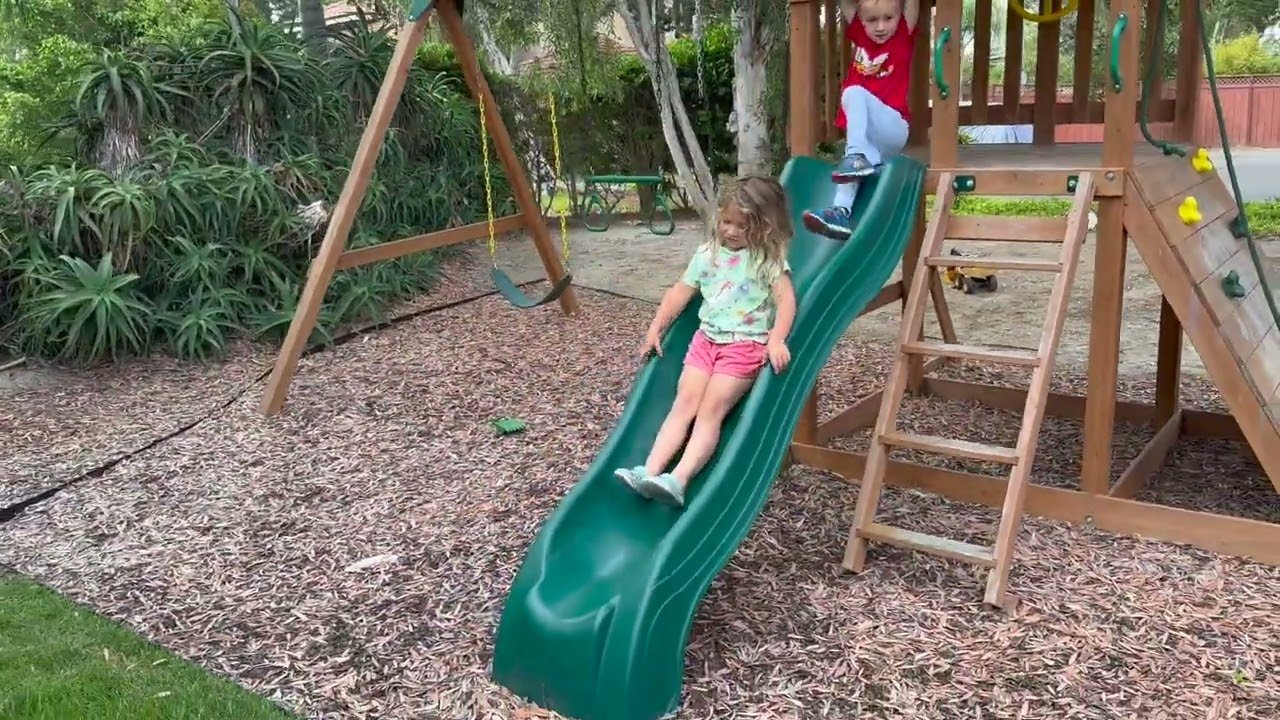
Image source: YouTube / Product Reviews & Demos (YouTube thumbnail (fair-use with source credit))
This is the moment where logic that comes together. After you know the child, the yard shape, and the budget, choose the build style.
When a Full Playset Makes Sense
If you have a flat space, a child in an active age range, and a mind for an all-in-one unit, a playset is your answer. It offers multiple functions in one footprint. You get climbing, swinging, and sliding in one platform.
Full playsets work well for ages 3 to 8, especially when you have two or three children. They centralize supervision and. They also make your backyard look finished immediately.
In our research, compact kits under $1,000 can handle basic play time for years. But you still need the safety (9,000) and definitely before installation.
When Standalone Swings and Slides Win
If your space is small or your main goal is a single activity, buy one. That's the only way to build swings, slides, and climbing walls separately. That approach fits a maximum finally.
- A small child may just need a swing near the back wall.
- An older child might prefer an overhead ladder by the fence.
- A climbing dome can sit in a corner and leave the rest grass.
This is your best call if you want to piece together options over time. You might replace the swing set for a larger one as the child grow.
You can also set up a water-play station next to the house and keep the middle of the yard open. A simple garden hose reel makes it easy to bring water at lunchtime.
When a Natural Playscape Is the Better Fit
A natural playscape or "backyard adventure playground" uses wood, stone, sand, and plant material instead of standard play equipment. It looks less structured and might blend with a wooded yard. It is also more flexible to your surroundings.
Use natural logs as balance beams. A small tree trunk can become a climbing stump. Boulders can become a stepping route.
This is best if your budget can go toward the site, not equipment, or if you want a very organic design. Make sure to still use a fall surface of 9 to 12 feet inches of sand, stamps, or wood chips. A natural slope doesn't keep a crash soft automatically.
Once you pick a route, the next battle is the floor. That's where from here you'll pretty much always retrace your steps. We'll get into surfacing right after, as having oversight beneath the equipment changes the entire finish.
Ground Surfacing Is a Decision Too

Image source: YouTube / Playground Equipment (YouTube thumbnail (fair-use with source credit))
Grass alone doesn't cut it. A fall from a 4-foot deck onto packed dirt can cause serious injury. The CPSC recommends a minimum of 9 inches of loose-fill material under and around equipment.
Loose-Fill Options: Rubber Mulch, Wood Chips, Engineered Wood Fiber
Loose-fill is the most common choice for home play areas. It's cheaper than poured surfaces and easier to install yourself.
- Rubber mulch lasts longer and doesn't decompose, but it costs more.
- Wood chips are budget-friendly and natural, but they break down over time.
- Engineered wood fiber is the CPSC's top pick for playgrounds because it compacts well and stays put.
You'll need to re-rake loose-fill every few weeks. Kids kick it around, and the fall zone thins out. Check the depth monthly, especially after heavy rain.
Rubber Mats vs Poured-in-Place: Cost and Longevity
Rubber mats and poured-in-place surfaces cost more upfront but need almost no maintenance. A poured surface runs $8 to $15 per square foot installed. Rubber tiles run $5 to $10 per square foot.
These options work best for small areas or permanent installations. They also hold up better in high-traffic zones. The tradeoff is price and the fact that you can't easily move them later.
A Step-by-Step Workflow to Narrow It Down
Start with measurements, not wish lists. Grab a tape measure and map out your yard before you look at any equipment.
Measure Your Clear Zone
The fall zone extends 6 feet beyond the equipment on all sides. For swings, it's even larger. The zone must extend 2 times the swing height in front and behind the swing.
Mark the area with spray paint or flags. If the zone overlaps a fence, tree, or patio, you need a smaller piece of equipment.
Set Your Non-Negotiables
Write down three things you won't compromise on. Maybe it's a shaded spot. Maybe it's a surface that won't get muddy.
Maybe it's a structure that fits your backyard project plans.
These non-negotiables filter out half the options immediately. You'll save hours of browsing.
Match Your Shortlist to Your Yard
Now compare your shortlist against your measurements. A playset with a 10-foot swing beam needs a 22-foot clear zone. A climbing dome needs only a 12-foot circle.
If the numbers don't fit, move to the next option. This step prevents the most common installation mistake: buying something that doesn't physically fit.
Common Mistakes That Ruin Backyard Play Areas
Skipping the Utility Locate Call
One phone call to 811 marks your underground lines for free. Skipping it can lead to hitting a gas line or buried cable. That's a $500 repair at best and a serious safety hazard at worst.
Forgetting the Fall Zone Clearance
Most people measure the equipment footprint, not the fall zone. A 6-foot-wide slide needs 6 feet of clearance on each side. That's 18 feet total.
If you don't have that space, you need a smaller unit.
Installing Over Poor Drainage
Water pools under playsets when the ground isn't graded properly. That creates mud, rust, and slippery surfaces. Add a slight slope or a drainage layer before you install.
Choosing the Wrong Wood Treatment
Pressure-treated pine resists rot but contains copper. Cedar is naturally rot-resistant but costs more. Some cheap kits use untreated pine that warps within a year.
Check the wood grade before you buy.
Maintenance and Long-Term Upkeep
A playset lasts longer when you treat it like outdoor furniture. A yearly inspection catches small problems before they become safety issues.
Spring and Fall Safety Inspections
Check all bolts, S-hooks, and connectors twice a year. Tighten anything loose. Look for cracks in plastic parts and splinters in wood.
Replace worn swing seats before they break.
Re-Raking Surfacing and Checking Anchors
Loose-fill surfacing migrates. Rake it back into the fall zone every few weeks. Check that ground anchors haven't worked loose, especially after winter frost heave.
Wood Preservation and Hardware Checks
Re-stain or seal wood every 1 to 2 years. Use a water-based exterior stain. Replace any hardware that shows rust.
A little upkeep now prevents a full replacement later.
Safety and Compliance You Actually Need to Care About
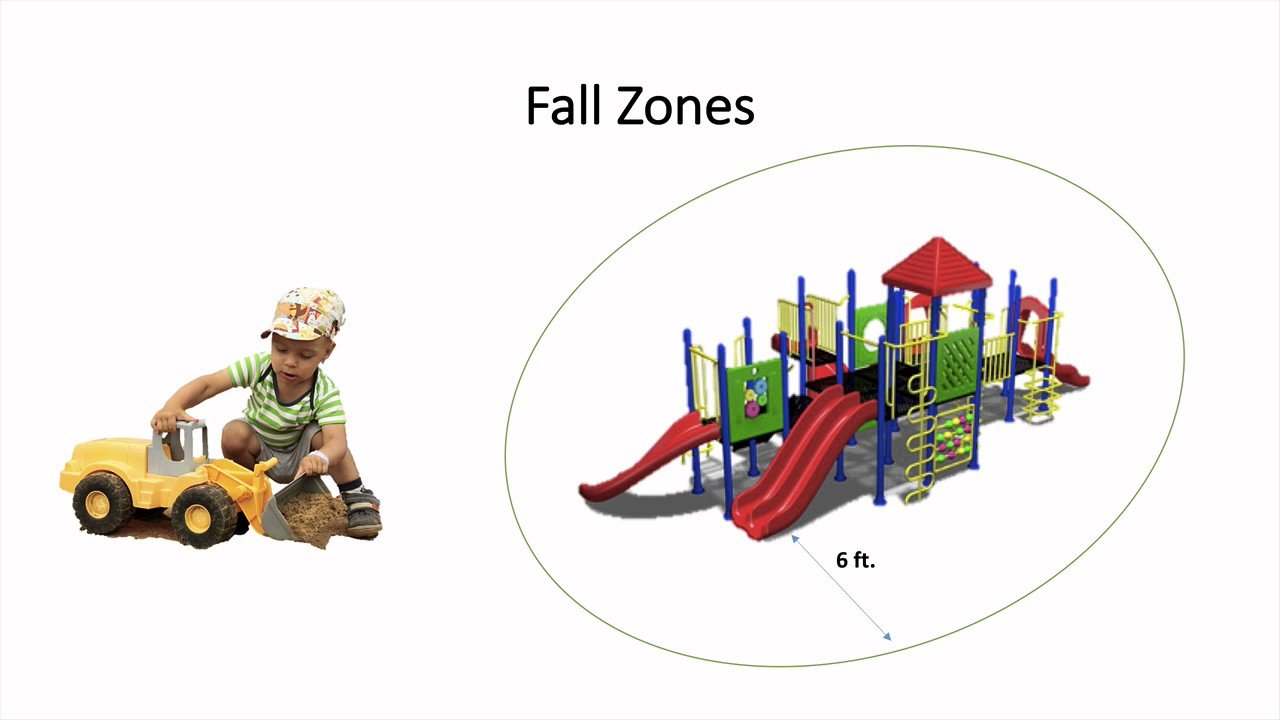
Image source: YouTube / YFCS GradProgramAdministration (YouTube thumbnail (fair-use with source credit))
Home playsets aren't heavily regulated, but standards exist for a reason. ASTM F1148 covers residential play equipment. It addresses entrapment, protrusion, and fall zone requirements.
ASTM F1148 for Home Play Sets
This standard is voluntary, but most reputable manufacturers build to it. It limits deck heights, spacing between rails, and hardware protrusions. If your set meets F1148, it's safer than one that doesn't.
CPSC Fall-Surface Guidelines
The CPSC publishes the Public Playground Safety Handbook. It recommends 9 to 12 inches of loose-fill surfacing. It also specifies the 6-foot fall zone we've mentioned throughout.
Local Permits and Setback Rules
Some cities require permits for structures over a certain height. Others have setback rules from property lines. Check with your local building department before you buy.
A quick call saves you from a fine or a forced removal later.
A Quick Cost Map for Typical Setups
A basic home setup runs $600 to $2,500 once you count equipment, surfacing, and hardware. That price includes a compact playset or a quality swing set plus 9 inches of wood chips.
| Component | Typical Range |
|---|---|
| Compact playset kit | $400 to $1,200 |
| Premium wood playset | $1,500 to $4,000 |
| Loose-fill surfacing (200 sq ft) | $200 to $600 |
| Rubber mulch surfacing (200 sq ft) | $400 to $900 |
| Concrete anchors and hardware | $50 to $150 |
| Professional installation | $300 to $800 |
A custom natural playscape runs higher. You'll pay $1,000 for materials alone, and more if you hire a contractor. Budget for annual maintenance too, roughly $50 to $150 per year for stain, hardware, and fresh surfacing.
The Final Decision: Matching the Play Area to Your Family
Run through your three answers one more time. Ages tell you the height and difficulty. Yard shape tells you the footprint.
Budget tells you whether to buy a kit, piece it together, or build from scratch.
If you have a toddler and a flat yard, buy a compact playset. If you have older kids and a slope, build a natural playscape. If you're renting or short on space, go with standalone pieces.
The best backyard play area isn't the biggest one. It's the one that fits your exact conditions, gets used weekly, and passes a safety check every year.
Frequently Asked Questions
How much space do I need for a playset?
A standard playset needs a 6-foot fall zone on all sides. Add 6 feet to the equipment width and 6 feet to the depth. For a 10-foot swing set, you need about a 22-foot by 14-foot area.
What is the safest playground surface for home use?
Engineered wood fiber is the CPSC's top recommendation. It compacts well, stays in place, and absorbs impact at 9 to 12 inches of depth. Rubber mulch also works but costs more upfront.
Do I need a permit to build a backyard playset?
Many cities require permits for structures over 6 feet tall. Some have setback rules from property lines. Call your local building department before purchasing to avoid fines.
How long does a wooden playset last?
A cedar playset lasts 10 to 15 years with yearly maintenance. Pressure-treated pine lasts 8 to 12 years. Cheap pine kits may only last 5 years.
Re-staining every 1 to 2 years extends the lifespan.
Can I install a playset on a slope?
Yes, but you need a level base first. Use a retaining wall or dig into the hill to create a flat platform. Ensure proper drainage so water doesn't pool under the structure.

Similar Posts