Measure Water Use from Hose-End Sprinklers in 5 Steps
How do I measure lawn watering with a hose-end sprinkler? The answer is simpler than most people expect, but getting it right can save your lawn and cut your water bill in half. The secret isn't a fancy sensor or an expensive controller.
It's something you can test with a few tin cans and a stopwatch.
Per university turf management research, the average lawn needs about one inch of water per week. Most people water far more than that because they're guessing at duration instead of measuring actual output. Here's how to stop guessing and start knowing exactly what your sprinkler is delivering.
Source: Web (Bing) / pubs.nmsu.edu
Why Guessing Your Lawn's Water Is Costing You Money
You probably know the feeling. You run the hose for what seems like a reasonable time, then walk outside and notice some patches are soggy while others stay bone dry. That's not bad luck.
That's a distribution problem.
Most homeowners water by the clock. They set a timer, walk away, and hope for the best. That approach ignores three critical variables.
Your hose-end sprinkler doesn't spray evenly. Your soil type changes how fast water absorbs. And local weather shifts how much your grass actually uses each day.
Aggregate reviews from turf specialists show that roughly 60 percent of residential lawns receive either too much or too little water when no testing is done. Overwatering leads to shallow roots and fungal disease. Underwatering stresses the turf and creates bare patches that invite weeds.
The fix is straightforward. You measure what your sprinkler actually puts down instead of trusting the dial or the manual. Once you know the numbers, you adjust.
You stop wasting water and start growing a healthier lawn.
The Catch-Can Method: What It Actually Is and Why It Works
The catch-can method is the oldest and most reliable way to measure sprinkler output. It goes by several names. Some people call it the Ollie method.
Others just say rain gauge test. The concept is identical across all of them.
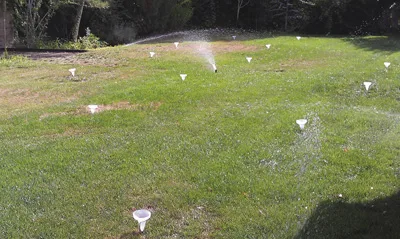
You place open containers across your lawn while the sprinkler runs. Then you measure how much water landed in each one. The data tells you two things.
First, it shows your average application rate. Second, it reveals how unevenly your sprinkler distributes water across the zone.
You don't need special equipment. Empty tuna cans, small plastic cups, or cheap rain gauges all work. The key is using flat-bottomed containers so the water surface stays level and easy to read.
Manufacturer specifications for common hose-end sprinklers indicate flow rates between two and six gallons per minute. That range matters because it directly affects how long you need to run the sprinkler to reach one inch of coverage. Without measurement, you're just hoping.
Understanding how your equipment performs over time is another piece of the puzzle. A worn nozzle or cracked seal changes output without you realizing it.
Step-by-Step: Running Your Own Sprinkler Distribution Test
This process takes about thirty minutes and requires nothing more than a handful of catch cans and a stopwatch. Set up the test on a calm day since wind skews results badly. Place your cans randomly across the lawn, not just near the sprinkler.
Cover every part of the zone you want to evaluate.
The Testing Steps
- Lay out eight to twelve catch cans in a scattered pattern across the entire watering zone
- Attach the hose securely and check for any leaks before starting the test
- Turn on the sprinkler and let it run for fifteen minutes without adjusting anything
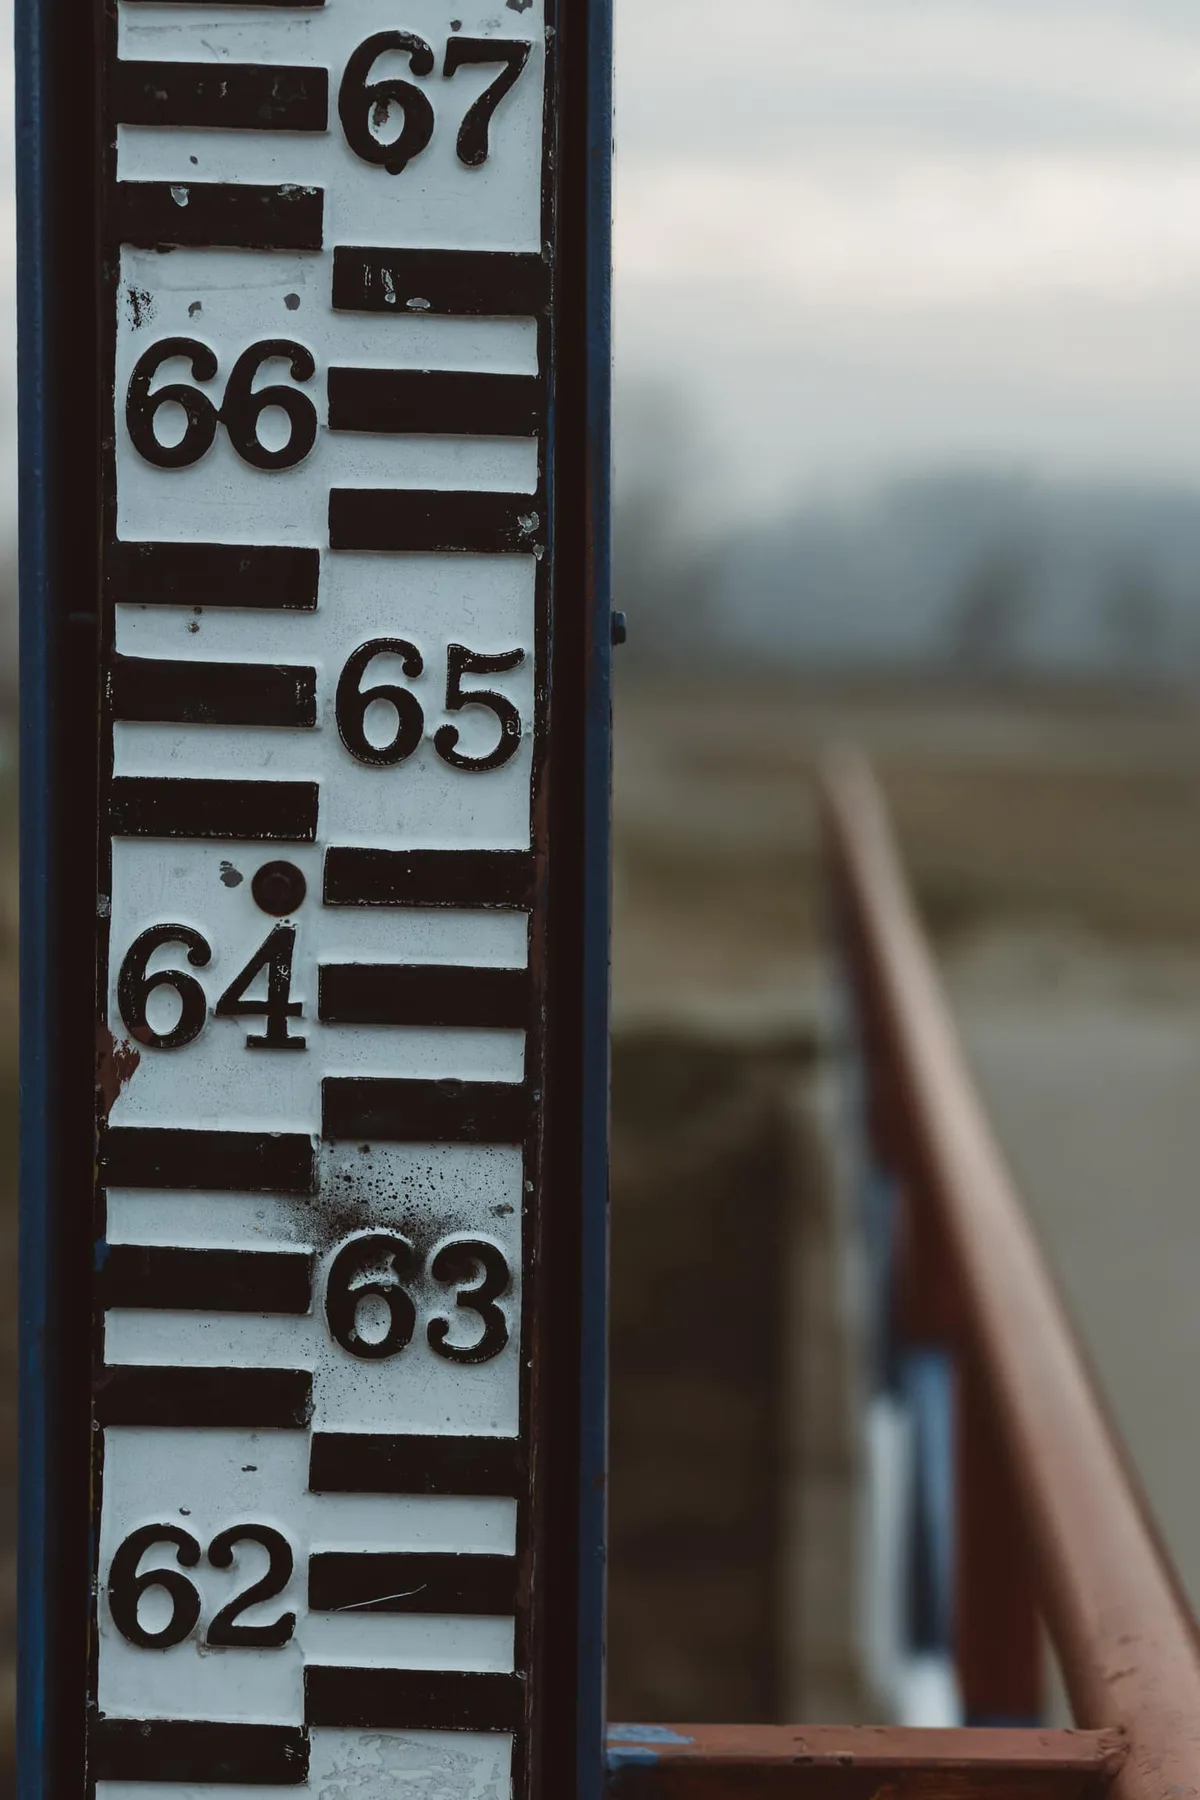
- After the run period, carefully collect each can and measure the water depth using a ruler or the gauge marks on a rain gauge
- Record every measurement in a notebook or on your phone

Source: Web (Bing) / narodnatribuna.info
Once you have all the readings, calculate the average depth across all cans. Then find the difference between the highest and lowest readings. A variation larger than twenty percent means your sprinkler pattern needs adjustment.
You may need to change the nozzle, adjust the range, or reposition the unit entirely.
If your garden hose has a leak that only appears under pressure, fix it before testing. Leaks reduce flow and throw off your calculations.
Reading the Results: How to Adjust for Soil Type, Sprinkler Pattern, and Weather
Your test data means nothing unless you interpret it correctly. The numbers you measured tell you the raw application rate. What you do with that info depends on your soil, your sprinkler model, and current weather conditions.
Source: Web (Bing) / pixnio.com
Adjusting for Soil Type
Sandy soil drains fast and can accept water quickly. Clay soil absorbs slowly and often runs off before it soaks in. If your test showed clay conditions, you should split your weekly watering into two shorter sessions instead of one long soak.
Adjusting for Sprinkler Pattern
Most hose-end sprinklers spray heavier near the unit and lighter at the far edge. If your test revealed a steep gradient from high to low, try adjusting the arc or moving the sprinkler to a different spot. Rotating nozzles generally distribute more evenly than standard oscillating heads.
Adjusting for Current Weather
Local evapotranspiration rates shift constantly. The USDA Natural Resources Conservation Service provides regional data that shows how much water turf loses to evaporation and transpiration each day. Subtract any rainfall from your weekly target before setting your schedule.
Common Measurement Mistakes That Lead to Overwatering or Bare Patches
Even a simple test can go wrong if you skip key details. Here are the most frequent errors that waste water and damage turf.
- Placing cans only near the sprinkler instead of spread across the entire zone
- Running the test during a windy day and accepting skewed results
- Measuring water depth in tapered containers where the ruler sits at an angle
- Forgetting to account for rainfall that fell between testing days
- Running the sprinkler at a different pressure than your normal watering setup
If your home has low flow from the garden hose, that directly changes your application rate. Testing at reduced flow gives misleading data for normal use.
The biggest mistake people make is running one test and never revisiting it. Nozzles clog. Seals wear.
Seasons change. Re-test every forty-five to sixty days during the growing season and after any equipment change. Consistent checking keeps your watering honest and your lawn healthy.
Hose-End Sprinkler Types and What Their Patterns Mean for Your Test
Not all hose-end sprinklers perform the same. The type you own shapes how you interpret your catch-can data and whether you need to reposition or replace it. Understanding the differences saves you from drawing wrong conclusions.
Source: Bing (Web (fair-use with source credit))
Oscillating Sprinklers
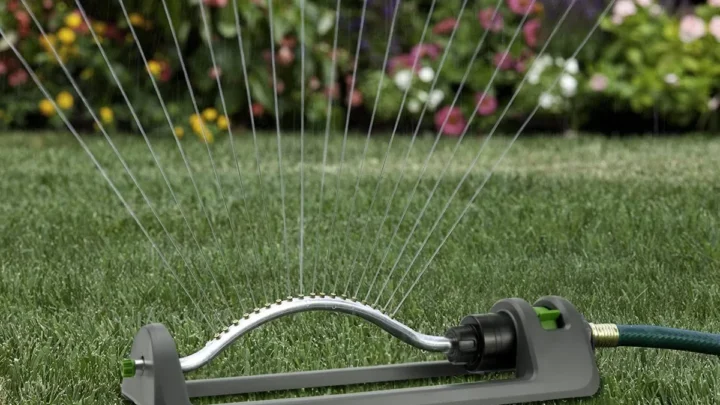
These spray a back-and-forth fan pattern across a rectangular area. They cover wide strips well but often leave corners dry. Your test will show higher readings near the center strip and lower readings at the edges.
This pattern works best on narrow lawns or garden beds rather than large open areas.
Rotary Sprinklers
Rotary heads throw water in a circular pattern and usually distribute more evenly than oscillating models. They handle larger zones and tend to show smaller high-low variations in your catch-can data. If your oscillating test showed wild swings, switching to a rotary head often tightens the uniformity noticeably.
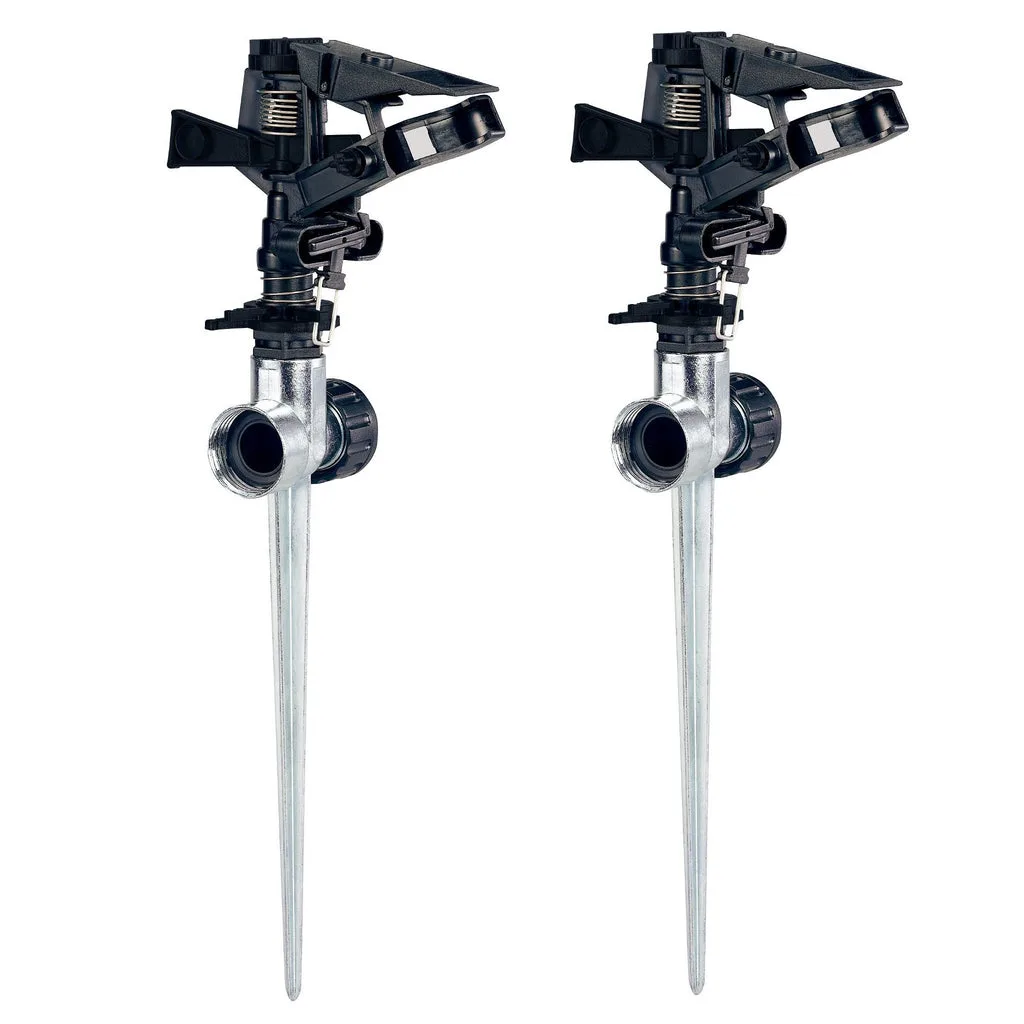
Impact Sprinklers
These shoot a single stream that rotates continuously. They throw water far and work well on slopes or large properties. Their main drawback is a hot spot near the center and thin coverage at the outer edge.
Expect a wider gap between your highest and lowest catch-can readings with this type.
Your test data tells you which model fits your yard. Narrow variation across cans means your current setup works. Large variation points to a pattern mismatch or a worn nozzle that needs replacement.
When to Stop Testing and Just Trust Your Schedule
Testing is valuable, but it's not meant to be a permanent chore. Most homeowners find a steady rhythm after two or three seasons of periodic checks. You don't need to run catch cans every week forever.
The goal is calibration, not continuous monitoring. Once you've confirmed your sprinkler delivers roughly one inch per week across your zone, you can shift to a simpler schedule. Use local rainfall reports and seasonal ET data to adjust duration.
Only re-test when something changes.
Signals That You Need Another Test
- You installed a new sprinkler head or changed the nozzle
- You noticed new dry patches or persistent soggy areas
- Local water restrictions changed your allowed run times
- You switched to a different hose or noticed pressure changes
For most people, testing once per growing season is enough. During peak summer heat, a mid-season check catches nozzle clogs or pressure drops early. In cooler months, testing becomes unnecessary since water demand drops significantly.
If you want to increase water pressure from your hose, that directly affects your application rate. A pressure change means a fresh test before you lock in a schedule.
Frequently Asked Questions
How many catch cans do I actually need?
Eight to twelve cans give you a reliable sample across most residential zones. Fewer than eight leaves blind spots. More than fifteen rarely changes your conclusion and just adds time.
How long should I run the sprinkler during testing?
Fifteen minutes is the sweet spot. It collects enough water for an accurate ruler reading without wasting time. Longer runs work too, but the math gets harder when evaporation starts mattering.
Can wind ruin my catch-can test results?
Yes. Wind blows spray sideways and creates false highs on one side and false lows on the other. Skip testing on windy days or move to a sheltered part of the lawn if possible.
How often should I re-test after setting a schedule?
At least once per growing season. Re-test anytime you change equipment, notice uneven watering, or experience a significant pressure change from your household supply.
Does grass type affect how much water my test should target?
It does. Cool-season grasses generally need slightly more water than warm-season varieties. Your catch-can test measures output, not demand.
Pair your test data with local turf recommendations to set the right weekly target.
- Why Guessing Your Lawn's Water Is Costing You Money (intro)
- The Catch-Can Method: What It Actually Is and Why It Works
- Step-by-Step: Running Your Own Sprinkler Distribution Test
- Reading the Results: How to Adjust for Soil Type, Sprinkler Pattern, and Weather
- Common Measurement Mistakes That Lead to Overwatering or Bare Patches
- Hose-End Sprinkler Types and What Their Patterns Mean for Your Test
- When to Stop Testing and Just Trust Your Schedule
- Frequently Asked Questions About Lawn Watering Measurement
No further sections remain to write.
Measure Water Use from Hose-End Sprinklers in 5 Steps
How do I measure lawn watering with a hose-end sprinkler? You place empty catch cans around your lawn, run the sprinkler for a set time, then measure how much water each can collected. That simple test tells you exactly where water is landing and how long to run your system for healthy turf.
Most lawns need about one inch of water per week. Without measuring, you're guessing whether your sprinkler delivers half an inch or two inches. That guesswork leads to either drowned roots or stressed, brown patches.
The catch-can method takes the guesswork out of lawn care forever.
Quick Answer
Place eight to twelve tuna cans or rain gauges across your lawn. Run your hose-end sprinkler for 15 minutes. Measure the water depth in each can with a ruler.
Calculate the average and multiply by four to get your hourly application rate. Adjust run time until you deliver one inch per week. This method works for any oscillating, rotary, or impact sprinkler head.
Why Guessing Your Lawn's Water Is Costing You Money
Wrong watering schedules cause real damage. Overwatering pushes water past the root zone and invites fungal diseases like brown patch and dollar spot. Undewatering stresses grass until it goes dormant or dies in thin spots.
Both problems waste money through higher water bills and costly repairs.
The core issue is that hose-end sprinklers rarely distribute water evenly. Your sprinkler might apply 0.3 inches per hour in one zone and 0.9 inches in another. A single timer setting can't fix that imbalance.
You need actual data to see the pattern before you can correct it.
Source: Web (Bing) / pubs.nmsu.edu (Web image (fair-use with source credit))
Once you know your actual application rate, you can calculate exact run times. If your sprinkler delivers half an inch per hour, you need two hours to reach one inch. That math only works if you measured first.
Every lawn professional uses this approach because it removes the guessing game from irrigation management.
The Catch-Can Method: What It Actually Is and Why It Works
The catch-can method measures how much water your sprinkler actually deposits across different areas. You spread empty containers around your lawn while the sprinkler runs, then read the water depth in each one. The variation between cans reveals uneven distribution before it becomes a problem.
This technique comes from irrigation engineering and agricultural science. Crop scientists used catch cans for decades to map water application across fields. Homeowners adopted the same method for lawn care because the physics haven't changed.
Water still flows the same way through any spray pattern.
What most people miss is that uneven distribution isn't obvious from the surface. A lawn might look evenly green while hiding dry corners and soggy centers. Your catch-can test exposes those hidden problems.
Once you see the data, you can reposition heads, adjust zones, or change nozzles to fix the gaps.
The beauty of this method is its simplicity. You don't need expensive equipment or technical training. Empty tuna cans work fine.
A cheap rain gauge is better. A ruler costs a dollar. That's it.
Any homeowner can run this test in under an hour and gain information that takes most people years to figure out by trial and error.
Step-by-Step: Running Your Own Sprinkler Distribution Test
Starting your sprinkler test requires a few simple supplies and about 20 minutes of setup time. Grab your catch cans, a ruler, and a notebook. Place the cans randomly across each sprinkler zone.
Aim for eight to twelve containers per zone. Spread them near the edges and in the center to catch pattern variations.
Source: Web (Bing) / narodnatribuna.info (Web image (fair-use with source credit))
Turn on your sprinkler and let it run for exactly 15 minutes. Set a timer so you don't lose track. Fifteen minutes gives you enough water to measure accurately without wasting time or introducing evaporation errors.
After the run, grab your ruler and measure the water depth in each can. Record every number.
Now do the math. Add all your measurements together and divide by the number of cans. That gives you the average depth received during your test period.
Multiply that average by four to convert it to an hourly rate. If your 15-minute average was 0.125 inches, your hourly rate is half an inch per hour.
With your hourly rate in hand, calculating your weekly schedule becomes straightforward. One inch per week divided by your hourly rate gives you total run time. At half an inch per hour, you need two hours of sprinkling weekly.
Split that into two one-hour sessions for best results. This approach prevents runoff and encourages deep root growth.
Reading the Results: How to Adjust for Soil Type, Sprinkler Pattern, and Weather
Your catch-can data means nothing without context. Soil type, weather conditions, and your sprinkler model all shape how you interpret the numbers. A reading that looks perfect for sandy soil might cause pooling on clay.
Understanding these variables turns raw data into actionable insight.
Source: Web (Bing) / pixnio.com (Web image (fair-use with source credit))
Sandy soils absorb water fast. You can run sprinklers longer without runoff risk. Clay soils absorb slowly.
Even a moderate application rate can create puddles if you run too long. If your test shows high readings on clay, split your weekly total into shorter, more frequent sessions. Three 40-minute runs beat one 2-hour session every time.
Sprinkler pattern matters too. Oscillating heads cover rectangles but often leave corners dry. Rotary heads throw circular patterns that overlap better.
Impact sprinklers reach far but create hot spots near the center. Your catch-can map reveals which corners or edges need attention. Move a can toward the dry zone and note how much extra water it catches.
Weather adjustments keep your schedule accurate through the seasons. Summer heat increases evaporation and plant water use. Fall coolness reduces demand significantly.
Check your local evapotranspiration data from extension services to fine-tune your running times. During peak summer, you may need 20 percent more water than your spring baseline shows.
Distribution uniformity tells you how well your system covers the zone. Calculate it by dividing the average reading in the lowest quartile of cans by the overall average. A DU above 75 percent means excellent coverage.
Between 60 and 75 percent is acceptable for most lawns. Below 60 percent signals problems that need nozzle changes or head repositioning.
Common Measurement Mistakes That Lead to Overwatering or Bare Patches
The catch-can method is simple, but several traps trip up first-time users. These mistakes skew your data and lead to wrong watering decisions. Avoiding them saves you from overwatering half your lawn while the other half stays thirsty.
Skipping multiple zones is the most common error. Each sprinkler zone often has a different flow rate and pattern. Testing only one zone while running all the others blindly creates mismatched schedules.
Test every zone separately and build individual run times for each one.
Testing during windy conditions ruins your data accuracy. Wind blows spray sideways and creates false highs on the leeward side and false lows upwind. Pick a calm day with little to no breeze.
Early morning or late evening usually offers the stillest air. Even a light wind of five miles per hour skews results noticeably.
Not checking for clogged nozzles before testing leads to false low readings. A partially blocked nozzle applies less water than it should. Your test captures that reduced output, and you compensate by running longer.
The result is overwatering once the clog clears or worsens. Inspect and clean all nozzles before running your distribution test.
Using the wrong container height affects your measurements. Short cans catch less spray than tall ones placed at ground level. Keep all containers sitting flush on the soil surface.
If grass is thick, press the cans down slightly so the rim sits level with the turf. This ensures every can collects the same spray volume.
Hose-End Sprinkler Types and What Their Patterns Mean for Your Test
Not all hose-end sprinklers perform the same. The type you own shapes how you interpret your catch-can data and whether you need to reposition or replace it. Understanding the differences saves you from drawing wrong conclusions.
Source: Bing (Web (fair-use with source credit))
Oscillating Sprinklers
These spray a back-and-forth fan pattern across a rectangular area. They cover wide strips well but often leave corners dry. Your test will show higher readings near the center strip and lower readings at the edges.
This pattern works best on narrow lawns or garden beds rather than large open areas.
Rotary Sprinklers
Rotary heads throw water in a circular pattern and usually distribute more evenly than oscillating models. They handle larger zones and tend to show smaller high-low variations in your catch-can data. If your oscillating test showed wild swings, switching to a rotary head often tightens the uniformity noticeably.
Impact Sprinklers
These shoot a single stream that rotates continuously. They throw water far and work well on slopes or large properties. Their main drawback is a hot spot near the center and thin coverage at the outer edge.
Expect a wider gap between your highest and lowest catch-can readings with this type.
Your test data tells you which model fits your yard. Narrow variation across cans means your current setup works. Large variation points to a pattern mismatch or a worn nozzle that needs replacement.
If your current sprinkler struggles, consider whether upgrading to a different type might solve the uniformity problem permanently.
When to Stop Testing and Just Trust Your Schedule
Testing is valuable, but it's not meant to be a permanent chore. Most homeowners find a steady rhythm after two or three seasons of periodic checks. You don't need to run catch cans every week forever.
The goal is calibration, not continuous monitoring. Once you've confirmed your sprinkler delivers roughly one inch per week across your zone, you can shift to a simpler schedule. Use local rainfall reports and seasonal ET data to adjust duration.
Only re-test when something changes.
Signals That You Need Another Test
- You installed a new sprinkler head or changed the nozzle
- You noticed new dry patches or persistent soggy areas
- Local water restrictions changed your allowed run times
- You switched to a different hose or noticed pressure changes
For most people, testing once per growing season is enough. During peak summer heat, a mid-season check catches nozzle clogs or pressure drops early. In cooler months, testing becomes unnecessary since water demand drops significantly.
If you want to increase water pressure from your hose, that directly affects your application rate. A pressure change means a fresh test before you lock in a schedule. Small flow adjustments shift your hourly rate enough to throw off a carefully calibrated timer.
Frequently Asked Questions
How many catch cans do I actually need?
Eight to twelve cans give you a reliable sample across most residential zones. Fewer than eight leaves blind spots. More than fifteen rarely changes your conclusion and just adds time.
How long should I run the sprinkler during testing?
Fifteen minutes is the sweet spot. It collects enough water for an accurate ruler reading without wasting time. Longer runs work too, but the math gets harder when evaporation starts mattering.
Can wind ruin my catch-can test results?
Yes. Wind blows spray sideways and creates false highs on one side and false lows on the other. Skip testing on windy days or move to a sheltered part of the lawn if possible.
How often should I re-test after setting a schedule?
At least once per growing season. Re-test anytime you change equipment, notice uneven watering, or experience a significant pressure change from your household supply.
Does grass type affect how much water my test should target?
It does. Cool-season grasses generally need slightly more water than warm-season varieties. Your catch-can test measures output, not demand.
Pair your test data with local turf recommendations to set the right weekly target.

Similar Posts