Modern Wire Fence Panels: Types & Materials Guide
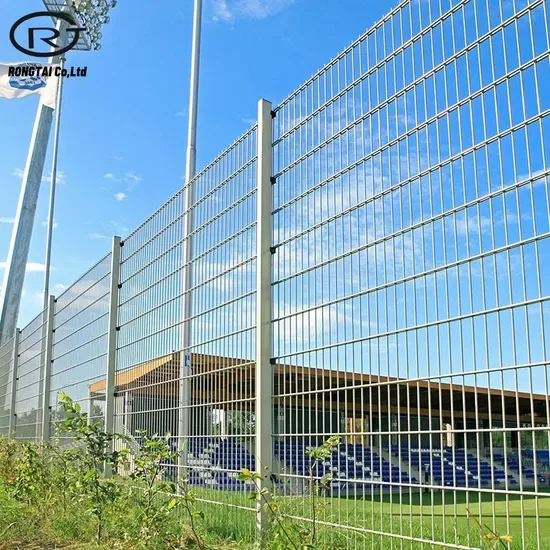
Modern Wire Fence Panels are a go-to solution for anyone needing a durable, cost-effective barrier. They've come a long way from the rusty, sagging wire of the past. Today's options offer a blend of strength, visibility, and surprisingly easy installation that makes them perfect for a huge range of jobs.
Whether you're keeping a dog in the yard or deer out of the garden, they're a solid choice.
The key to a successful project lies in choosing the right panel for your specific situation. Not all wire panels are created equal. A panel's gauge, coating, and mesh size are the primary factors that determine its performance and lifespan.
Understanding these specs upfront will save you from a costly mistake and guide you into the first major decision you need to make.
Quick Answer
Modern wire fence panels are prefabricated sections of welded or woven steel wire. They offer a fast, DIY-friendly way to install a durable fence. Key choices include galvanized steel for durability or PVC-coated for a decorative, low-maintenance finish.
Your selection should be based on what you need to contain, your local climate, and your budget as of 2026.
What Exactly Are Modern Wire Fence Panels?
At their core, modern wire fence panels are prefabricated grids of steel wire. The wires are welded or woven together at their intersections to form a rigid, rectangular mesh. This is a huge departure from the old days of unrolling a flimsy spool of wire and struggling to keep it taut.
The panels come in standard sizes, typically 4 to 6 feet tall and 8 to 16 feet long, which makes planning and installation far more straightforward.
The "modern" part refers to the advanced materials and manufacturing. Most are made from high-tensile steel wire, which is stronger yet more flexible than older materials. They're also protected with sophisticated coatings.
You'll find options like Class 3 galvanization, which is a heavy zinc coating that fights rust for decades. For an even more resilient and attractive option, many panels are sheathed in a PVC vinyl coating that's fused to the wire. This combination gives you the strength of steel with the weather resistance and look of vinyl.
Image source: Bing (Web (fair-use with source credit))
These panels are designed for speed. You can set your posts and simply attach the pre-made sections, dramatically cutting down on labor compared to building a fence from scratch. This design makes them a favorite for DIYers and professionals alike who need a reliable fence without the time-consuming hassle.
The Biggest Mistake People Make (And How to Avoid It)
The most common and costly error is choosing a panel based solely on price or a quick glance without considering the mesh size. It seems like a small detail, but getting it wrong can completely defeat the purpose of your fence. A mesh that's too large will allow small animals to walk right through or get their heads stuck.
A mesh that's too small is often overkill, driving up your cost unnecessarily and reducing visibility.
For example, a standard 2" x 4" mesh is great for keeping medium to large dogs contained. But if you're fencing in chickens or bantam breeds, a determined bird will easily squeeze through those openings. For poultry, you'd need a smaller mesh, often called hardware cloth or poultry netting, with openings of 1 inch or less.
Similarly, using a large mesh field fence to protect a vegetable garden from rabbits is an invitation for them to come and feast.
The fix is simple: match the mesh to your target. Before you buy anything, define what you're trying to keep in or out. Then, research the appropriate mesh size for that specific animal.
A little planning here ensures your fence actually works and your money is well spent.
Your First Decision: What Are You Fencing In or Out?
This is the most important question you'll answer. The purpose of your fence dictates everything that follows, the required height, the necessary mesh size, and even the type of posts you'll use. Getting this right from the start sets your entire project up for success.
For Keeping Pets Safe and Contained
For dogs, your main concerns are height and security. A 4-foot tall panel is usually sufficient for most breeds, but larger or more athletic dogs might require a 5 or 6-foot height. The mesh pattern is also critical.
A welded grid with 2" x 4" openings is a popular choice. It provides good visibility and is strong enough to contain most pets. You'll want to ensure the panels are securely attached to sturdy posts, as a motivated dog can test the fence's integrity.
For Protecting Gardens from Pests
This is primarily a defensive operation. Your goal is to create a barrier against rabbits, groundhogs, and most importantly, deer. For small burrowing animals, your fence doesn't need to be tremendously tall, but it must extend underground or be secured with a tight mesh apron at the base to prevent digging.
For deer, height is your best weapon. A fence needs to be at least 8 feet tall to effectively deter them, which often means combining multiple panels or choosing a specialized tall deer fence.
For Containing Livestock Like Chickens or Goats
Livestock fencing needs to be tough and appropriately sized. For chickens, a smaller mesh (1" or less) is non-negotiable to keep predators out and birds in. Goats are notorious for testing fences, so a heavy-duty welded panel with a small mesh at the bottom is essential.
They are clever and will lean on fences, so a sturdy construction with robust posts set in concrete is highly recommended for any permanent livestock enclosure.
For Creating a Secure Perimeter
If security is your main goal, focus on strength and deterrence. A tall, rigid panel made from a heavier gauge wire (like 12.5 gauge) is the way to go. The visibility of a wire fence can be a security feature in itself, eliminating hiding spots.
For added security, some panels are available with a pointed or spiked top to discourage climbing. This application almost always requires the strongest posts, metal U-posts or wood posts set in concrete, to ensure the fence can't be easily forced open.
Your Second Decision: Understanding Materials and Coatings
Once you know your fence's job, you need to pick the material that can handle it. The coating on your wire panels is what determines their resistance to rust, their maintenance needs, and ultimately, their lifespan. This is where you decide between pure function and added aesthetics.
The Low-Maintenance Choice: PVC-Coated Panels
PVC-coated panels are steel wire cores completely encased in a thick layer of vinyl. This coating acts as a protective barrier, shielding the steel from moisture, scratches, and UV rays. The result is a fence that is highly resistant to rust and corrosion, making it an excellent choice for coastal areas or regions with high humidity.
The coating also comes in colors, typically black or green, which allows the fence to blend into its surroundings more naturally than bare metal.
The trade-off is cost. PVC-coated panels are generally more expensive upfront than their galvanized counterparts. However, that initial investment buys you decades of near-zero maintenance.
You won't be dealing with rust spots or needing to touch up paint. For a clean, finished look that lasts, they're a top contender.
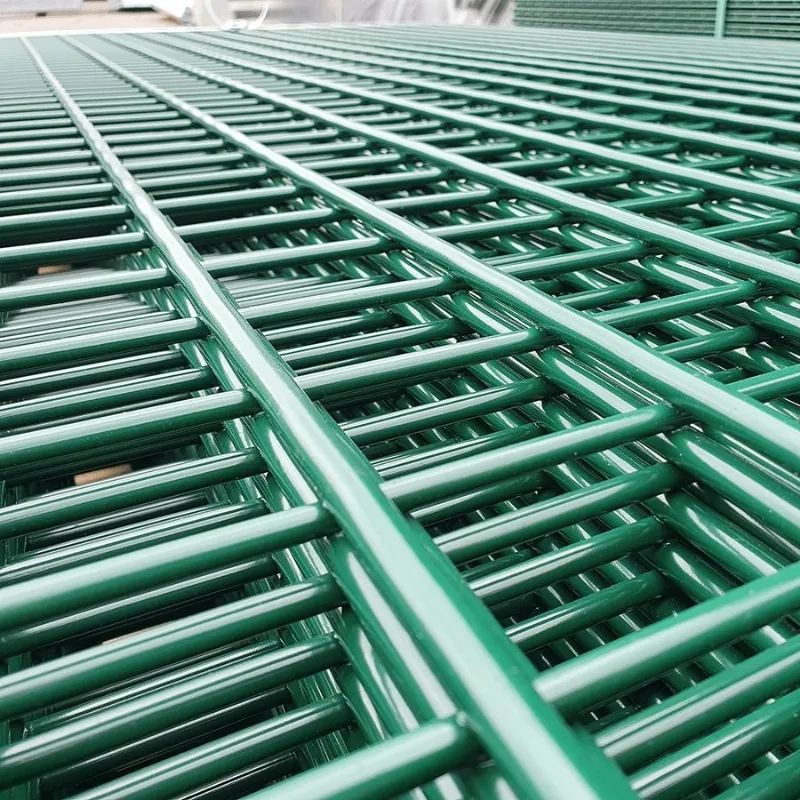
Image source: Bing (Web (fair-use with source credit))
The Durable Workhorse: Galvanized Steel
Galvanized panels are the classic, no-nonsense option. The steel wire is coated in a layer of zinc through a process called hot-dip galvanizing. This zinc sacrificeally corrodes instead of the underlying steel, providing robust protection.
For most inland applications, a quality galvanized fence will last for 20 years or more without significant rust.
The key is to look for the coating class. Class 3 galvanization is the commercial standard for fencing and offers the best protection. You might see lighter coatings (Class 1 or 2) on cheaper products, but they are not recommended for a long-term outdoor installation.
Galvanized steel is purely functional, it has a silver-gray metallic appearance, but it offers the best strength-to-cost ratio on the market.
Why Gauge Thickness Really Matters
The gauge number refers to the thickness of the wire used in the panel. It's counterintuitive, but a smaller number means a thicker, stronger wire. This is a critical spec that directly impacts the fence's strength and resistance to impact.
- 12.5 gauge: This is a heavy-duty wire. It's excellent for containing large livestock like horses or cattle, for security applications, or for areas with high wind loads. It's harder to cut and bend, making it more resistant to forced entry.
- 14 gauge: This is a medium-duty wire that serves most common purposes perfectly. It's strong enough for dogs, small livestock like goats and sheep, and general garden fencing. It offers a good balance of strength and affordability.
- 16 gauge & higher: These are lighter-duty wires. They might be suitable for temporary fencing, decorative garden accents, or containing very small animals where strength isn't a primary concern. For a permanent, functional fence, it's best to stick with 14 gauge or thicker.
Always choose the thickest gauge your budget allows for the intended use. It’s the backbone of your fence's durability.
Your Third Decision: Rigid Panels vs. Flexible Rolls
This choice is all about the trade-off between installation ease and adaptability to your land's topography. Both have their place, but picking the wrong one can turn a simple project into a frustrating ordeal.
When to Choose Rigid Panels for a Clean, Easy Install
Rigid panels are the ultimate choice for simplicity and speed on flat or gently sloping ground. Because they're pre-fabricated into straight, flat sections, they go up quickly and guarantee a clean, uniform look. You simply set your posts in a straight line at the correct spacing and attach the panels.
There's no need for special tensioning tools or wrestling with a heavy, uncooperative roll of wire.
They're also inherently stronger. The welded grid construction resists bending and sagging far better than a loose roll of wire. This makes them ideal for containing animals that might push against the fence or for applications where a neat appearance is important.
If your yard is mostly level, rigid panels will save you a significant amount of time and effort.
When a Roll Makes More Sense for Uneven Ground
If your property has significant hills, dips, or uneven terrain, flexible rolls of wire fencing are often the better, and sometimes the only, practical option. A roll can follow the contour of the ground, rising and falling with the slopes without leaving awkward gaps at the bottom or requiring complex custom cutting.
The installation process is different. It requires a fence stretcher tool to pull the wire taut between sturdy end posts before securing it to the line posts. This adds a step and requires an extra tool, but it's necessary to achieve a tight, professional-looking fence that conforms to the land.
For long runs across pastures or wooded areas where the ground isn't perfectly flat, the flexibility of a roll is a major advantage.
How to Choose the Right Post and Foundation
The strongest fence panel in the world is only as good as the posts holding it up. Skimping here is a surefire way to end up with a wobbly, sagging fence in a few years. Your choice depends on the fence's purpose and your soil type.
T-Posts vs. Wood Posts: A Quick Comparison
| Feature | T-Posts (Metal) | Wood Posts |
|---|---|---|
| Best For | Line posts, temporary fencing, dry/stable soil | Corner posts, end posts, gate posts, permanent installations |
| Strength | Good for supporting the weight of the fence | Superior strength for bearing tension and resisting leverage |
| Installation | Driven in with a post driver; faster and easier | Require digging and setting in concrete; more labor-intensive |
| Lifespan | Long-lasting, but can rust at ground level over time | Varies by wood type; can rot if not treated or set properly |
| Cost | Generally less expensive per post | More expensive, especially when factoring in concrete |
For most wire fence installations, a hybrid approach works best. Use sturdy wood posts set in concrete for all corner posts, end posts, and gate posts. These "terminal" posts handle all the tension in the fence line.
Then, use metal T-posts for the line posts in between. This combination provides maximum strength and stability while keeping costs manageable.
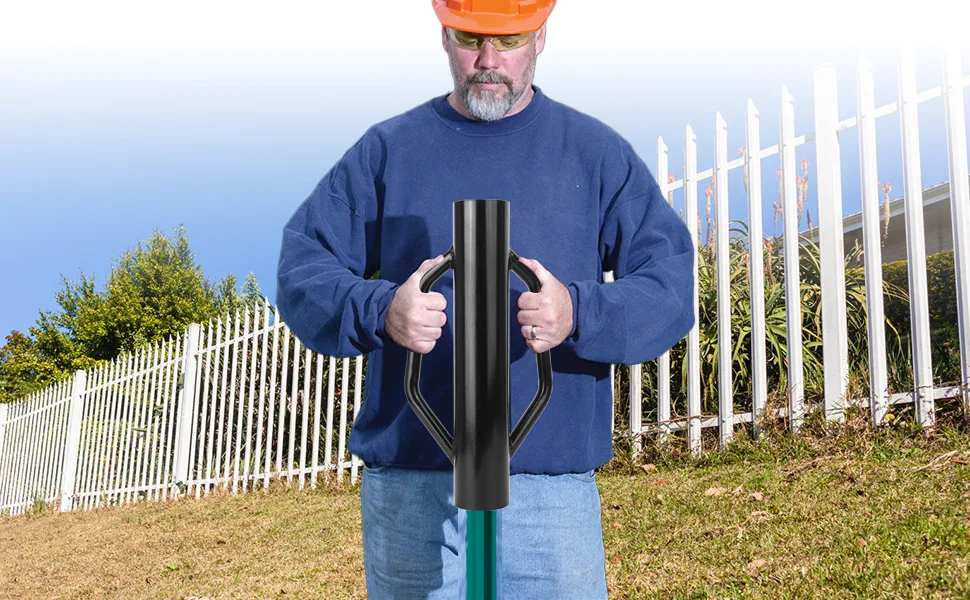
Image source: Bing (Web (fair-use with source credit))
How Deep to Dig and How Far Apart to Space Posts
This is where many DIY projects fail. Posts set too shallowly will loosen over time and eventually lean or pull out.
- Depth: A good rule of thumb is to bury at least one-third of the total post length. For a standard 6-foot tall fence, that means your post holes should be at least 2 feet deep. In sandy soil or areas with high wind, going deeper to 2.5 or even 3 feet provides crucial stability. For corner and gate posts, which bear the most strain, add an extra 6 inches of depth.
- Spacing: For line posts, spacing them 6 to 8 feet apart is standard. This provides ample support for the panels and prevents sagging between posts. Always position your posts so the studs (the bumps on a T-post) face away from the livestock or the pressure side of the fence. This helps keep the fence secure against the post.
Estimating Your Project: Cost and Timeline
Let's talk numbers. A realistic budget and timeline prevent surprises and help you plan effectively. The cost for a modern wire fence panel project can vary widely based on materials, length, and who does the work.
The biggest cost drivers are the panels themselves and the posts. As of 2026, you can expect to pay:
- Galvanized Panels: A 4' x 50' roll of 14-gauge field fence might cost between $100 and $200. Pre-made rigid panels are often priced per piece; a 16' long panel could range from $40 to $80.
- PVC-Coated Panels: These carry a premium. A similar sized PVC-coated panel can be 50-100% more expensive than its galvanized counterpart.
- Posts: T-posts can cost $10-$20 each. Wood posts vary significantly by wood type but often start around $15-$25 per post for a 4×4. Don't forget the cost of concrete for setting wood posts.
- Hardware: Budget for clips, staples, and a gate latch. This is usually a smaller expense, around $50-$100 for the whole project.
For a typical DIY installation of a 100-foot fence using a mix of T-posts and wood corner posts, a realistic total cost often falls between $500 and $1,500, depending heavily on your material choices.
For timeline, a 100-foot fence is a solid weekend project for two people. Day one is for planning, gathering materials, and setting all the posts. Day two is for attaching the panels, installing the gate, and adding finishing touches.
Always allow extra time for the concrete at your corner posts to cure fully before attaching the fence and applying tension.
The Installation Workflow: A Step-by-Step Overview
A smooth installation follows a logical sequence. Rushing steps or doing them out of order leads to problems.
- Plan and Measure: Sketch your layout, mark your post locations, and call 811 to have underground utilities marked. This is not a suggestion, it's a critical safety and legal step.
- Set Terminal Posts: Dig holes for your corner, end, and gate posts. Set them in concrete, use a level to ensure they're perfectly plumb, and let the concrete cure for at least 24 hours.
- Set Line Posts: Using your terminal posts as a guide, drive in your T-posts at the planned spacing. A string line stretched between terminal posts ensures your line posts are perfectly aligned.
- Attach Panels: Starting at a corner, lift your first panel into place. Secure it to the posts using appropriate fence clips or staples. Work your way down the line, ensuring each panel is level before fully securing it.
- Install the Gate: Hang your gate on its dedicated post, ensuring it has proper clearance and swings freely. Install a robust latch.
- Add Finishing Touches: This includes trimming any excess wire, adding a tension wire along the bottom if needed, and installing post caps on wood posts to prevent water intrusion.
Common Installation Pitfalls and How to Sidestep Them
Even with the best materials, a few common mistakes can undermine your entire project. Being aware of them is your best defense.
The number one issue is a lack of tension. A loose fence will sag over time, look unprofessional, and become less effective. For rigid panels, this means ensuring each one is pulled tight and securely fastened at every post connection.
For wire rolls, it's non-negotiable to use a proper fence stretcher tool. Trying to stretch a roll by hand or with a truck will not achieve the necessary tautness and is dangerous.
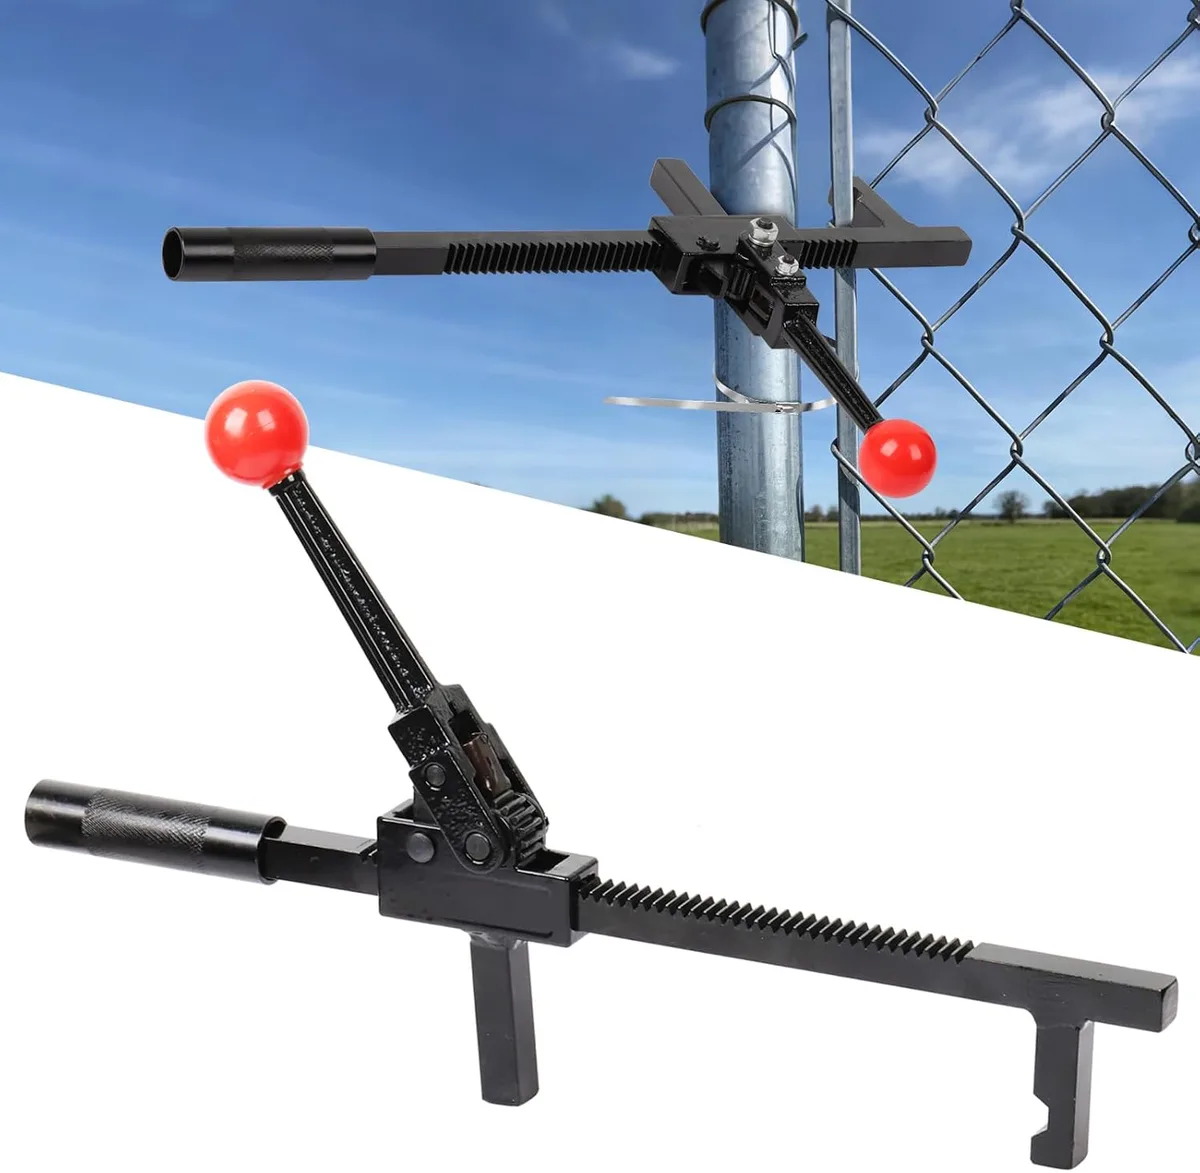
Image source: Bing (Web (fair-use with source credit))
Another frequent error is improper post alignment. If your posts aren't in a straight line, your fence won't be either. This creates waves and weak points.
Taking the time to run a tight string line between your set terminal posts before installing any line posts is the simplest way to guarantee a straight fence.
Finally, people often forget to account for ground clearance. You don't want your fence panels sitting directly on the soil, as this accelerates rust and rot. Leave a consistent 2- to 4-inch gap between the bottom of the panel and the ground.
This improves airflow and makes trimming around the fence much easier.
Long-Term Care: Making Your Fence Last for Years
A modern wire fence is low-maintenance, but it's not no-maintenance. A little periodic care will extend its life for decades. The main task is an annual inspection.
Walk the fence line in the spring. Look for signs of rust, especially around clips and at the base of posts. For galvanized fences, touch up any scratches or rust spots with a zinc-rich spray paint to reactivate the protection.
Check for vegetation. Vines and weeds growing on the fence can trap moisture and hide damage. Trim them back.
Also, check the tension. After a year of settling, you might find a section that has started to sag. You can often tighten it by adjusting the clips or using a come-along to pull it taut again before re-securing it.
For PVC-coated fences, maintenance is even simpler. A rinse with a garden hose will usually remove dirt and grime. Avoid using harsh abrasive cleaners or stiff brushes that could scratch the vinyl coating.
The key is to catch small issues like a loose clip or a bit of rust before they become big, expensive problems.
The Legal Stuff: Permits, Property Lines, and HOAs
Before you dig a single hole, you must handle the paperwork. The most important step is calling 811, a free national service that coordinates with local utility companies to mark underground lines. This protects you from accidentally hitting a gas, electric, or water line, which can be deadly and incredibly costly.
Next, know your property lines. The best practice is to have a recent survey done. Fencing even a few feet onto a neighbor's property can lead to disputes and potentially require you to move the entire fence.
If you're on good terms, it's wise to discuss your plans with adjoining neighbors beforehand.
Finally, check with your local building department and homeowners association (if you have one). Many municipalities require permits for fence installations, and they will have specific rules about maximum height, setback distances from the property line, and sometimes even acceptable materials. Your HOA covenants will likely have even stricter aesthetic guidelines.
It's far better to get approval first than to be forced to alter or remove a brand-new fence.
Final Checklist: How to Make the Right Choice for Your Property
Use this quick list to confirm you've thought of everything before you buy materials or start digging.
- Purpose Defined: You've identified what you're containing (pets, livestock) or excluding (deer, pests).
- Mesh Size Selected: The openings are appropriately sized for your target animal.
- Material Chosen: You've decided between cost-effective galvanized steel or low-maintenance PVC-coated.
- Gauge Selected: You've chosen a wire thickness (12.5 or 14 gauge) strong enough for the job.
- Style Picked: You've determined whether rigid panels or flexible rolls best suit your terrain.
- Posts Sourced: You've planned for sturdy wood terminal posts and metal T-posts for the line.
- Layout Planned: You've mapped your fence line, located all posts, and accounted for gates.
- Utilities Marked: You've called 811 and waited for the all-clear.
- Rules Checked: You've verified local permit requirements and HOA rules.
- Neighbors Notified: You've spoken to neighbors about the property line and your plans.
Frequently Asked Questions
How long does a modern wire fence last?
With proper installation and a quality coating, a galvanized steel fence can easily last 20 years or more. A PVC-coated fence often lasts 25-30 years or longer because the vinyl coating provides a more complete barrier against the elements.
Can I install a wire fence by myself?
You can install a shorter fence solo, but it's much easier and safer with two people. Handling long, heavy panels and setting posts straight is challenging alone. Having a helper is highly recommended for anything beyond a small garden enclosure.
Do I need to use concrete for the posts?
For all corner, end, and gate posts, yes. Concrete is essential to anchor these posts against the significant tension forces of the fence. For T-posts used as line posts, they are simply driven into the ground and do not require concrete.
What's the best way to cut wire fence panels?
The right tool makes all the difference. Use heavy-duty bolt cutters for a clean cut through the wire. Using an angle grinder is also effective but produces sparks.
Avoid using wire cutters meant for electronics or thin wire, as they will be damaged and won't work well.
How tall should a fence be to keep deer out?
To effectively deter deer, your fence needs to be at least 8 feet tall. Deer are powerful jumpers, and a standard 6-foot fence will not stop them. You may need to stack panels or purchase specialized tall deer fencing.
Frequently Asked Questions
Can wire fence panels be used for a temporary barrier?
Yes, they're excellent for temporary use. Lighter gauge panels or rolls can be secured to T-posts driven by hand, creating a movable enclosure for projects, events, or rotating livestock grazing. They're much easier to relocate than a permanent fence.
How do I prevent animals from digging under the fence?
Install an apron or a tension wire. Bury the bottom foot of the fence mesh horizontally outward from the base, creating an underground barrier. Alternatively, attach a tight strand of smooth wire about 4 inches off the ground and 4 inches out from the base to deter digging.
What's the difference between welded and woven wire?
Welded wire has rigid intersections that won't come apart if cut. Woven wire is more flexible, allowing it to absorb impact without permanent deformation. Welded is better for rigid panels and security.
Woven is often preferred for livestock as it's less likely to injure an animal that runs into it.
Do I need special tools to install a wire fence?
For a basic install, you need a post hole digger, a level, and a hammer. For a professional result, add a post driver for T-posts and a fence stretcher for wire rolls. These tools ensure posts are set deep and the wire is taut.
How do I handle a sloped yard with panels?
Use stepped installation. Set your posts to follow the slope, but keep each individual panel level. This creates a "stair-step" effect down the hill.
It's the best method for maintaining a strong, visually clean fence on a significant slope.
Final Recommendation
For most homeowners, a 14-gauge galvanized welded wire panel offers the best balance of strength, cost, and durability. It handles dogs and garden pests perfectly. If your budget allows and you want a maintenance-free finish, upgrade to PVC-coated panels.
Always prioritize correct mesh size and proper post installation over any other feature. These two factors determine whether your fence succeeds or fails.
Frequently Asked Questions
How do I repair a broken weld on a wire panel?
Use a small piece of galvanized wire or a hog ring to securely tie the broken wires back together. For a more permanent fix on a critical spot, a quick tack weld with a portable welder will restore the original strength.
Can I paint a galvanized wire fence?
Yes, but proper preparation is crucial. The fence must be clean and free of any oils or rust. Use a vinegar wash or a dedicated galvanized metal etching primer first.
Then apply a high-quality exterior metal paint for a color change and an extra layer of protection.
What is the best way to anchor a fence in very soft soil?
Use wider footing for your posts. For wood posts, dig a wider hole and use more concrete to create a larger base. For T-posts in sandy soil, drive them deeper than usual.
You can also use post anchors that screw into the ground for additional stability.
Are wire fence panels strong enough for a privacy screen?
They are not designed for privacy. Their primary function is containment and security with visibility. To create privacy, you would need to attach privacy slats or plant a fast-growing vine to grow on the fence, but a dedicated privacy fence is a better solution.
How do I keep the bottom of the fence from rusting?
Ensure it never sits in constant moisture. Maintain that crucial 2-4 inch ground clearance. In damp areas, consider placing a layer of gravel along the fence line to improve drainage.
For galvanized fences, promptly touch up any scratches that expose the bare steel.

Similar Posts