How to Connect a Garden Hose to a Kitchen Sink Faucet
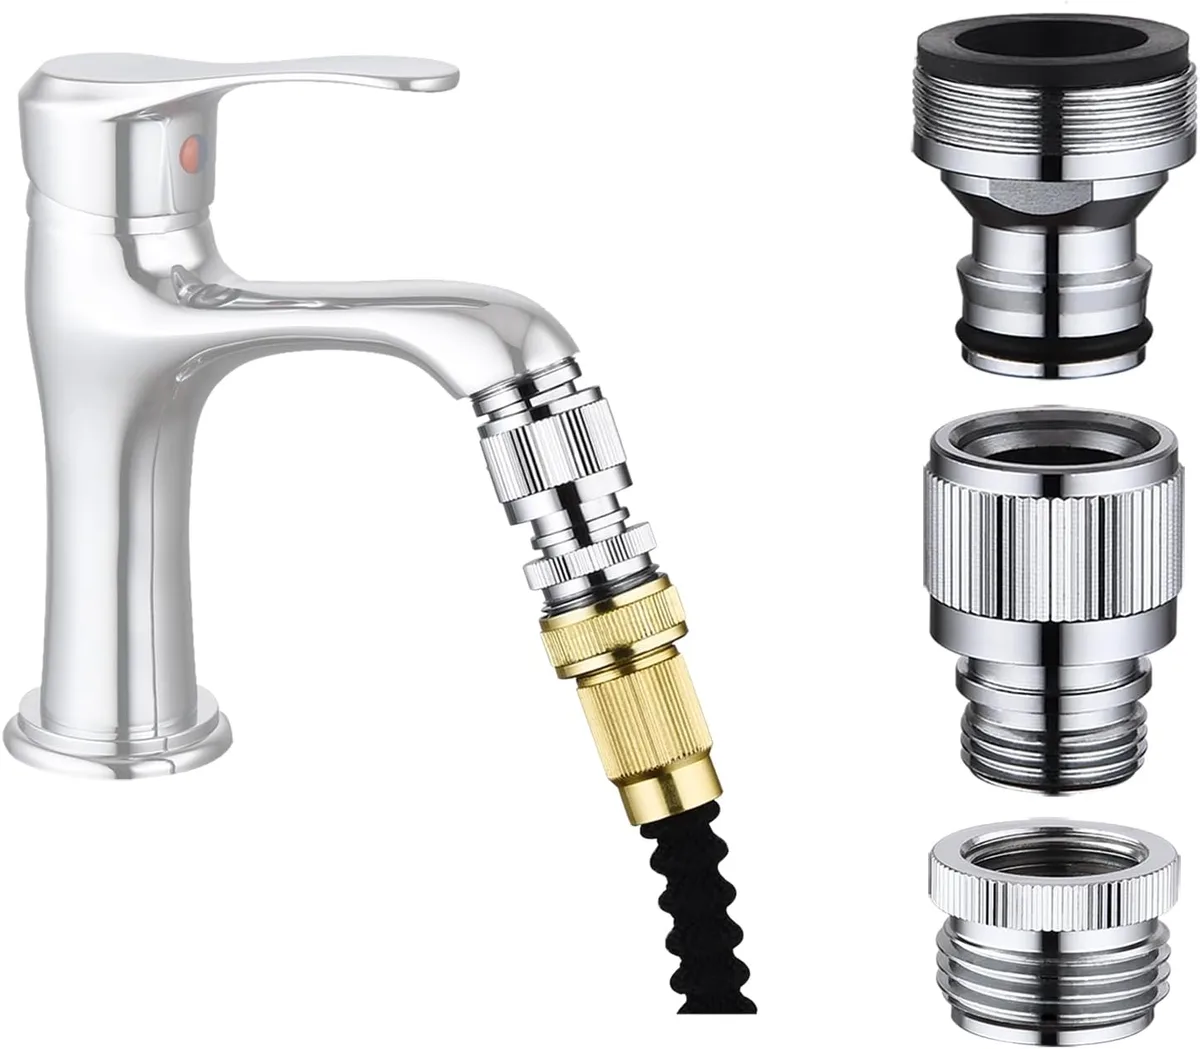
What adapter do I need to connect a garden hose to a kitchen sink faucet? You need a hose-to-faucet adapter, a small brass or plastic fitting that screws onto your faucet's aerator and accepts a standard garden hose. Most kitchen faucets use one of two aerator thread sizes: 55/64 inch or 15/16 inch, which is roughly 13.5mm or 24mm respectively.
Pick the wrong size and nothing seals properly, which is why measuring first matters more than buying.
Once you know your thread size, the rest is straightforward. The adapter creates a temporary bridge between your indoor sink and the 3/4-inch GHT (Garden Hose Thread) on the outside of any standard hose. In this guide, we'll walk through exactly how to identify your setup, choose the right adapter, install it safely, and avoid the mistakes that turn a five-minute job into a flooded cabinet.
Learn more about garden hose connection basics before you begin so you're comfortable with the standard threads involved.
Why Turn Your Kitchen Sink Into a Temporary Hose Bib
You've got a garden hose curling in the garage and a watering can that needs filling. The outdoor spigot is frozen, blocked by a patio table, or simply too far away to drag everything across the yard. A kitchen sink adapter lets you tap directly into your home's pressurized potable water line without running a new line or calling a plumber.
It works on the simple principle that almost every kitchen faucet has a removable aerator at its tip, and that aerator carries a standardized male thread. A hose adapter screws onto that thread, and your garden hose clicks right onto the other end. That's it.
The most common uses for this setup:
- Watering houseplants or a greenhouse bench during winter
- Filling a birdbath or pet water station indoors
- Rinsing muddy boots and gardening gloves before heading back outside
- Topping off an RV fresh-water tank when parked without hookups
- Emergency water access if an outdoor spigot fails
A standard garden hose uses the same connection diameter and thread pattern across nearly every adapter kit sold in North America, so once you match the faucet end, the hose end is automatic.
As of 2026, solid brass adapters typically run $8 to $15, while quick-connect kits with built-in shut-off valves sit in the $15 to $30 range. Plastic versions are cheaper but tend to crack after two or three seasons of temperature swings.
If you're wondering whether this setup is safe for your drinking water, we cover that in the backflow risks section later in this article. For now, let's figure out what kind of faucet you're working with.
How to Identify Your Faucet Aerator Thread Size
The single biggest reason adapters fail is picking the wrong aerator size before you even open the box. Your kitchen faucet tip carries a small screw-on cap called an aerator, and that cap's outer diameter tells you exactly which adapter to buy.
Here's the practical breakdown most homeowners need to know:
| Aerator Outer Diameter | Typical Faucet Type | Adapter Label to Search |
|---|---|---|
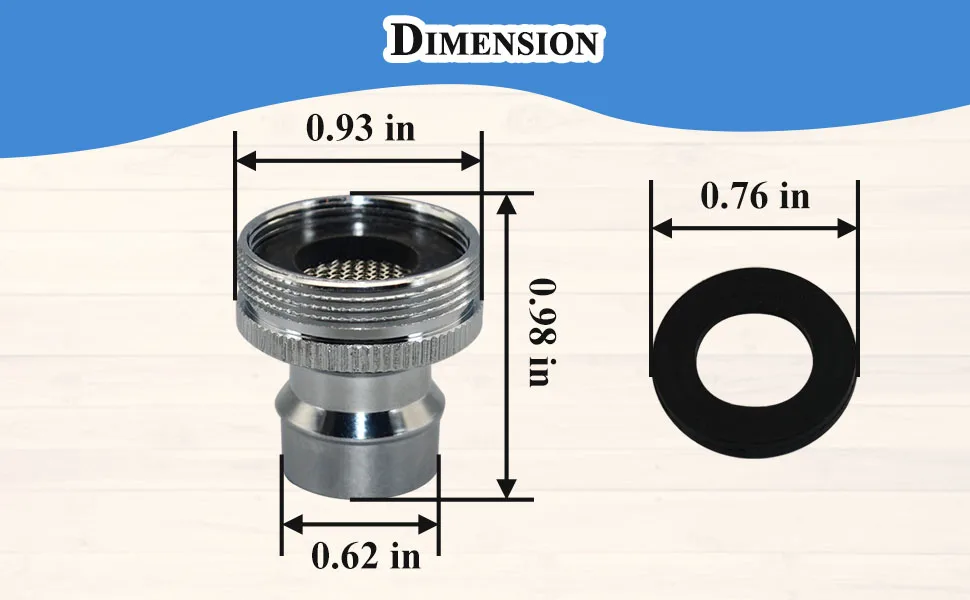
| 55/64 inch (~13.5mm) | Most American standard faucets (pre-2010) | "Small" or "55/64" adapter |
| 15/16 inch (~24mm) | Modern American faucets (post-2010) | "Large" or "15/16" adapter |
| Non-aerated / spray nozzle | Pull-out or pull-down faucets | Universal or no-aerator adapter |
How to measure your aerator without tools:
Unscrew the aerator by hand. Most spin counter-clockwise. If it won't budge, wrap it in a rubber glove or use a basic tool for removing stubborn faucet parts.
Once it's off, lay it next to a ruler and measure the widest part of the outer threading.
If you don't have a ruler handy, the penny test works in a pinch. A 55/64-inch aerator is just under 14mm, which fits inside the edge of a US penny. A 15/16-inch aerator sticks well past the rim.
Pull-out and pull-down faucets are a different story. These fixtures often replace the aerator entirely with a spray wand that has no removable threading. If that's your setup, you'll need a universal quick-connect adapter designed for non-aerated spouts. These clamp around the base of the spray head instead of screwing on.
What about non-US faucets? If you live in the UK, Australia, or much of Europe, your faucet threads follow British Standard Pipe (BSP) or BSPP standards, not the American GHT system. A North American adapter will not seal on those fixtures. Check your local hardware store for region-specific fittings before ordering online.
Once you've confirmed your thread size, you're ready to pick the right adapter. Let's walk through the decision tree so you can land on the exact type that fits your situation.
Which Adapter Fits Your Faucet: The Decision Tree
Not all hose-to-faucet adapters are the same. The right choice depends on three factors: your faucet type, how often you plan to use the setup, and whether you want a permanent-shutdown option so you don't leave water running accidentally.
Use this decision tree to land on the right pick:
Step 1, Is your faucet aerated or non-aerated?
- Aerated: Go to Step 2.
- Non-aerated (pull-out wand): Skip to the "Universal Quick-Connect" section below.
Step 2, What thread size did you measure?
- 55/64 inch (~13.5mm): Buy a small-thread adapter.
- 15/16 inch (~24mm): Buy a large-thread adapter.
- Unsure: Buy a universal double-ended adapter that covers both sizes. These cost about $2 more and eliminate guesswork.
Step 3, How often will you use this?
- Occasionally (2, 4 times per year): A basic brass or zinc hose adapter for $8 to $12 is plenty.
- Weekly or seasonal: Invest in a solid brass adapter with a reinforced rubber washer and a swivel joint to reduce kinking.
- Daily or high-use: Get a quick-connect kit with an inline shut-off valve. These let you disconnect the hose without turning off the sink faucet, and they prevent accidental flooding if the connection pops off.
Adapter types at a glance:
| Adapter Type | Best For | Price Range | Durability |
|---|---|---|---|
| Basic brass screw-on | Occasional winter watering | $8–$15 | 5–10 years |
| Zinc alloy screw-on | Budget buyers, light use | $5–$10 | 1–3 seasons |
| Plastic screw-on | Rare use, tight budgets | $3–$7 | 1 season |
| Quick-connect with shut-off | Frequent use, safety priority | $15–$30 | 5+ years |
| Universal dual-size | Uncertain thread size | $10–$18 | 5–8 years |
The universal quick-connect option is worth a mention if you have a pull-out spray faucet. These adapters clamp around the faucet base and include a rubber gasket that creates a watertight seal without relying on threading. They're slightly less rock-solid than a screw-on brass adapter, but they're the only reliable path for non-aerated modern faucets.
Once you've chosen your adapter, installation is quick. Here's the step-by-step process.
Installing the Adapter Step by Step
This process takes about three to five minutes and requires no tools beyond a cloth and possibly an adjustable wrench if the aerator is tight. Follow these steps in order to avoid leaks and cross-threading.
Tools and materials you'll need:
- Your selected hose-to-faucet adapter
- Clean rag or microfiber cloth
- Adjustable wrench or channel-lock pliers (optional, for stubborn aerators)
- Teflon tape (only if your adapter manual recommends it, most modern adapters include a rubber washer and don't need tape)
- Standard 3/4-inch garden hose
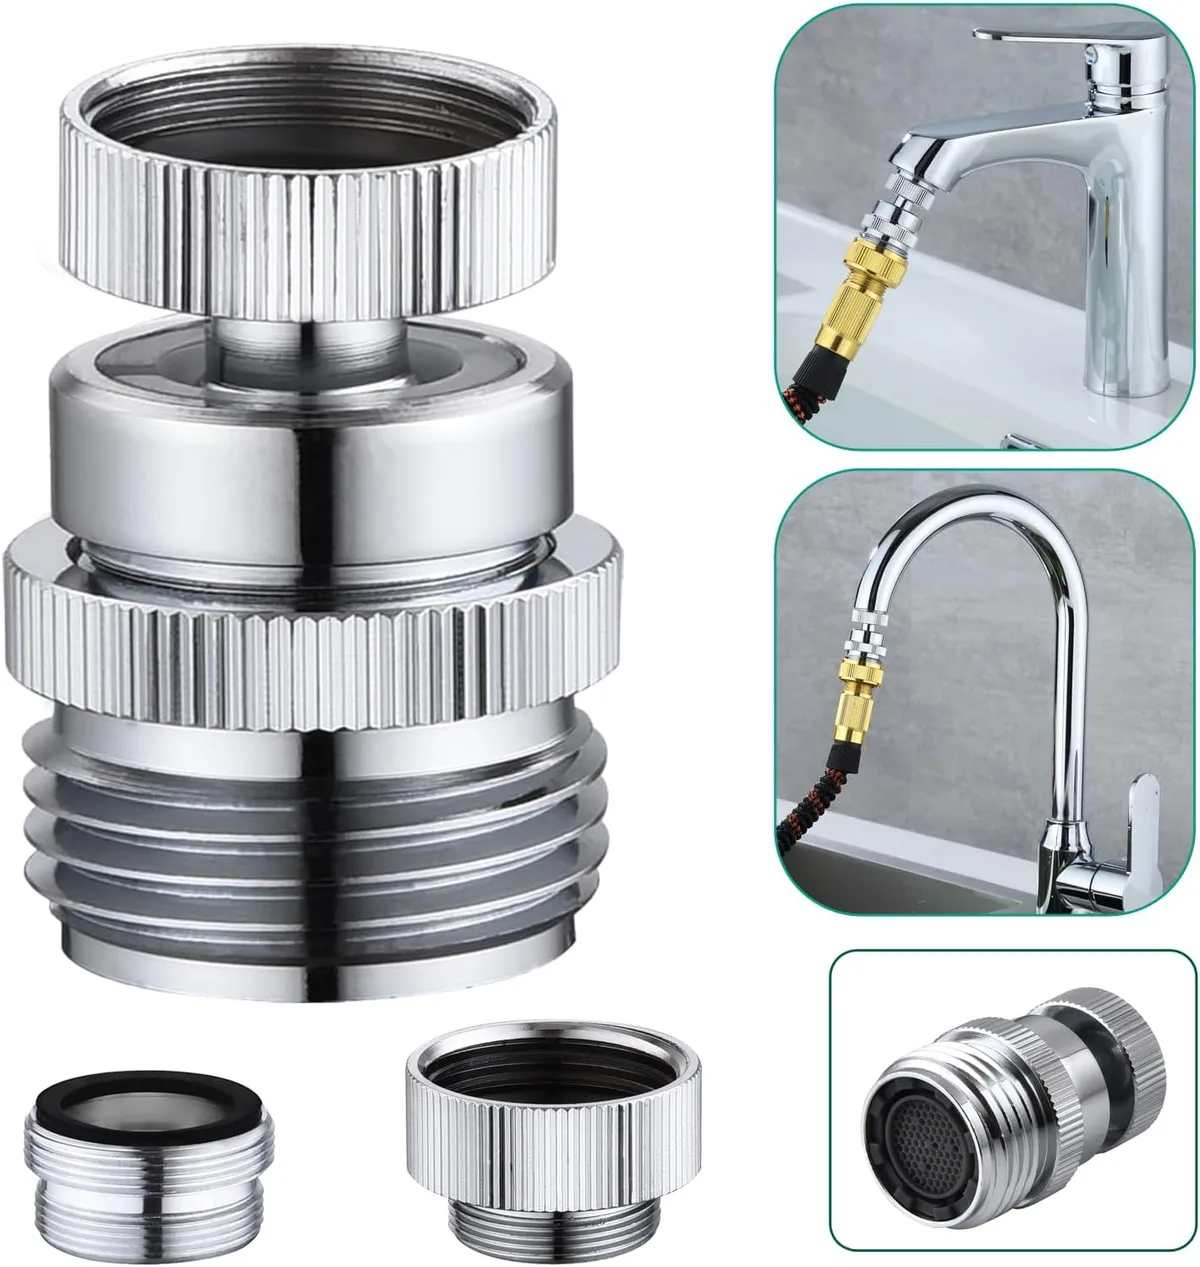
Step 1, Turn off the faucet and remove the existing aerator.
Screw the aerator counter-clockwise by hand. If it resists, wrap the rag around it for grip and twist again. Save the aerator.
You may want to reattach it later when you switch the setup back to normal sink use.
Step 2, Inspect the faucet threads.
Wipe away any mineral deposits or old Teflon residue with the rag. Clean threads ensure a tight seal. Look for cracks or corrosion, especially in homes with hard water.
Step 3, Hand-tighten the adapter onto the faucet.
Screw the adapter clockwise onto the faucet threads. Turn it until it stops, then give it a quarter-turn more with your hand only. Do not use a wrench on the adapter itself, the metal jaws will crush the threads and void the seal.
If the adapter feels loose after hand-tightening, add a single wrap of Teflon tape around the faucet threads and try again.
Step 4, Attach the garden hose.
Push the hose coupling straight onto the adapter's 3/4-inch GHT male end. Twist clockwise until it stops. Hand-tight is sufficient here.
Over-tightening a garden hose coupling cracks the plastic washer inside and creates a drip that's worse than a slightly loose fit.
Step 5, Turn on the water and check for leaks.
Slowly open the faucet. Watch two joints: the faucet-to-adapter connection and the adapter-to-hose connection. A light weep at the first joint means the adapter isn't seated fully.
Tighten it a touch more by hand. A steady drip at the second joint usually means the hose coupling needs another quarter-turn.
Step 6, Test your nozzle or wand.
Connect whatever spray tool you plan to use. Run the water for 10 seconds to flush out any debris that may have entered the line during disassembly.
When you're done, shut off the faucet, disconnect the hose, and unscrew the adapter. Dry both the faucet threads and the adapter threads with a cloth, then screw the original aerator back on. Store the adapter in a drawer until next use.
Mistakes That Cause Leaks, Stripped Threads, and Broken Adapters
Even a simple adapter install goes wrong when people skip the basics. These are the most common failures we see, and each one is easy to avoid.
Using a wrench on the adapter body. The moment you clamp channel-locks onto a brass adapter and crank it down, you risk cracking the fitting or deforming the threads. Hand-tight plus a quarter-turn is always enough. Let the rubber washer inside do the sealing, not brute force.
Cross-threading the aerator. If the adapter doesn't start straight, stop and reseat it. Forcing a misaligned thread strips the delicate aerator grooves on your faucet, and then you're looking at a $200 plumbing repair instead of a $12 adapter. Start slow and feel for the threads catching cleanly before turning.
Ignoring the rubber washer. Every quality adapter includes a reinforced rubber or silicone washer inside the female coupling. If yours doesn't, or if the washer is flattened and cracked, water will spray out the back of the hose connection. Replace the washer before connecting the hose.
Leaving the adapter attached year-round. Outdoor temperature swings expand and contract brass and plastic at different rates. An adapter left on a kitchen faucet through a freezing winter can develop micro-cracks or a warped seal. Remove and store it indoors when you're done with the season.
Running the hose without a shut-off. If you grab a quick-connect adapter with a built-in valve, use it. Without that valve, you must turn the entire sink faucet off before disconnecting the hose, and even then a splash of residual pressure can soak your cabinet. A shut-off valve saves a lot of cleanup time.
Submerging the free end of the hose in standing water. This is the most dangerous mistake on this list. We'll cover the backflow risk in detail next, but the short version is: dipping your hose into a bucket, birdbath, or puddle while it's connected to your kitchen faucet can pull contaminated water backward into your drinking supply. Never do this.
Assuming all adapters fit all hoses. A standard garden hose uses 3/4-inch GHT. Some specialty hoses, narrow spray wands, some expandable hoses, and certain European models, use different thread standards. Confirm your hose coupling before buying the adapter.
If you're unsure about how garden hose diameters are measured, check the coupling threading first.
Using Teflon tape on a washer-sealed adapter. Many modern adapters rely entirely on an internal rubber O-ring. Adding Teflon tape can push the adapter too far on the threads and compress the washer unevenly, causing a leak. Only use tape if the manufacturer explicitly recommends it.
Backflow Risks and Local Plumbing Code Concerns
This is the section most people skip, and it's the one that matters most for safety. Connecting a garden hose directly to a kitchen faucet creates a potential cross-connection between your drinking water and anything sitting at the other end of that hose.
What is backflow?
When municipal water pressure drops suddenly, due to a main break, a fire hydrant being opened nearby, or a sudden demand spike, the pressure inside your home's plumbing can reverse direction. If a hose end is submerged in contaminated water, that dirty water gets pulled backward into your pipes and mixes with the water your family drinks, brushes their teeth with, and cooks with.
The EPA and plumbing codes take this seriously because backflow contamination has caused real public health incidents. Per EPA cross-connection control guidelines, any direct hose-to-potable-water connection requires an approved air gap or vacuum breaker to prevent this scenario.
How to protect yourself:
- Never submerge the open end of a hose connected to your kitchen faucet in a bucket, tub, or pool. Keep the hose end elevated above the water line at all times.
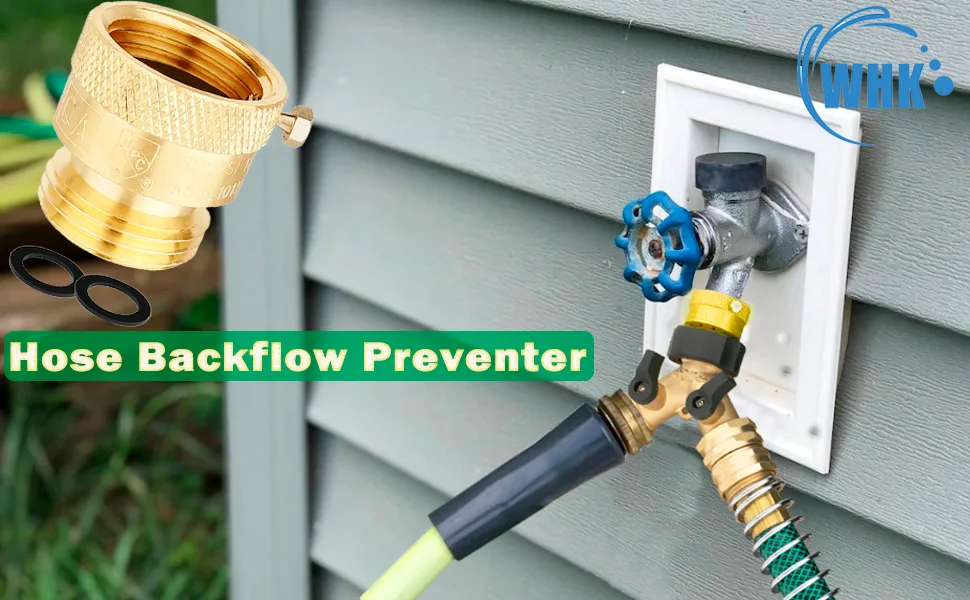
- Use a hose adapter with a built-in vacuum breaker or backflow preventor. These devices contain a spring-loaded valve that closes automatically if negative pressure is detected, blocking reverse flow.
- Install an atmospheric vacuum breaker (AVB) on the hose side if you plan frequent or extended use. This is a small brass device that screws between the adapter and the hose.
- Check your local plumbing code before making a permanent modification. Some municipalities require a listed backflow prevention assembly for any indoor-to-outdoor hose connection, even temporary ones.
- If your home has a whole-house backflow preventer already installed, your risk is significantly reduced, but the rule about never submerging the hose end still applies.
Is this setup legal in my area?
Most residential plumbing codes in the US and Canada allow temporary garden hose connections to indoor sinks as long as the hose end remains above the flood rim level of the sink and no submerged condition exists. However, local ordinances vary, and some cities require a visible air gap device on every permanent hose bib. A quick call to your local building department or a review of your municipal plumbing code will tell you exactly what's required.
When in doubt, the safest path is a quick-connect adapter with an integrated vacuum breaker. It costs a few dollars more upfront and removes the guesswork from compliance.
Frequently Asked Questions
What adapter do I need for a standard kitchen faucet?
You need a hose-to-faucet adapter that matches your aerator thread size. Most US kitchen faucets use either 55/64 inch or 15/16 inch threads. Measure the aerator outer diameter before buying, or choose a universal dual-size adapter to cover both.
Can I use a garden hose adapter on a pull-out sprayer faucet?
Yes, but you'll need a universal quick-connect adapter designed for non-aerated faucets. These clamp around the spray head base instead of screwing onto threads. Standard screw-on adapters will not seal on a pull-out wand.
Will this adapter damage my kitchen faucet?
No, if you install it correctly. Hand-tighten only, never use wrenches on the adapter body, and remove it when not in use. The only risk is cross-threading, which happens when you force the adapter on at an angle.
Start the threads straight and turn slowly.
Is it safe to connect a garden hose to my kitchen sink?
It is conditionally safe. The key rule is never submerge the free end of the hose in standing water while it is connected to the faucet. Use an adapter with a built-in vacuum breaker for extra protection, and keep the hose end above the sink's flood rim at all times.
How long does a brass adapter last compared to plastic?
A solid brass adapter typically lasts five to ten years with normal use, while a plastic or zinc-alloy version often cracks after one to three seasons of temperature changes. Brass is worth the extra cost if you use this setup more than a few times per year.
Do I need Teflon tape when installing the adapter?
Usually not. Most modern adapters include a reinforced rubber washer that creates the seal. Only use Teflon tape if your adapter lacks a washer or the manufacturer's instructions specifically call for it.
Tape on a washer-sealed adapter can actually cause leaks by over-compressing the seal.

Similar Posts