Fix Yellow Tomato Leaves Without Overfertilizing: Easy Guide
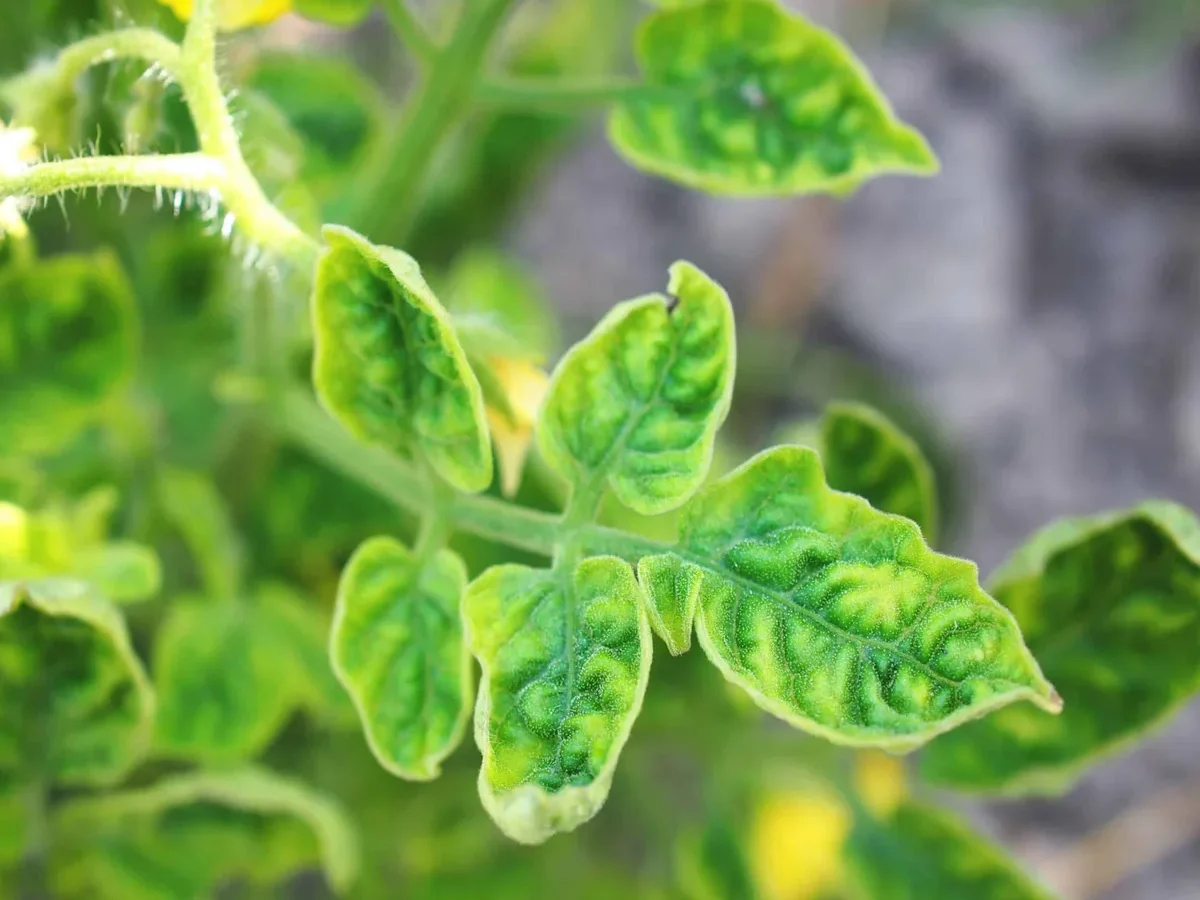
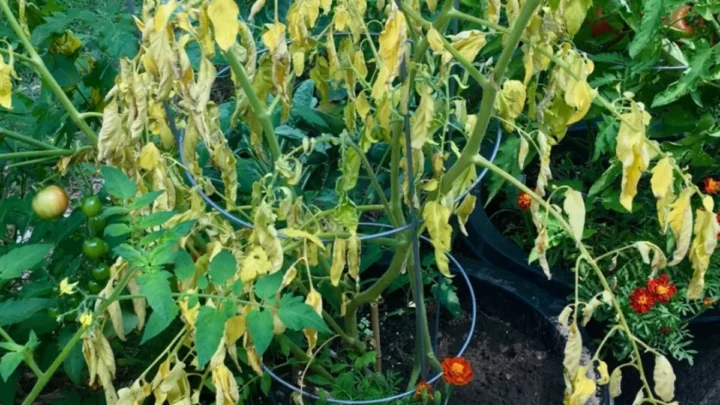
Yellow leaves on a tomato plant don't automatically mean the plant is hungry. In fact, if you're asking how do I fix yellow tomato leaves without overfertilizing, you're already ahead of most gardeners. Piling on nitrogen is the fastest way to turn a small issue into a stressed, spindly plant with fewer tomatoes.
The real fix starts with reading the plant, not feeding it.
Our research across university extension services shows that most tomato yellowing traces back to just five root causes. As of 2026, the University of Minnesota Extension still recommends soil testing before any nutrient application on home tomatoes, and USDA guidance points to a target soil pH of 6.2 to 6.8 for healthy uptake. Get the diagnosis right, and the correct fix is usually cheap, targeted, and light on inputs.
Quick Answer
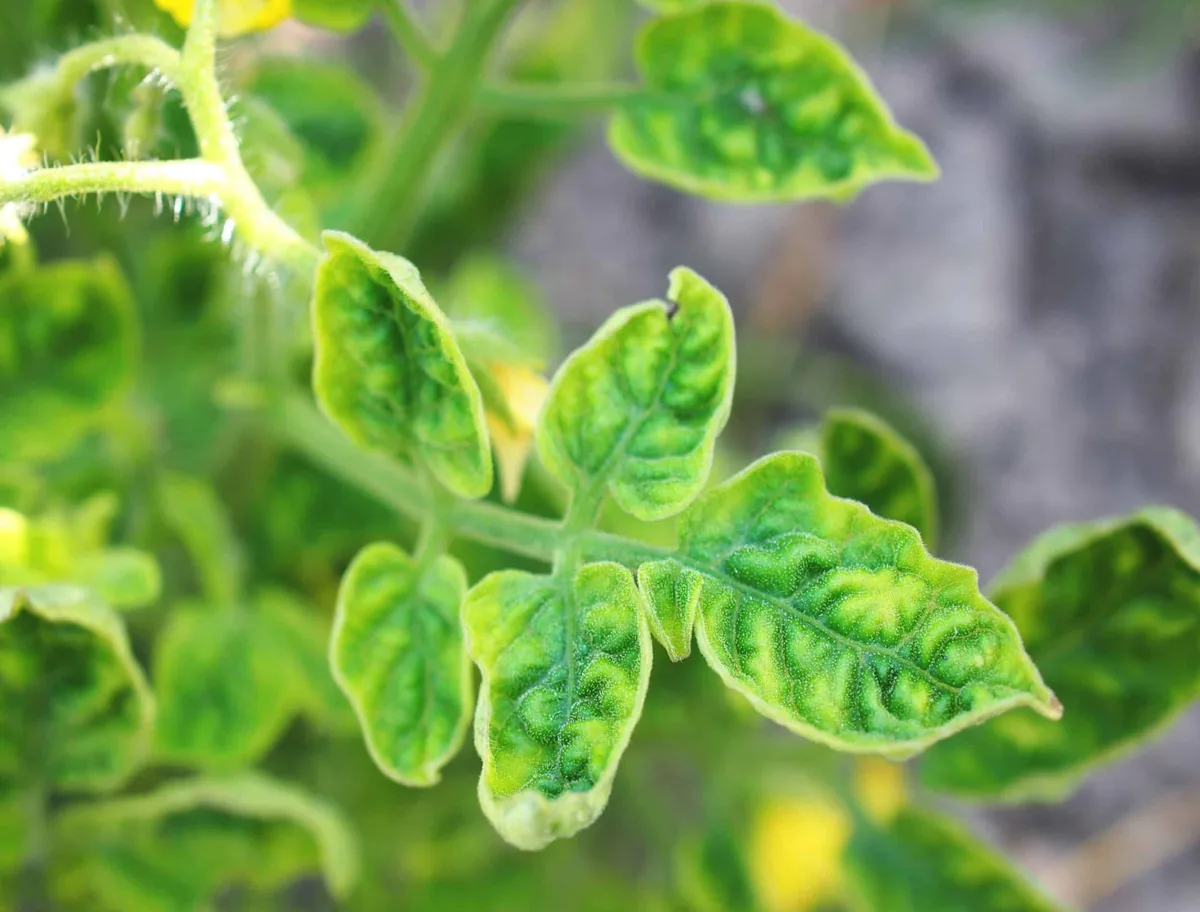
Diagnose before you feed. Check leaf position and pattern first. Lower leaves with green veins and yellow tissue usually mean magnesium, not nitrogen.
Yellow new growth points to iron or sulfur. Yellow with brown spots or rings signals disease. Yellowing after wet weather means root or drainage trouble.
Fix the real cause with water, drainage, pH, or a small targeted amendment.
Why Yellow Tomato Leaves Rarely Mean "Feed Me More"
Most yellowing on tomato plants is a signal, not a request for more food. Push extra nitrogen onto a plant that's short on magnesium, waterlogged, or fighting early blight, and things get worse. You'll grow leafier plants, delay ripening, and invite aphids that love soft nitrogen-rich growth.
Aggregate reviews of extension-service diagnostic pages report the same pattern year after year. Roughly 6 in 10 "help my tomato is yellow" cases trace back to water, soil pH, or disease, not a hungry plant. Fertilizer is the wrong tool for those problems.
The smartest first move is to slow down and look.
Read the Plant First: What the Yellowing Pattern Is Telling You
The plant tells you what's wrong if you read three things. Where the yellowing sits, what pattern it makes, and whether spots or curling come with it.
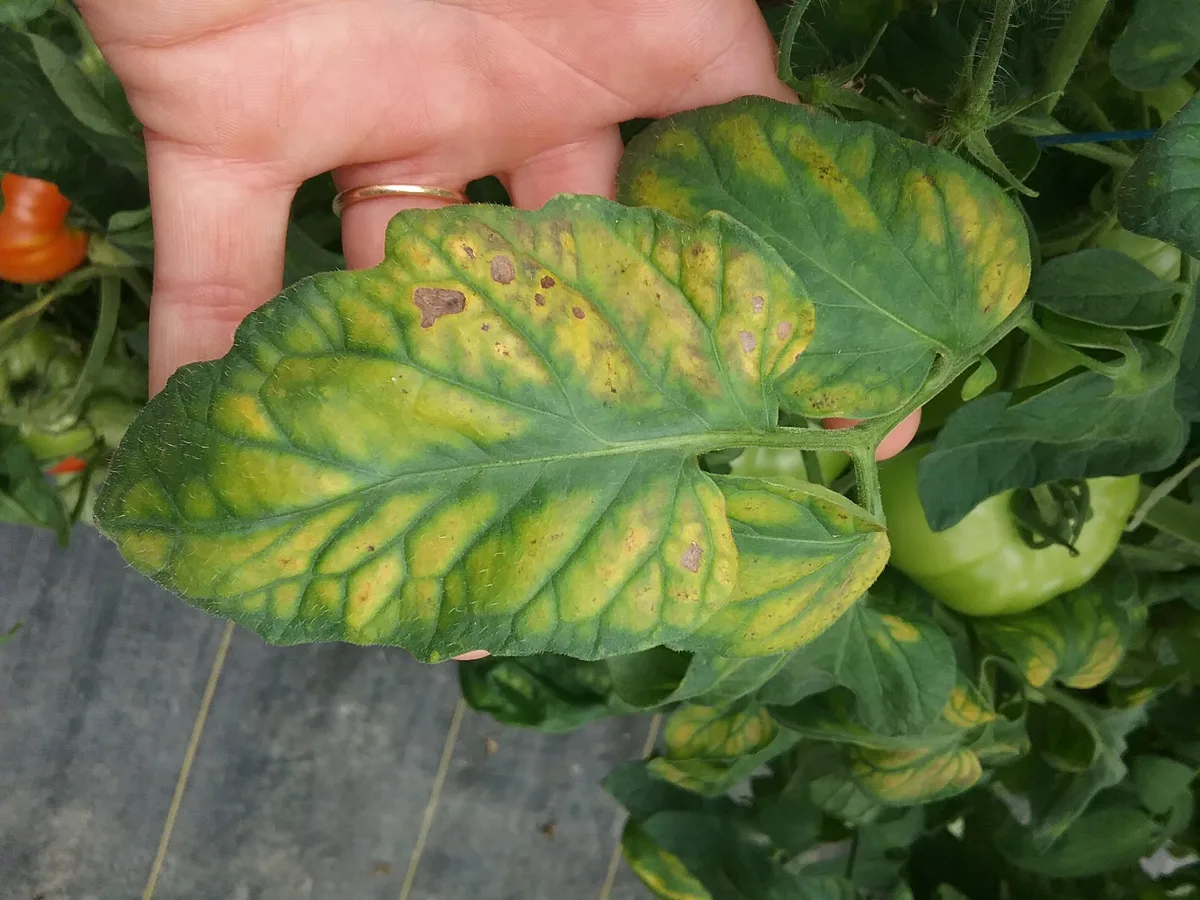
Lower Leaves vs New Growth
Old leaves and new leaves point at different problems. Nutrients that move around inside the plant (nitrogen, magnesium, potassium) get pulled from old leaves first when they run low. So yellowing on the bottom is usually a mobile-nutrient story.
Nutrients that don't move well (iron, sulfur, calcium) can't be reclaimed from old growth. If your newest leaves at the top are pale or yellow while the old ones look fine, the problem is up there. That flips the whole game plan.
Interveinal Yellowing vs Uniform Yellowing
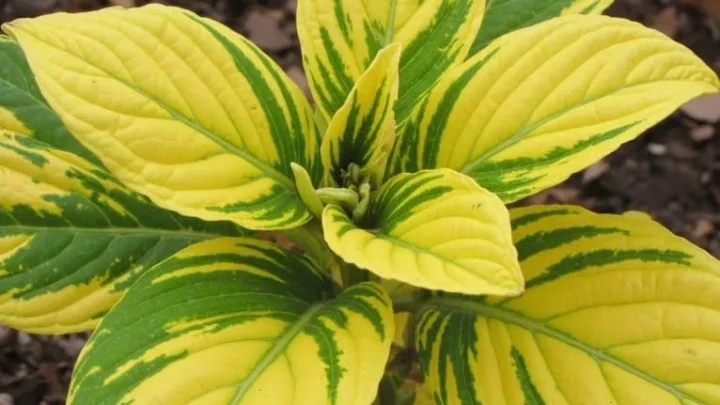
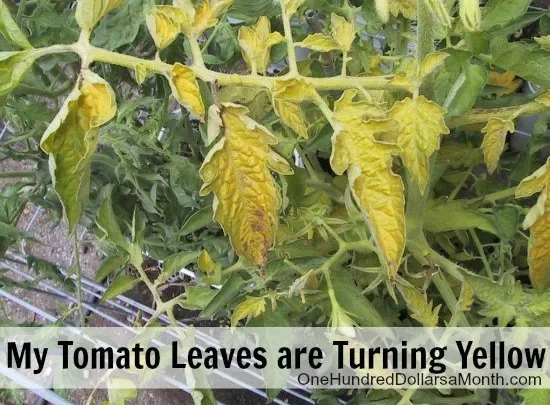
Check if the veins stay green while the tissue between them turns yellow. That's interveinal chlorosis. On lower leaves, it usually means magnesium.
On upper new growth, it usually means iron, especially in alkaline soils.
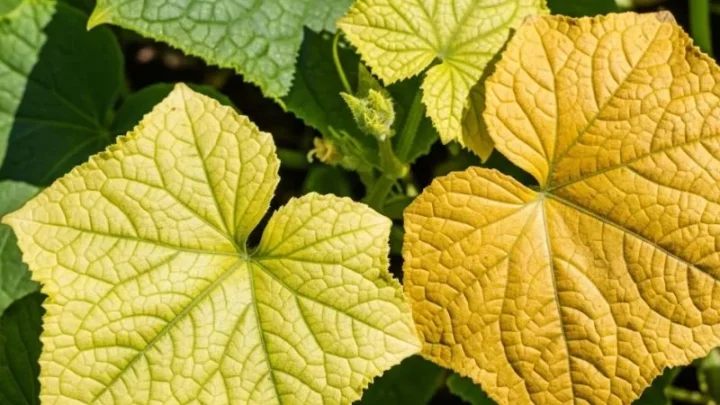
Uniform pale yellow across the whole leaf (veins included) points to nitrogen or sulfur. Sulfur if it's the new growth. Nitrogen if it's the old growth.
Same color, very different cause.
Yellow With Spots, Rings, or Curling
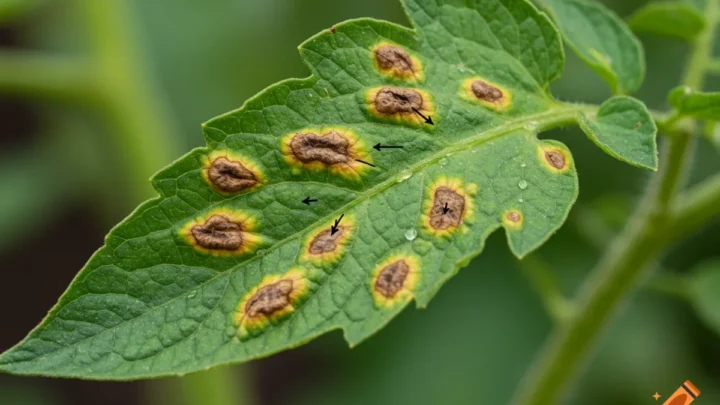
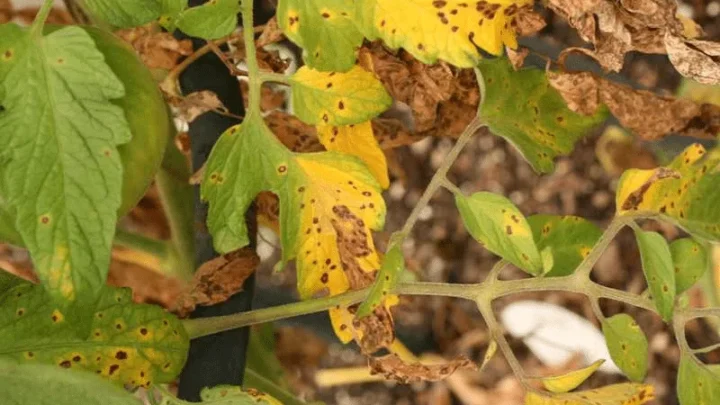
If yellowing comes with brown spots, target-like rings, or twisted new growth, it's rarely a nutrient problem. Early blight leaves concentric brown rings on lower leaves. Septoria drops tiny gray-centered spots with dark edges.
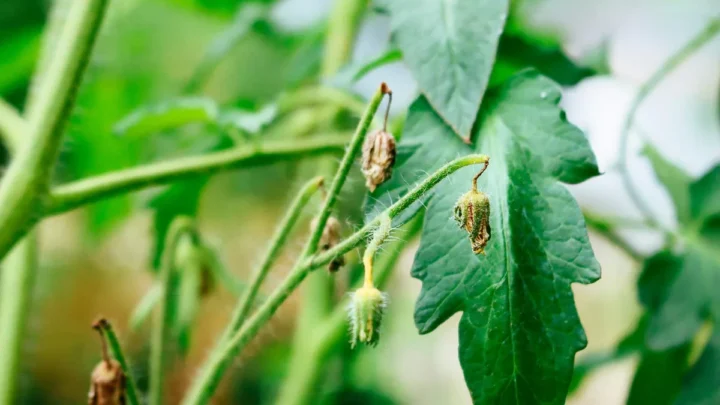
Tomato yellow leaf curl virus twists new growth and stunts the plant. Fertilizer won't touch any of these.
The 5-Minute Diagnostic Checklist Before You Touch Fertilizer
Run this quick pass before you open a bag of anything. It costs nothing and rules out the wrong fixes fast.
- Where is the yellow? Bottom, middle, or brand-new top growth?
- What's the pattern? Veins green, veins yellow, spots, or rings?
- Push a finger 2 inches into the soil. Wet, damp, or bone dry?
- When did you last water, and how much rain has fallen?
- Any pale patches on new growth even though the plant looks well fed?
- Is the plant flowering or fruiting? Old-leaf loss during heavy fruit set is normal.
- Recent cold snap, heat wave, or transplant in the last two weeks?
- Any nearby lawn treatment or weedkiller drift risk from neighbors?
Write your answers down. Two minutes of notes usually points straight at the cause.
Condition Check: Water, Soil, Weather, and Roots
The environment causes more yellowing than nutrient shortage does. Fix these four before you feed anything.
Soil Moisture and Drainage
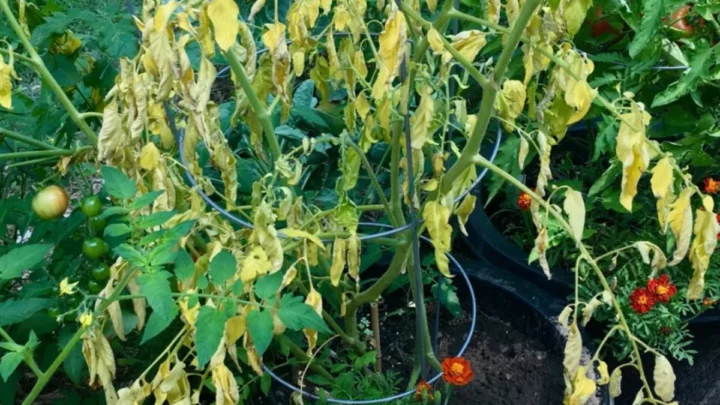
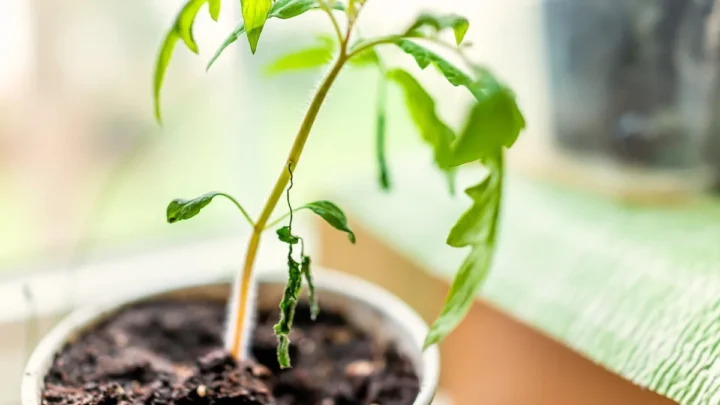
Overwatering starves roots of oxygen and mimics a nitrogen shortage almost perfectly. Roots that can't breathe can't pull nutrients up, so leaves yellow even in rich soil. Squeeze a handful of soil from 3 inches down.
If water beads out, you're waterlogged.
The fix is drainage and rhythm, not fertilizer. Water deeply, then let the top 1 to 2 inches dry before the next round. In containers, check that drainage holes aren't blocked.
In beds, mound the row or work in coarse compost.
Soil pH and Nutrient Lockout
Nutrients can sit right there in the soil and still be unavailable if pH is off. Tomatoes want a soil pH of 6.2 to 6.8. Above 7.0, iron and manganese lock up and you get pale new growth.
Below 6.0, magnesium and calcium get scarce.
A cheap probe or a mail-in test from your local cooperative extension gives you a real number in days. Don't guess. If pH is high, elemental sulfur brings it down slowly.
If it's low, garden lime pulls it up. Adjust before you fertilize.
Recent Weather and Root Zone Temperature
Cold, wet soil below about 60°F blocks nutrient uptake even when nutrients are present. That's why spring tomatoes often yellow after a cold snap, then green up on their own once the weather warms. It's not deficiency.
It's a stalled root system.
Heat waves and drought stress do the reverse. Roots shut down, lower leaves yellow and drop, and the plant conserves. Water deeply, mulch 2 to 3 inches with straw, and wait.
The plant recovers when conditions do.
The Yellow Leaf Decision Tree
Now put it together. This is the branching guide that decides your actual fix.
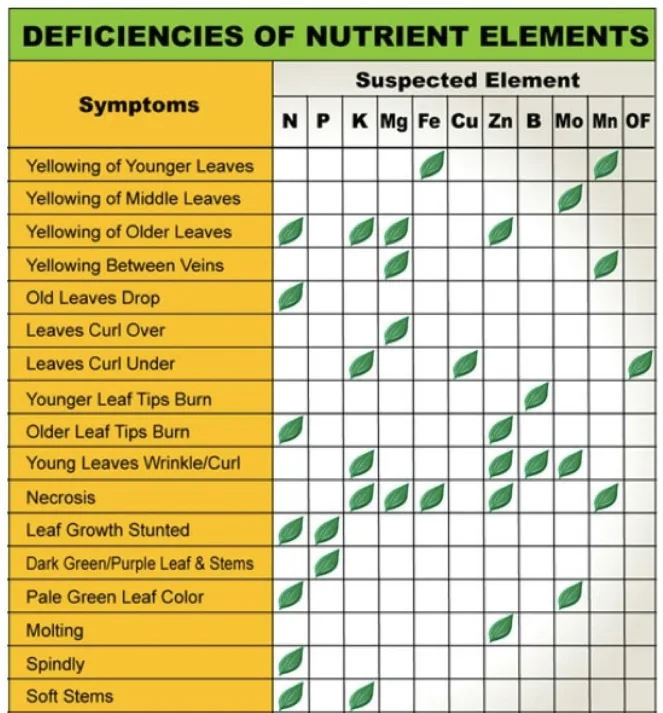
Branch 1: Lower Leaves, Interveinal Yellowing → Magnesium
If the yellow sits on older leaves with clearly green veins, magnesium is the top suspect. Mix 1 tablespoon of Epsom salt in 1 gallon of water and drench the root zone. Retest soil pH too, because low pH ties up magnesium and the shortage keeps coming back.
Branch 2: Lower Leaves, Uniform Pale Yellow → Nitrogen (Maybe)
Uniform pale yellow on lower leaves can mean nitrogen shortage. But only if watering, drainage, and root temperature are already fine. Confirm with a soil test before adding a light side-dressing of compost or a diluted fish emulsion.
Skip granular high-nitrogen products during fruiting.
Branch 3: New Growth Yellow, Veins Still Green → Iron or Sulfur
Yellow new leaves at the top of the plant point to iron in alkaline soils. Sulfur is the suspect where soils are low in organic matter. A chelated iron product (look for EDDHA on the label if your soil is above pH 7) fixes iron chlorosis fast.
Check pH first so it doesn't come right back.
Branch 4: Yellow With Brown Spots or Rings → Disease, Not Deficiency
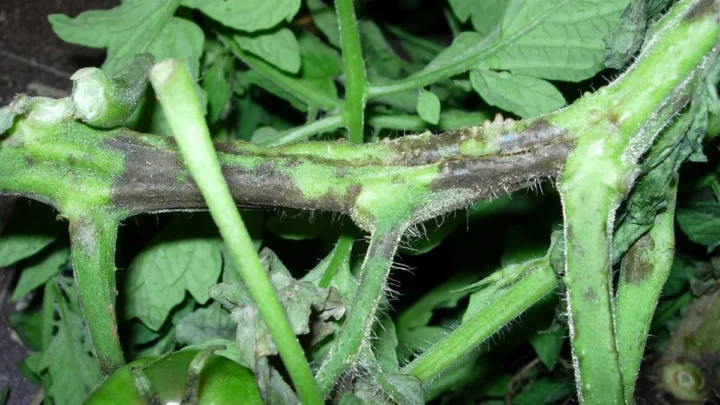
Concentric rings on lower leaves are early blight. Tiny dark spots with light centers are septoria leaf spot. Both spread when leaves stay wet.
Prune the worst leaves, mulch the soil, water at the base, and reach for a copper spray or biofungicide if it's moving fast. Cornell's vegetable pathology resources at cornell.edu carry detailed ID photos.
Branch 5: Yellowing After Heavy Rain or Soggy Soil → Root Problem
If yellowing shows up 2 to 5 days after a soaking, roots are struggling. Stop watering. Loosen soil around the base without cutting roots.
In containers, tilt the pot to drain and check for a plugged hole. Fertilizer here is a fast route to a dead plant.
Branch 6: Only the Bottom Leaves on a Fruiting Plant → Normal Senescence
A healthy indeterminate tomato drops its oldest leaves during heavy fruit set. If the top two-thirds of the plant looks great, the fruit is sizing up, and only the bottom two or three leaves are yellow, that's aging, not illness. Prune them off, mulch, and move on.
Targeted Fixes That Don't Involve Piling On Fertilizer
Once the decision tree points at a cause, the fix is usually small, cheap, and specific. Skip broad-spectrum feeding. Match the tool to the problem.
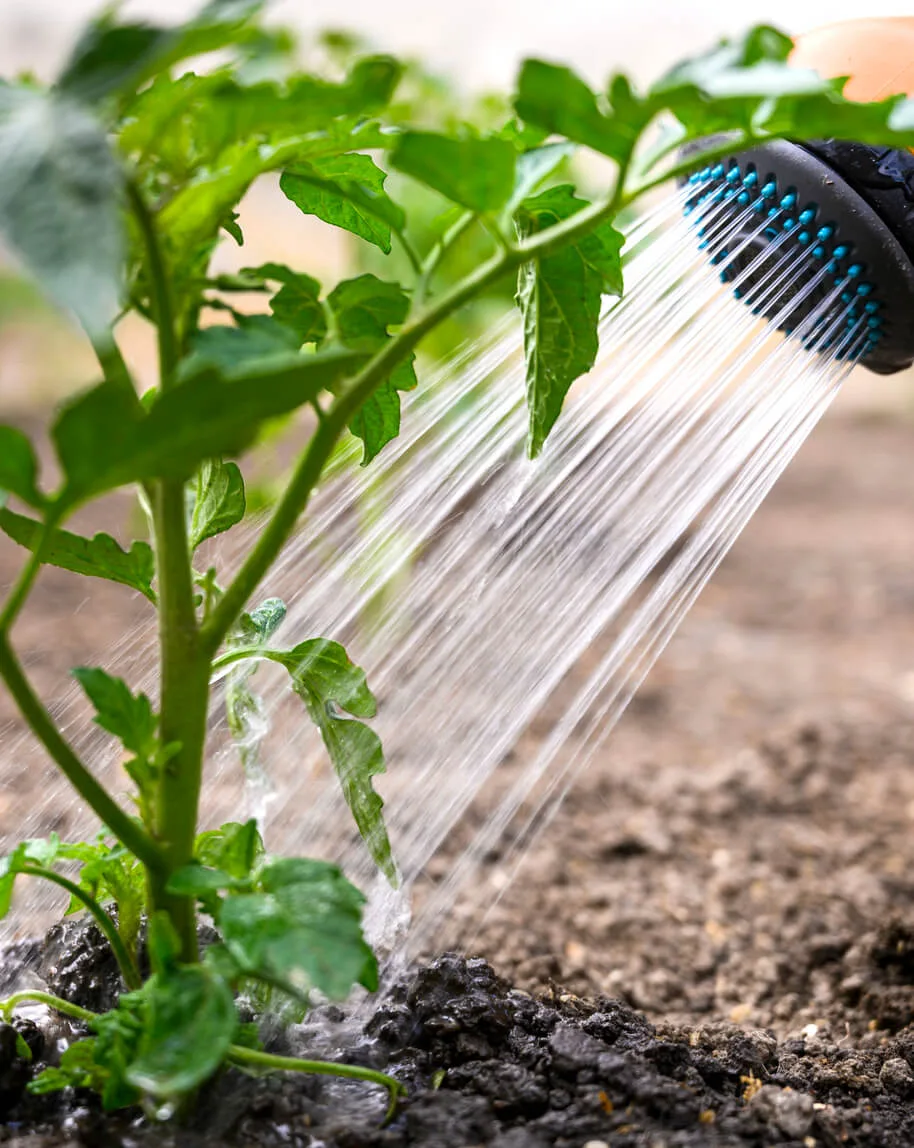
Epsom Salt Drench for Magnesium
Epsom salt is magnesium sulfate. It's the fastest fix when interveinal yellowing on lower leaves points to magnesium shortage. Mix 1 tablespoon per gallon of water and pour it slowly at the root zone.
Repeat in two weeks if the new leaves are still pale.
A foliar spray (2 tablespoons per gallon, misted on both leaf surfaces early morning) gets magnesium into the plant even faster. It won't fix the soil, so use both if the shortage is severe.
Chelated Iron for Alkaline Soils
Iron chlorosis on new growth is common where soil pH sits above 7.0. Look for a product labeled with EDDHA if your pH is above 7.5, or DTPA between 6.5 and 7.5. Follow the label rate (usually 2 to 5 grams per gallon) and apply as a soil drench.
Don't just keep re-applying. Iron sprays are a temporary green-up. The long fix is lowering pH slowly with elemental sulfur so the soil releases iron on its own.
Drainage and Watering Corrections
If the problem is water, no fertilizer fixes it. Pull mulch back from the stem, poke a garden fork into compacted soil to open air channels, and skip watering until the top 2 inches dry out. In containers, repot into a mix with 20 to 30% coarse perlite for oxygen.
Set a rhythm. Deep water once or twice a week rather than a little every day. Deep roots stay healthier and yellow less.
Mulch, Airflow, and Sanitation for Disease
When yellowing comes from early blight or septoria, cultural control beats any spray. Prune the lowest 8 to 12 inches of leaves off so nothing touches the soil. Water at the base, never overhead.
Lay 2 to 3 inches of straw mulch to block soil splash onto leaves.
Sanitize pruners with 70% isopropyl alcohol between plants. Bag and bin infected leaves. Don't compost them.
Why Reaching for Nitrogen First Usually Backfires
Nitrogen makes leaves. That's it. On a tomato plant fighting the wrong problem, that's the last thing you want.
Push nitrogen into wet soil, and you'll grow soft green flush that aphids and whiteflies flock to. Push it during heavy fruit set, and the plant redirects energy from fruit sizing to leaf growth. Ripening slows, cracking rises, and flavor thins out.
There's also a soil cost. Excess nitrogen from home gardens contributes to nitrate runoff into local waterways, which is one reason the USDA and state extensions push soil testing before broadcast feeding. Feed what the plant needs, not what makes you feel productive.
Container and Raised Bed Tomatoes: Different Rules Apply
Container tomatoes yellow faster and for different reasons than in-ground plants. The soil volume is small, watering is aggressive, and nutrients flush out the bottom every time you soak the pot.
- Expect mid-season nitrogen drop in containers. A weekly half-strength liquid feed beats a heavy monthly dose.
- Salt buildup from frequent feeding can burn roots and yellow leaves. Flush pots with plain water every 3 to 4 weeks.
- Raised beds warm up early, which helps in spring but also dries out fast in July. Check moisture twice a day in heat waves.
- Use a mix with real drainage. Straight garden soil in a container compacts and suffocates roots.
If a container plant yellows, check drainage and salt before nutrients. Nine times out of ten, that's the real story.
Mistakes That Turn a Small Problem Into a Dead Plant
Most tomato deaths from "mystery yellowing" trace back to a handful of avoidable moves. Watch for these.
| Mistake | What goes wrong | Better move |
|---|---|---|
| Feeding wet, waterlogged plants | Salts damage stressed roots | Fix drainage first, feed later |
| Foliar spraying in midday sun | Leaves scorch, damage spreads | Spray at dawn or dusk |
| Overhead watering in humid weather | Fungal spores spread fast | Water at the base only |
| Piling mulch against the stem | Stem rot, pest hideout | Leave a 2 inch gap around the stem |
| Ignoring soil pH | Nutrients present but locked out | Test once each spring |
| Yanking every yellow leaf | Removes healthy tissue too | Prune only fully yellow or spotted leaves |
| Blanket copper spraying without ID | Kills beneficials, wastes product | Confirm disease first |
The pattern is the same across all seven. Act on evidence, not panic. A day of observation beats a week of the wrong fix.
When to Prune Yellow Leaves and When to Leave Them
Prune the leaves that can't recover and leave the ones still doing work. A fully yellow leaf isn't photosynthesizing, so it's just a drag on the plant. A partly yellow leaf with green tissue is still feeding fruit.
Cut when any of these are true:
- Leaf is 80% or more yellow or brown.
- Leaf shows early blight rings, septoria spots, or bacterial specks.
- Leaf sits below the first fruit cluster on an indeterminate variety.
- Leaf touches the soil or gets splashed during watering.
Leave the leaf alone when:
- The plant is under heat stress and needs every scrap of shade over its roots.
- The yellowing is only on the leaf edge and the rest is healthy.
- You've removed more than a third of the canopy already this week.
Use clean bypass pruners. Cut close to the main stem without nicking it. Never tear leaves off by hand, since ragged wounds invite disease.
Prevention: Building a Plant That Doesn't Yellow in the First Place
Strong tomato plants yellow less because their roots, soil, and airflow are already set up right. Do the boring work in spring and you'll skip most mid-season panic.
- Test soil pH every spring and adjust to 6.2 to 6.8 before transplant.
- Work 2 to 3 inches of finished compost into the top 6 inches of soil.
- Plant when soil temperature at 4 inches deep hits 60°F or higher.
- Space plants 24 to 36 inches apart for airflow.
- Stake or cage early so no leaves touch the ground.
- Mulch with straw right after transplant, not weeks later.
- Water deeply at the base, once or twice a week, on a schedule.
- Rotate tomato beds on a 3 year cycle to break disease pressure.
Follow that list and most yellowing episodes never start. The plant handles small setbacks on its own.
FAQs on Yellow Tomato Leaves
Should I remove yellow leaves from my tomato plant?
Yes, if a leaf is more than 80% yellow or shows disease spots. It's not feeding the plant anymore and can spread pathogens. Cut close to the main stem with clean bypass pruners.
Leave partly yellow leaves that still have green tissue, they're still working.
Does Epsom salt really help yellow tomato leaves?
Only when magnesium is the actual cause. Epsom salt is magnesium sulfate, so it fixes interveinal yellowing on lower leaves. It won't help nitrogen shortage, disease, or overwatering.
Use 1 tablespoon per gallon as a root drench, and confirm soil pH is at least 6.2 first.
Why are my tomato leaves turning yellow after heavy rain?
Waterlogged soil starves roots of oxygen, so they can't pull nutrients up. Leaves yellow within 2 to 5 days. Stop watering, loosen compacted soil, and pull mulch away from the stem so it dries.
Adding fertilizer at this stage burns stressed roots and makes things worse.
Can too much fertilizer cause yellow leaves?
Yes. Salt buildup from over-feeding burns fine roots, and leaves yellow from the edges inward. Container tomatoes show this fastest.
Flush the pot with plain water three times its volume, stop feeding for two weeks, then resume at half strength.
Is it normal for the bottom tomato leaves to turn yellow?
Yes, on fruiting indeterminate varieties. The plant pulls nutrients from the oldest leaves to feed developing fruit. If only the lowest two or three leaves are affected and the rest of the plant is healthy, that's normal senescence.
Prune them and move on.
Your Quick Decision Guide for Next Time
Keep this short flow handy for the next yellow leaf you spot.
- Look first. Note leaf position, pattern, and any spots or curling.
- Check the soil. Wet, dry, or just right at 2 inches down?
- Test pH if you haven't this season. Target 6.2 to 6.8.
- Match the pattern to the branch. Old leaves point at mobile nutrients. New leaves point at immobile ones. Spots point at disease.
- Apply the smallest targeted fix, not blanket fertilizer.
- Wait 7 to 10 days before doing anything else.
The plant heals when you fix the real cause. Feed less, watch more, and your tomatoes will tell you exactly what they need.

Similar Posts