Why Tomato Leaves Turn Yellow in Containers: Fixes That Work
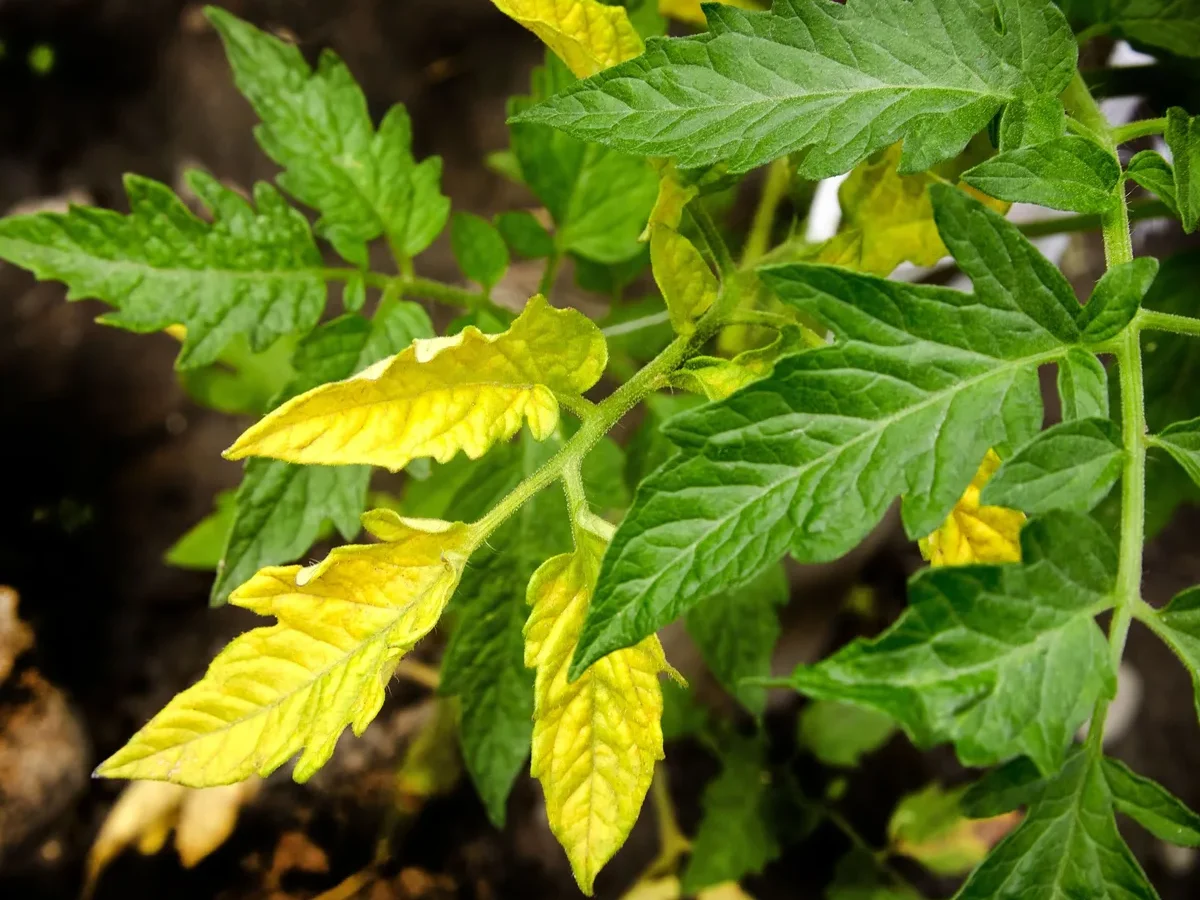
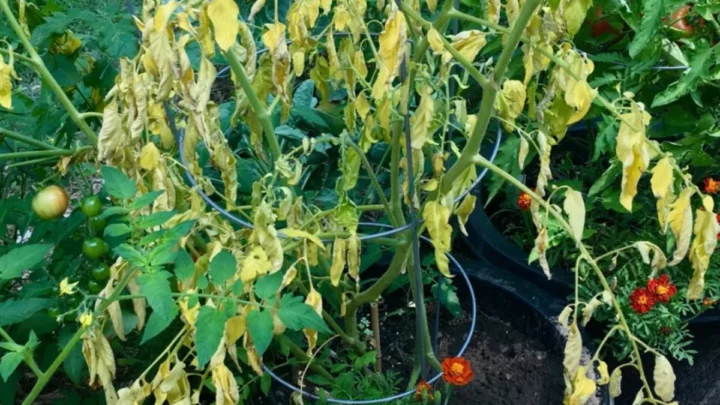
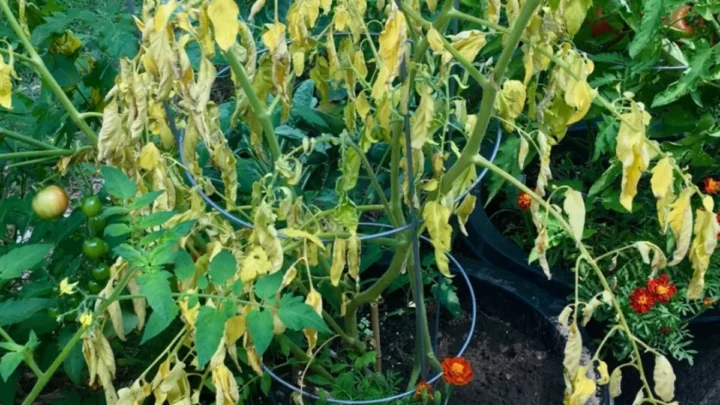
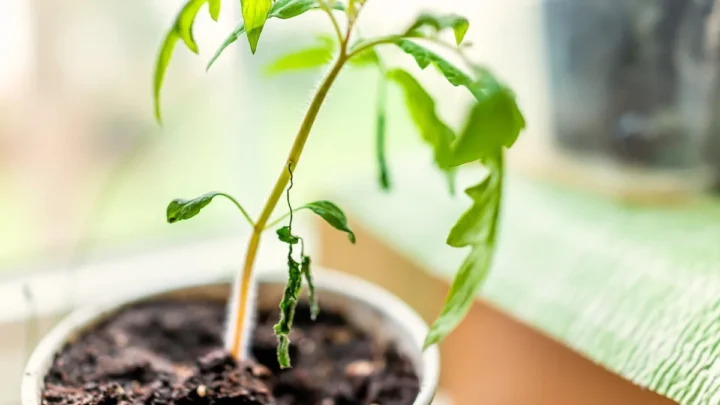
Yellow leaves on a potted tomato usually mean one of six things, and the pot itself often makes the problem worse. If you've been asking why are tomato leaves turning yellow in containers, the honest answer is that containers dry out faster, heat up harder, and leach nutrients quicker than any garden bed ever will. That combination stresses tomato roots in ways ground-grown plants rarely feel.
The good news: the leaves themselves tell you exactly what's wrong if you know where to look.
Container tomatoes need a minimum 5-gallon pot for determinate varieties and 10 to 20 gallons for indeterminates, per guidance from university extension programs as of 2026. Undersize the pot and yellowing is almost guaranteed by midsummer, no matter how well you feed or water. The pattern of yellowing, which leaves, which part of the leaf, and what else is happening on the plant, is the fastest path to a fix.
Quick Answer
Container tomato leaves turn yellow mainly from overwatering, underwatering, nutrient deficiency, root binding, disease, or heat stress. Pots dry out and leach nutrients faster than garden soil. Bottom leaves usually signal water or nitrogen problems.
Top leaves usually signal iron or magnesium issues. Spots or curling point to disease or pests.
Why Container Tomatoes Yellow Faster Than Garden Tomatoes
A tomato in the ground has thousands of cubic feet of soil to buffer temperature, hold moisture, and store nutrients. A tomato in a 10-gallon pot has roughly 1.3 cubic feet. That's a massive difference in root-zone stability, and it explains most of the yellowing you'll ever see in containers.
Three container-specific pressures hit tomatoes hard:
- Fast drying. On a hot patio, a 10-gallon pot can lose gallons of water in a single day.
- Nutrient leaching. Every deep watering flushes mobile nutrients (nitrogen, magnesium, potassium) out the drainage holes.
- Root-zone heat. Dark plastic pots in direct sun can push root temperatures past 100°F (38°C), which stresses roots and blocks nutrient uptake.
That's why the same tomato variety that thrives in the ground can yellow within weeks in a pot. The plant isn't sick. Its environment is just less forgiving.
The 30-Second Diagnosis: Read the Leaf Pattern First
Before you fertilize, water, or repot anything, stop and look. The leaves already know what's wrong. Ask three quick questions.
1. Which leaves are yellowing?
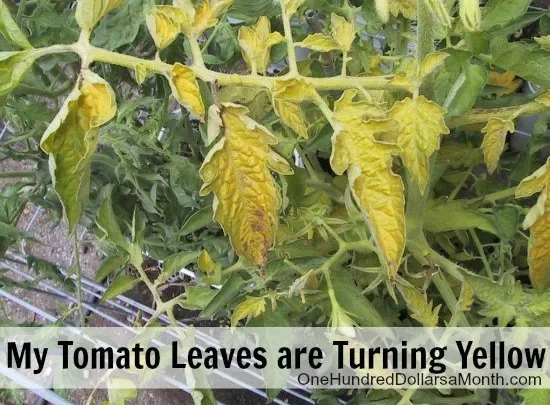
- Bottom (oldest) leaves → usually water or nitrogen.
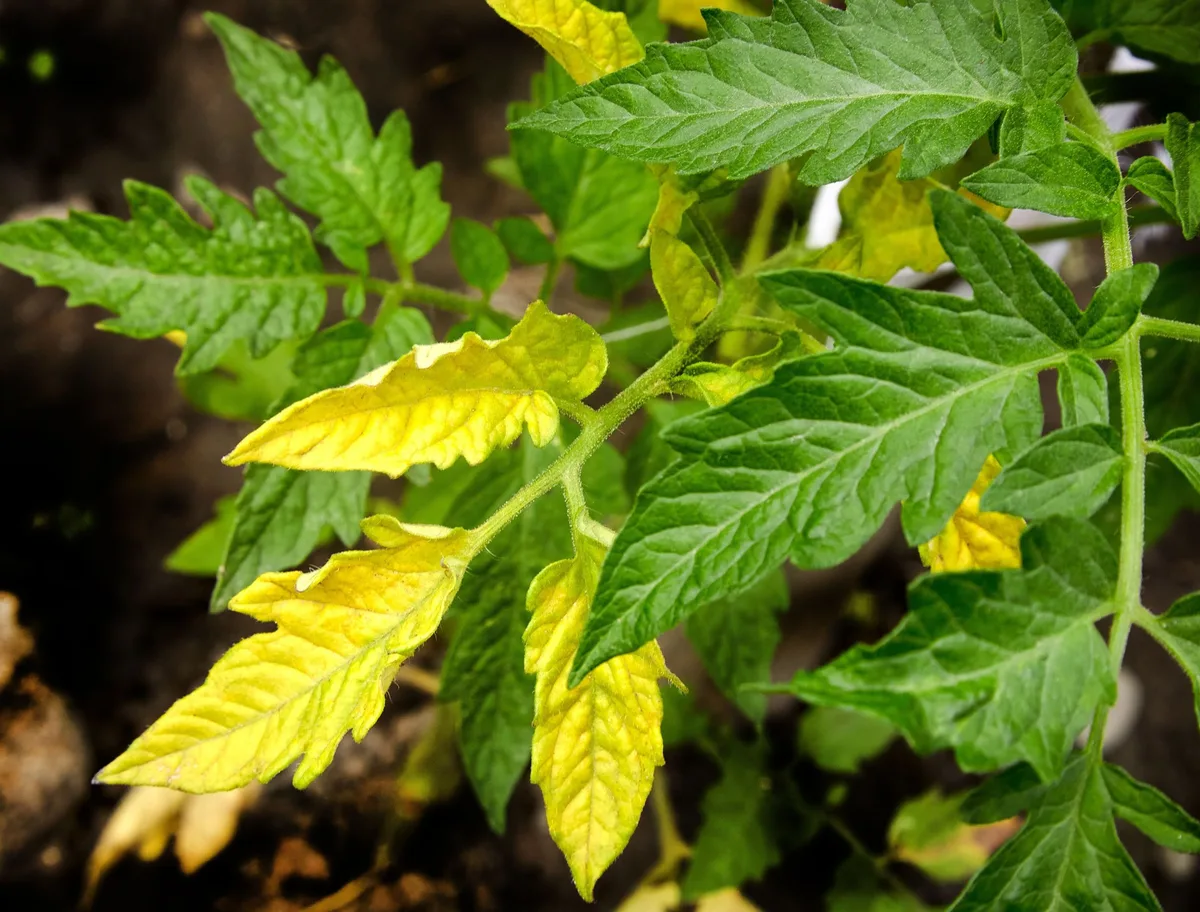
- Top (newest) leaves → usually iron, magnesium, or sulfur.
- Random leaves everywhere → usually disease or pest.
2. What's the pattern on the leaf itself?
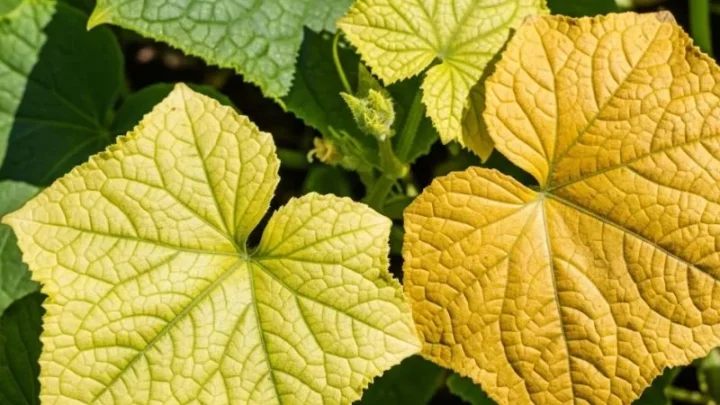
- Uniform pale green or yellow → nitrogen.
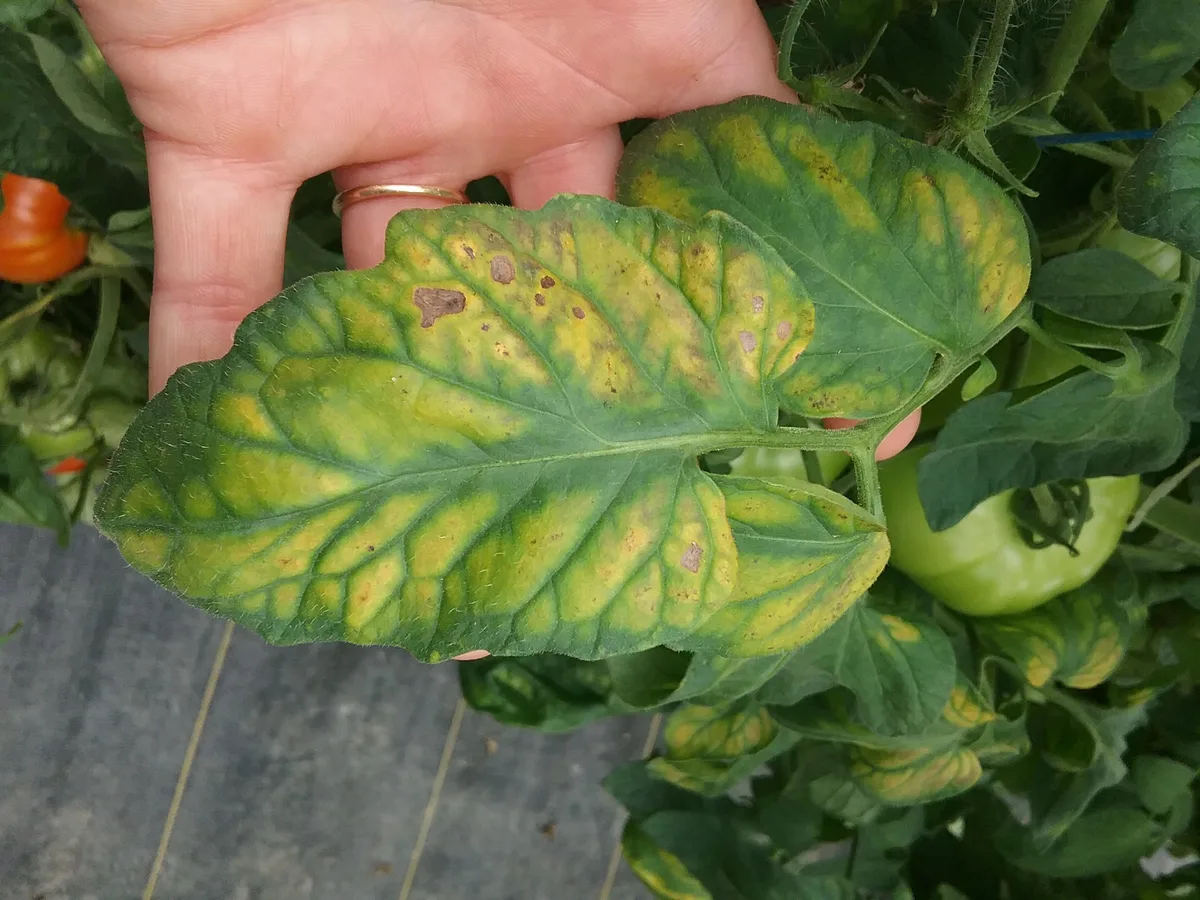
- Green veins with yellow tissue between → iron or magnesium.
- Yellow edges curling inward → potassium.
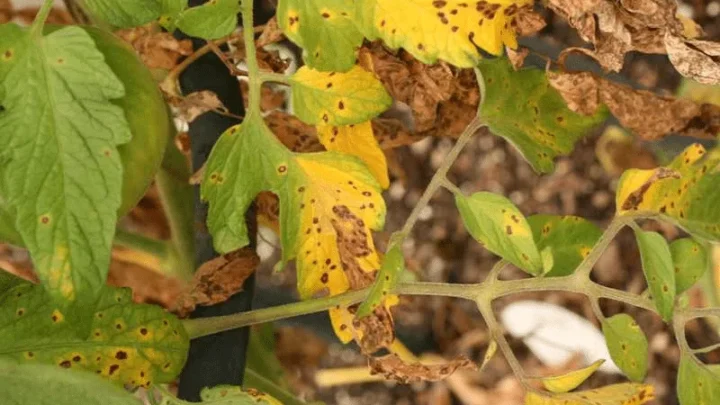
- Yellow blotches, halos, or brown centers → fungal disease.
- Yellow stippling or speckling → spider mites or thrips.
3. What's the soil doing?
- Wet and heavy for days → overwatering or poor drainage.
- Bone dry, pulling from the pot edges → underwatering or hydrophobic mix.
- Crusty white residue on top → salt buildup from fertilizer.
Match your answers to the sections below. That's the whole decision tree in one glance.
Yellowing on the Bottom Leaves: What It Usually Means
If the oldest leaves at the base yellow first while new growth stays green, you're almost always looking at one of three things: overwatering, nitrogen deficiency, or natural aging. Container plants show all three more often than in-ground plants because water and mobile nutrients cycle so fast in a small pot.
The plant is smart. When something's short, it pulls nitrogen and other mobile nutrients out of old leaves and sends them to new growth. That's why the bottom goes yellow first.
Knowing which cause is in play saves you from throwing the wrong fix at it.
Overwatering vs. Nitrogen Deficiency (How to Tell Them Apart)
Both look similar at a glance. The soil test tells you which one you have.
| Clue | Overwatering | Nitrogen Deficiency |
|---|---|---|
| Soil feel | Wet 2 inches down, days after watering | Dry or normal moisture |
| Leaf feel | Soft, limp, sometimes wilting despite wet soil | Firm but pale, uniform yellow |
| Smell | Slightly sour or swampy from the drainage holes | No unusual smell |
| Roots (if you check) | Brown, mushy, no white tips | White and healthy |
| Fix | Stop watering. Improve drainage. Repot if root rot is present | Feed with a balanced tomato fertilizer or diluted fish emulsion |
If you're on the fence, lift the pot. A waterlogged container feels heavy long after it should. That weight test alone catches most overwatering cases before root rot sets in.
When It's Just Natural Leaf Aging
Not every yellow leaf is a crisis. A tomato plant sheds its oldest leaves as it grows, especially once the plant sets fruit and pushes energy upward. If only one or two of the very lowest leaves turn yellow, and the rest of the plant looks strong, prune them off and move on.
Removing old, drooping leaves also improves airflow at the base, which cuts fungal risk.
Yellowing on the New Top Growth: The Micronutrient Story
When the fresh leaves at the top yellow while the older leaves stay dark green, the plant is telling you it can't move a nutrient. Iron, calcium, and sulfur are immobile. The plant can't rob old leaves to feed new ones, so the deficiency shows up first on new growth.
Container soil is where this gets tricky. Peat-based potting mixes drift alkaline over time from hard tap water. Once pH climbs above 7.0, iron and other micronutrients get locked up even if they're technically present in the pot.
Iron Deficiency and High-pH Potting Mix
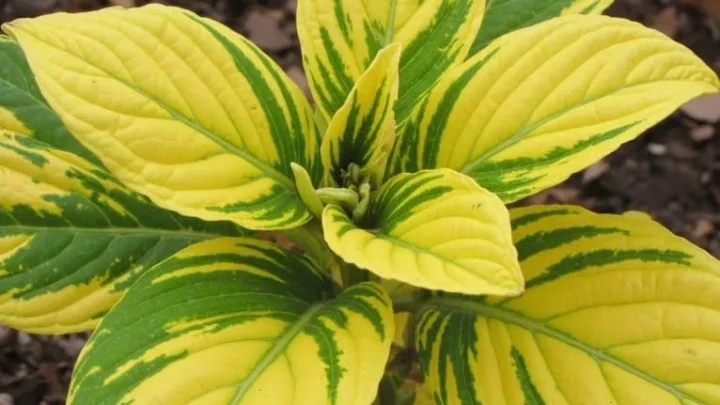
Iron deficiency in tomatoes shows up as bright yellow new leaves with sharply contrasting green veins. Classic pattern. If you see it in a container, don't reach for iron supplements first.
Test the pH.
Tomatoes prefer a soil pH of 6.0 to 6.8. Municipal tap water in hard-water regions often runs 7.5 to 8.5, and repeated watering pulls the potting mix in that direction. Even with plenty of iron in the mix, the plant can't absorb it above pH 7.0.
The fix order for iron chlorosis:
- Test pH with a meter or a strip kit.
- If pH is above 7.0, flush the pot with rainwater or distilled water.
- Water in a chelated iron product labeled for tomatoes, following the label rate.
- Long term, switch to rainwater or add a mildly acidic amendment like elemental sulfur.
Magnesium Deficiency and the Epsom Salt Question
Magnesium deficiency looks similar to iron, yellow between the veins on newer or middle leaves, but the yellowing has a more diffuse, marbled look. Magnesium is often flushed out of pots faster than gardeners realize, especially in high-rainfall or heavy-watering situations.
Epsom salt (magnesium sulfate) is the classic response, and in this specific case, it actually works. A common dose is 1 tablespoon per gallon of water, applied as a soil drench once, then again in two weeks if symptoms improve. Don't use Epsom salt as a routine "just in case" tonic.
Excess magnesium can block calcium uptake and trigger blossom end rot. For confirmed diagnosis and dosing on tricky cases, extension programs like Penn State Extension publish tomato-specific guidance worth cross-checking.
Interveinal Yellowing (Green Veins, Yellow Tissue): The Lockout Clue
Interveinal chlorosis, the pattern where leaf veins stay dark green while the tissue between them turns yellow, is almost always a nutrient lockout, not a nutrient shortage. The pot may have plenty of iron, magnesium, or manganese, but something is blocking the roots from taking it up.
Three lockout triggers to check in this order:
- pH drift. Above 7.0, iron and manganese lock out. Below 5.5, calcium and magnesium lock out.
- Salt buildup. White crusty deposits on the soil surface or pot rim signal fertilizer salt accumulation. High salts damage root hairs and block nutrient uptake, even when nutrients are present.
- Waterlogged roots. Anaerobic soil kills the fine feeder roots that absorb micronutrients. Symptoms mimic deficiency but the real problem is drainage.
The first move is a flush. Water the pot slowly with plain water at three to four times the pot's volume. This resets salt levels and washes out excess mineral buildup.
Wait a week, then retest pH and reassess. If the yellowing continues after a flush and pH correction, only then supplement with the specific nutrient the leaf pattern points to.
Yellow Leaves With Spots, Halos, or Brown Patches: Disease Signals
If the yellow comes with spots, rings, or brown dead tissue, you're looking at disease, not deficiency. Container plants aren't immune. Wet foliage, poor airflow between crowded pots, and reused potting mix all raise fungal pressure fast.
Two categories matter here: foliar fungal diseases that spread from leaf to leaf, and soilborne wilts that attack from the roots up. The treatment paths are completely different, so identify before you spray.
Early Blight, Septoria, and Fungal Pressure in Pots
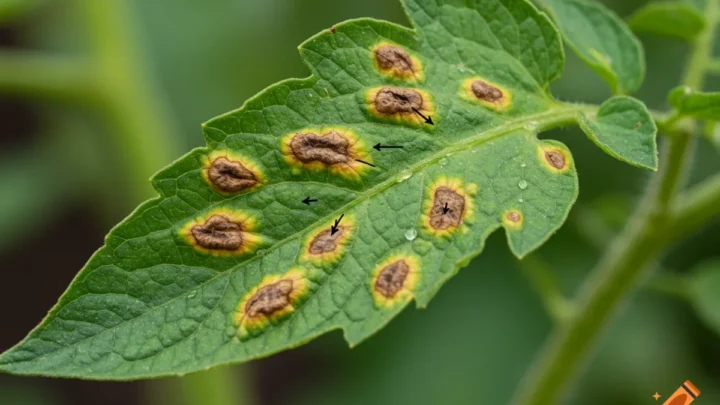
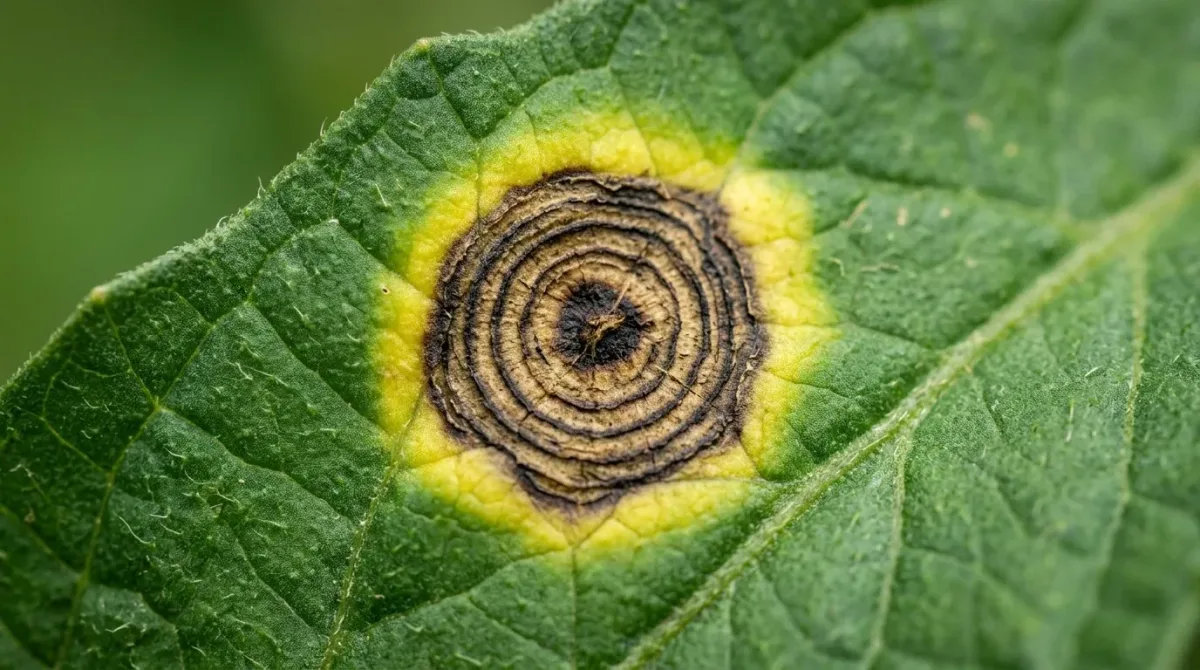
Early blight (Alternaria solani) shows as dark brown spots with concentric rings, ringed by a yellow halo, usually starting on lower leaves. Septoria leaf spot looks similar but the spots are smaller, grayish centers with dark borders. Both spread upward through the plant when leaves stay wet.
Container-specific control steps:
- Remove affected leaves immediately and bin them (do not compost).
- Water at the soil surface, never overhead.
- Mulch the pot surface to block soil splash.
- Space pots so leaves don't touch neighbors.
- Apply a copper-based fungicide labeled for tomatoes if spread continues, following the EPA-registered label rate.
Fusarium and Verticillium Wilt in Container Soil
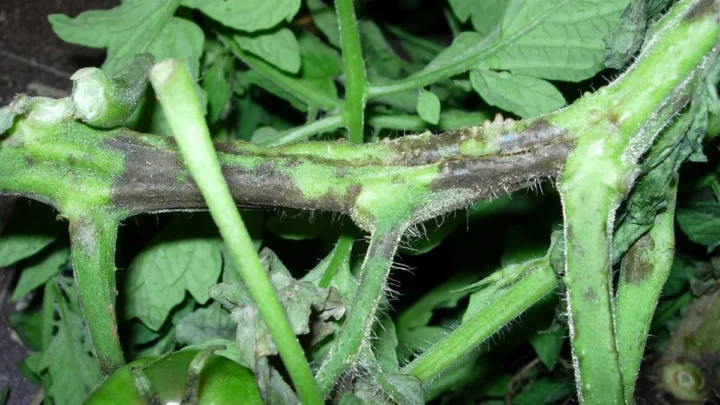
Fusarium and Verticillium wilts cause yellowing that's often one-sided on the plant, sometimes a single branch first. Leaves wilt during the day even in moist soil. Slicing a lower stem reveals brown streaking inside the vascular tissue.
These soilborne fungi persist for years in used potting mix. There's no cure once a plant is infected. Pull the plant, discard the soil, and sanitize the pot with a 10% bleach solution before replanting.
Look for tomato varieties tagged with the letters V and F on the label. Those are bred with resistance and are the best insurance for container growers reusing pots.
Yellow Leaves With Curling or Stippling: Pest Damage to Rule Out
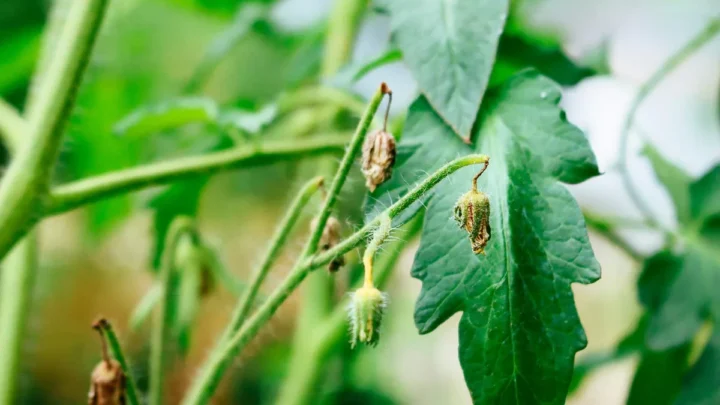
If the yellow shows up as tiny speckles, silvery stippling, or comes alongside curled and cupping leaves, check for pests before anything else. Container tomatoes on hot, sheltered patios are prime targets for spider mites, whiteflies, and aphids.
Flip a suspect leaf and look at the underside with a hand lens. Spider mites leave fine webbing and thousands of pinpoint yellow specks. Whiteflies flush up in a small cloud when you tap the plant.
Aphids cluster on tender new growth and shoot tips.
Quick control for container plants:
- Blast pests off with a strong spray of water every 2 to 3 days.
- Apply insecticidal soap or neem oil in the evening, coating leaf undersides.
- Introduce ladybugs or lacewings in enclosed patios or greenhouses.
- Isolate infested pots from healthy ones until controlled.
If the yellowing is uniform with severe upward leaf curl and stunted growth, suspect a virus like tomato yellow leaf curl virus (TYLCV). Viruses have no cure. Remove and destroy the plant to protect nearby tomatoes.
The Container-Specific Culprits Most Growers Miss
Even with correct watering, feeding, and pest control, container tomatoes can yellow from problems that never affect in-ground plants. These are the ones that trip up experienced gardeners the first time they switch to pots.
Pot Size, Root Binding, and Heat-Stressed Roots
Undersized pots are the single most common cause of unexplained yellowing in container tomatoes. Once roots hit the pot wall, they circle, compact, and lose function. Nutrient and water uptake drops even when the soil is fed and watered correctly.
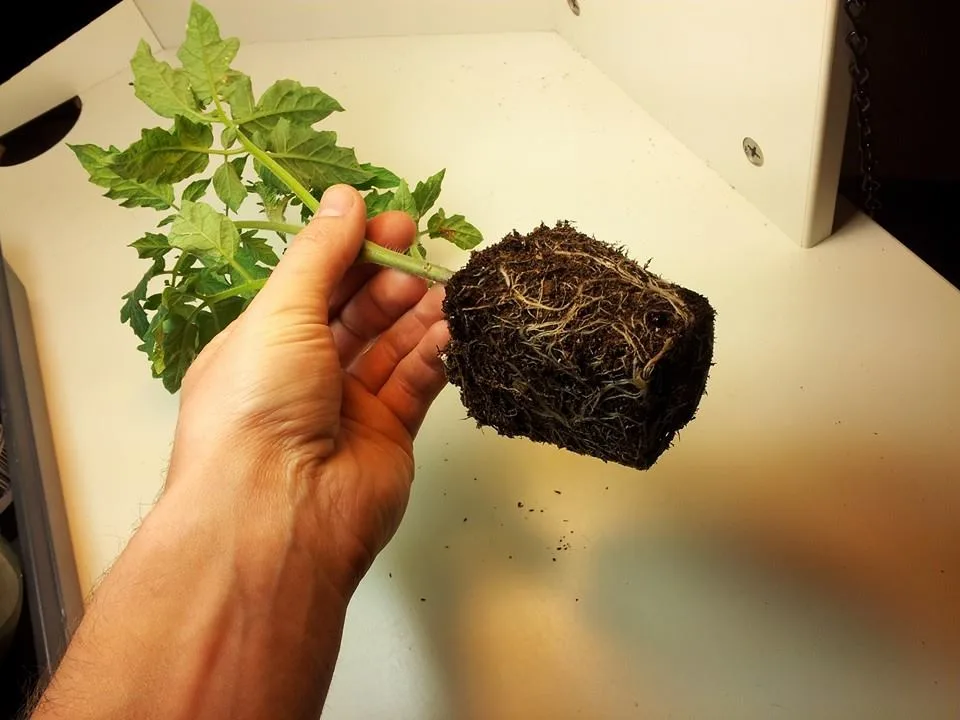
Slip the plant out and check the root ball. If you see a dense mat of white roots circling the outside, it's root bound. Options: shift to a larger pot (at least double the volume), or root-prune and refresh the soil.
Also move dark plastic pots out of direct afternoon sun. Wrap them in a light-colored cloth or double-pot inside a larger container to cut root-zone heat.
Salt Buildup and Fertilizer Burn From Frequent Feeding
Frequent feeding in a small pot leaves salts behind. That white crust on the soil surface and pot rim is the residue. High salt levels burn root tips and cause marginal leaf yellowing that looks like drought stress.
Flush the pot every 4 to 6 weeks during heavy feeding season. Run plain water through the pot at three to four times its volume. That resets the salt profile and often revives a stalled plant within a week.
Compacted or Hydrophobic Potting Mix
Old potting mix loses structure. Peat compacts, coco coir breaks down, and the surface can turn hydrophobic, meaning water runs off or straight through the pot without wetting the root zone. Roots dry out even when you water daily.
The tell: water pools on top or shoots out the drainage holes seconds after pouring. Fix by scratching the surface with a fork, watering slowly with a wetting agent (a drop of dish soap in a gallon works in a pinch), and top-dressing with fresh compost. Replace the mix entirely each growing season for best results.
Your Decision Tree: Match the Symptom to the Fix
Run through this in order. Stop at the first match.
| Symptom | Likely Cause | First Fix |
|---|---|---|
| Bottom leaves yellow, soil wet | Overwatering / root rot | Stop watering, improve drainage, check roots |
| Bottom leaves uniformly pale, soil normal | Nitrogen deficiency | Feed balanced tomato fertilizer |
| New top leaves yellow, green veins | Iron deficiency (high pH) | Test pH, flush, apply chelated iron |
| Mid-plant yellowing between veins | Magnesium deficiency | Epsom salt drench, 1 tbsp per gallon |
| Yellow with brown ringed spots | Early blight or Septoria | Remove leaves, mulch, copper spray |
| One-sided yellowing, wilting | Fusarium / Verticillium wilt | Pull plant, discard soil, sanitize pot |
| Yellow stippling, webbing underside | Spider mites | Water blast, insecticidal soap |
| White crust on soil, marginal yellowing | Salt buildup | Flush pot with 3–4x water volume |
| Roots circling, plant stalled | Root bound | Repot to larger container or root-prune |
Step-by-Step Recovery Plan for a Yellowing Container Tomato
If the plant is still upright with green growth somewhere, it's recoverable. Work through these steps in order over 7 to 14 days.
- Diagnose first. Use the leaf pattern and the decision tree above. Don't fertilize a plant that's drowning.
- Check the roots. Slip the plant out. Healthy roots are white with fine tips. Brown, mushy, or circling roots need action.
- Flush the pot. Run plain water through at 3 to 4 times pot volume to clear salts and reset pH.
- Correct pH. Test with a meter. If above 7.0, switch to rainwater. If below 5.5, top-dress with a pinch of garden lime.
- Feed appropriately. Match the fix to the deficiency. Don't shotgun multiple nutrients at once.
- Prune damaged leaves. Remove fully yellowed or spotted leaves to redirect energy and improve airflow.
- Stabilize watering. Water when the top inch of soil is dry. Bottom-water if the surface has gone hydrophobic.
- Wait and watch. New growth should come back green within 10 to 14 days. If it doesn't, revisit the diagnosis.
Mistakes That Make Yellowing Worse (Not Better)
Panic feeding is the top offender. Piling on fertilizer to fix yellow leaves usually adds to salt buildup and burns roots further. Watering a soaked pot on a schedule instead of by soil feel drowns the very roots you're trying to save.
Other common missteps:
- Spraying fungicide on a nutrient problem.
- Repotting an already stressed plant into oversized soil that stays wet.
- Using tap water on iron-deficient plants without checking pH.
- Removing every yellow leaf at once, which shocks the plant.
Prevention: Setting Up Containers So Yellowing Doesn't Come Back
Start each season with fresh, high-quality potting mix in a pot sized to the variety. Use light-colored or fabric pots to keep root zones cooler. Mulch the surface with straw or wood chips to slow evaporation.
Feed lightly and often instead of heavily and rarely. A weak liquid feed every 10 to 14 days beats monthly heavy doses. Flush the pot every 4 to 6 weeks to keep salts in check.
Container Tomato Yellowing FAQs
Should I remove yellow tomato leaves?
Yes, remove fully yellow or spotted leaves to improve airflow and redirect energy. Don't strip more than a third of the plant at once. Always use clean shears to avoid spreading disease.
Does Epsom salt cure yellow leaves?
Only when magnesium is the actual deficiency, shown by interveinal yellowing on mid-plant leaves. It won't fix nitrogen, iron, or watering problems, and overuse can block calcium.
Can a yellowed tomato plant recover?
Usually yes, if the growing tip is still green and roots are firm. Correct the underlying cause and expect green new growth within two weeks.
Why do only the bottom leaves turn yellow?
Bottom leaves yellow first because the plant moves mobile nutrients like nitrogen upward to feed new growth, or because water is pooling near the base.
Quick Reference: Symptom-to-Cause Cheat Sheet
- Bottom yellow, wet soil → overwatering.
- Bottom uniform pale → nitrogen.
- Top yellow, green veins → iron, check pH.
- Mid interveinal → magnesium.
- Ringed brown spots → early blight.
- Stippling and webbing → spider mites.
- White crust on soil → salt buildup, flush pot.

Similar Posts