Why Your Okra Pods Stopped Growing and Dried Up
“Why did my okra pods stop growing and dry up?” is the summer question that stops gardeners cold, usually right when the crop should be hitting its stride. The short answer: okra stalls for a handful of specific reasons, and the fix depends entirely on which one you’re seeing. Most cases trace back to heat, water, pollination trouble, hidden pests, or pods left on the plant too long.
Okra thrives between 75 and 90°F, and pollination breaks down once daytime highs push past 95°F with nights above 75°F. As of 2026, guidance from Clemson Cooperative Extension and Texas A&M AgriLife still points to those thresholds as the primary cause of pod abortion in home gardens. Before we walk through fixes, let’s get you to the right diagnosis fast.
Quick Answer
Okra pods stop growing and dry up when heat blocks pollination. Above 95°F daytime, flowers drop before setting fruit. Inconsistent watering causes young pods to shrivel on the vine.
Nutrient shortages and pest damage produce similar drying symptoms. Leaving oversized pods on the plant also halts new production entirely.
Why Your Okra Pods Stopped Growing and Dried Up: The Fast Diagnosis
Okra pods fail in a predictable pattern once you know what to look for. In our research across university extension bulletins, most home-garden pod loss falls into five buckets: heat and pollination failure, uneven soil moisture, nutrient imbalance, insect feeding, and disease.
Here’s the fast-diagnosis grid we use before touching a single fix.
| Symptom you see | Most likely cause |
|---|---|
| Flowers drop before pods form | Heat stress above 95°F |
| Young pods shrivel at the tip | Water stress or calcium/boron shortage |
| Pods twist or develop wart-like bumps | Stink bug feeding |
| All leaves, few flowers | Nitrogen overload |
| Plant stops making new pods | Overripe pods left on stems |
Match the symptom, then jump to the section below that fits.
The First Fork: Did Pods Form and Then Shrivel, or Never Form at All?
The answer decides everything else. Pods that never form point to heat, pollination, thrips, or a boron shortage. Pods that form and then dry up point to water swings, nutrient deficiency, root damage, or disease.
Walk out and look at the growing tips. Flowers opening with no pods behind them? That’s the pollination stage.
Pods forming and then shriveling to yellow or brown? That’s downstream stress.
Use this fork as a filter:
- No pods behind flowers, check heat, thrips, boron, and pollinator activity
- Pods form but dry up, check water, nutrients, roots, and disease
Once you know which side you’re on, the next sections narrow it further.
Heat Stress and Pollination Failure Above 95°F
Heat is the number one reason okra flowers drop without setting fruit. Above 95°F daytime and 75°F nighttime, pollen viability crashes and the flower aborts before the ovary can develop.

You’ll notice this most during a heat wave. Blooms open in the morning, close by noon, and lie on the ground the next day with nothing behind them. Even reliable self-pollinating varieties like Clemson Spineless struggle when the flower interior overheats.
What to do during a heat stretch:
- Deep-water the root zone in the evening to cool the soil
- Add 3 to 4 inches of straw or shredded leaf mulch
- Deploy 30 to 40 percent shade cloth over the row during afternoon peaks
- Skip nitrogen feeding until temperatures moderate
Recovery usually kicks in within 5 to 7 days after the heat breaks. If your climate runs a long stretch above 95°F, plan a second planting timed for cooler pollination weather. Research from the University of Georgia Extension shows a mid-summer second sowing often outproduces the heat-stressed first crop.
Water Stress: Drought, Overwatering, and Inconsistent Moisture
Water swings are the second biggest reason pods dry up mid-development. Okra runs a deep taproot and hates both drought and soggy feet.
Under drought, young pods stop expanding and shrivel from the tip down. Under waterlogging, roots suffocate, the plant wilts even when soil looks wet, and pods yellow and drop. The trickiest case is inconsistent watering, where a rain event follows a dry stretch and pods split, brown, or stall.
Aim for 1 to 1.5 inches of water per week, delivered in one or two deep soakings rather than daily sprinkles. Drip irrigation beats overhead watering because it keeps flowers dry and cuts disease pressure.
Quick water-stress checklist:
- Push a finger 2 inches into the soil. If it’s dry, water deeply
- Mulch heavily to buffer moisture swings
- Fix drainage before adding more water to a wilting plant
- Never let the plant swing between drought and flood during flowering
Consistency matters more than volume. A plant that gets a steady inch every week outproduces one that swings between drought and drench.
Soil Nutrient Problems That Starve Developing Pods
Nutrient issues rarely announce themselves clearly. They mimic heat, water, and pest damage all at once, which is why a soil test through your local land-grant USDA-supported extension office is worth the twenty dollars.
Nitrogen Overload (All Leaves, No Pods)
Too much nitrogen is the most common feeding mistake. The plant grows dark green, tall, and lush, but produces few flowers and even fewer pods. If your okra looks like a small tree with almost no blooms, back off nitrogen and side-dress with a phosphorus-heavy fertilizer instead.
A 5-10-10 ratio usually resets flowering within 10 to 14 days.
Phosphorus, Potassium, Calcium, and Boron Deficiencies
Low phosphorus limits flower production. Low potassium weakens pod walls and causes tip drying. Calcium shortage triggers blossom-end shrivel, similar to blossom-end rot in tomatoes.
Boron deficiency shows up as hollow, deformed, or aborted pods even when moisture and heat look fine.
A quick reference:
| Nutrient | What you’ll see | Fast fix |
|---|---|---|
| Nitrogen (excess) | All leaves, no pods | Stop N, side-dress phosphorus |
| Phosphorus (low) | Few flowers | Bone meal or 5-10-10 |
| Potassium (low) | Pods dry at tip | Wood ash or potassium sulfate |
| Calcium (low) | Blossom-end shrivel | Gypsum, keep water steady |
| Boron (low) | Hollow, deformed pods | Foliar boron spray, tiny dose |
Boron is powerful in small amounts and toxic in slightly larger ones. Follow the label rate exactly and never eyeball it.
Pest Damage That Mimics Drought and Nutrient Issues
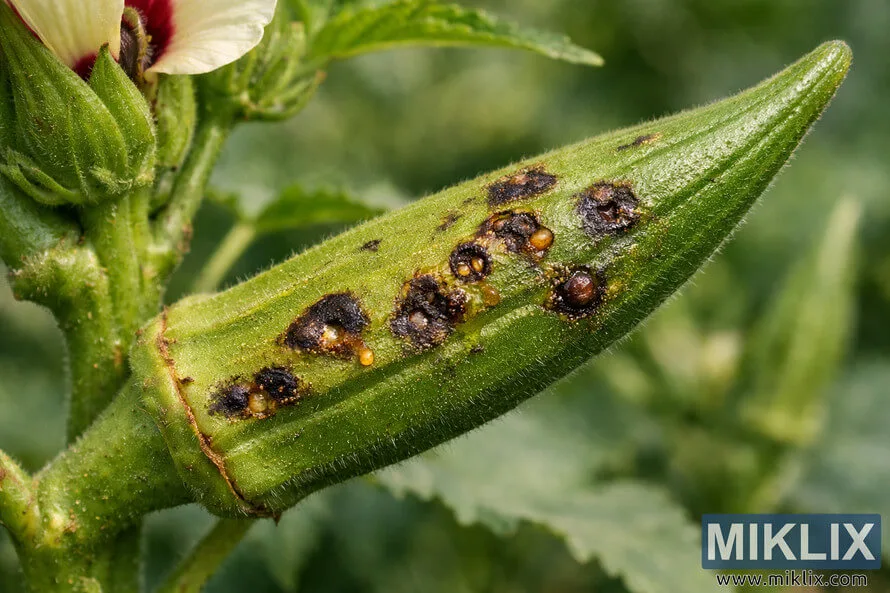
Insects can dry up pods just as fast as heat can, and their damage often gets misread as a watering problem. In our research across regional extension bulletins, thrips, aphids, stink bugs, and corn earworm cause most home-garden pod failures that look like abiotic stress.
Flower Thrips and Aphids on Buds
Flower thrips are tiny, slender, and hide inside unopened buds. They feed on developing pollen and shrivel the flower before it opens, so you rarely see a bloom fall. You just find missing pods where flowers should have set.
To confirm, tap a closed bud over a sheet of white paper. Thrips look like moving pepper flakes. Spinosad and insecticidal soap knock them down safely, applied at dusk to protect pollinators.
Aphids cluster on new growth and coat pods with sticky honeydew that invites sooty mold.
Stink Bugs and Corn Earworm on Pods
Stink bugs pierce young pods and inject enzymes that cause twisted shapes, warty bumps, and premature drying. Damaged pods often curve into a J-shape or develop hollow, brown-spotted tips. Hand-pick adults early in the morning when they move slowly.
Corn earworm bores directly into pods and eats seeds from the inside out. Look for a small entry hole and frass at the tip. Bt (Bacillus thuringiensis) sprays applied to young pods stop new larvae without harming beneficial insects.
Disease-Related Pod Failure: Fusarium, Verticillium, and Southern Blight
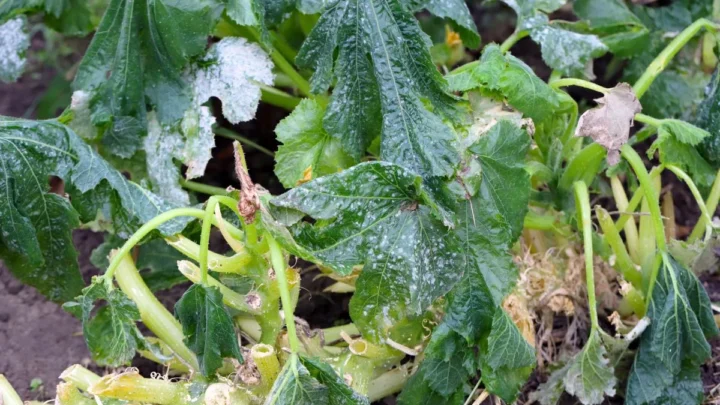
Disease is the least common cause but the most serious when it hits. Fusarium and verticillium wilt block the plant’s water-carrying vessels, so pods dry up even when soil moisture looks fine. Leaves usually yellow from the bottom up before pods start failing.
Southern blight shows a white fungal mat at the soil line and rapid plant collapse. Once a plant is infected, pull it, bag it, and remove it from the garden. Do not compost diseased okra plants.
Prevention beats treatment every time:
- Rotate okra out of the same bed for 3 years
- Water at the base, never overhead
- Solarize soil in mid-summer if wilt keeps returning
- Choose resistant varieties like Cajun Delight when disease has been a problem
Overripe Pods Left on the Plant (The Hidden Production Killer)
This is the cause most home gardeners miss. Once a single pod matures fully and starts forming seeds, the plant reads that as a signal to shut down new flowering. Production stalls almost overnight.
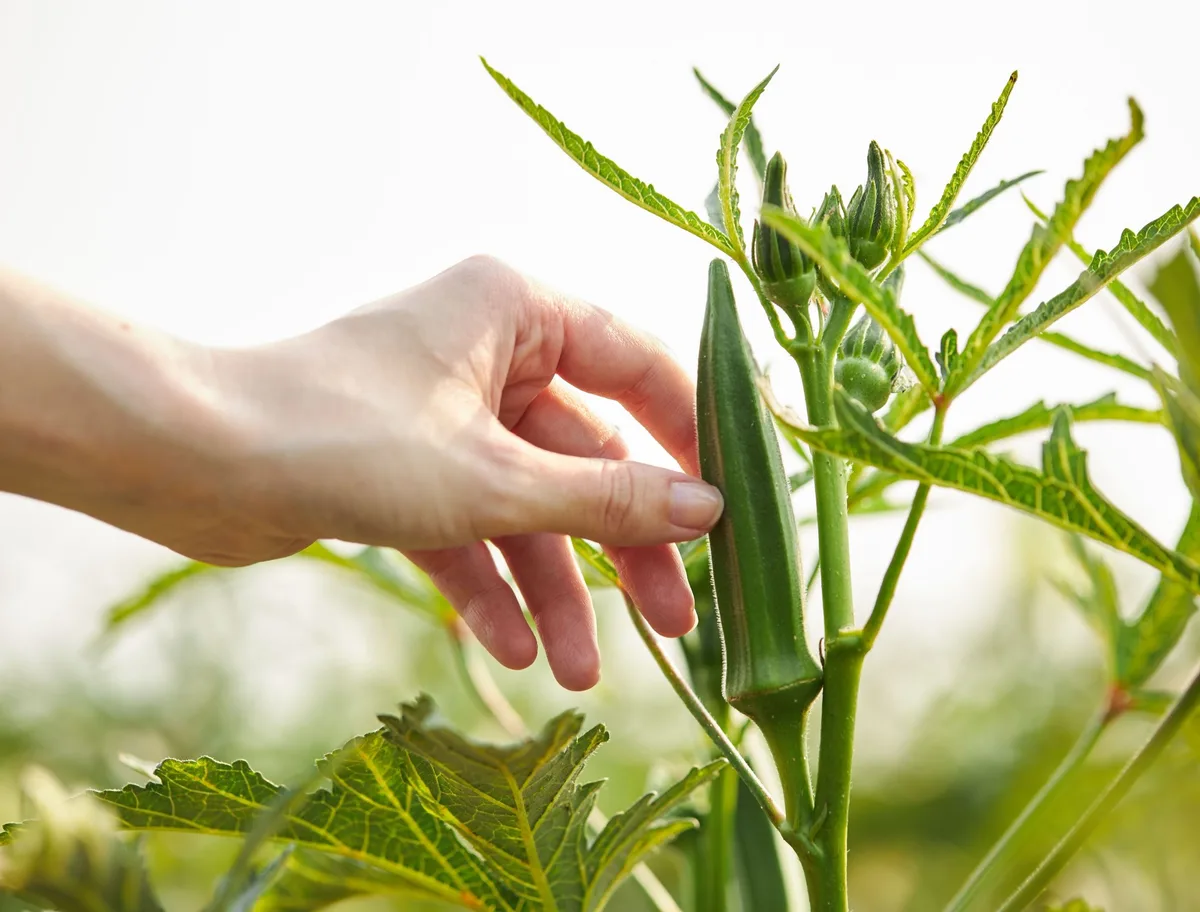
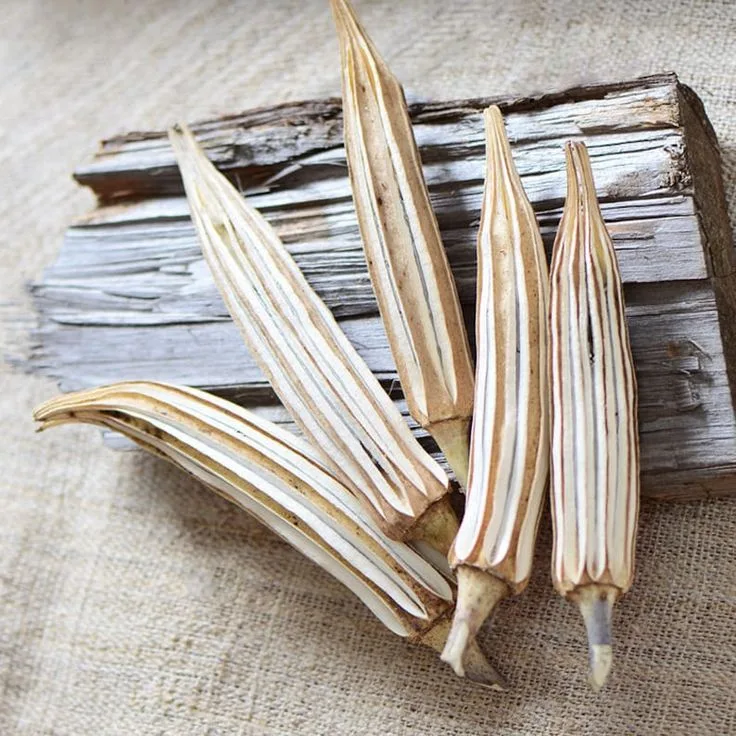
Harvest pods at 2 to 4 inches, every 2 to 3 days during the peak season. If a pod slips past that window and turns woody or ridged, cut it off anyway and toss it. The plant needs to see zero mature seed pods to keep producing new flowers.
Aggregate reports from small-market growers show weekly yields dropping by half within 10 days once overripe pods are ignored. Reset the plant by clipping every oversized pod off. New flowering typically resumes within a week.
Simple harvest rule: if in doubt, pick it. A slightly small pod is tender and edible. A slightly big pod is tough and shuts down the crop.
Soil Conditions and Root Problems That Stunt Pods
Root health drives everything above the soil line. When roots are compromised, pods dry up because the plant can’t move enough water and nutrients up the stem.
Compacted or Poorly Draining Soil
Okra taproots need loose soil 12 to 18 inches deep. Compacted clay or hardpan stops the taproot cold, and the plant becomes shallow-rooted and drought-prone. Pods on shallow-rooted okra shrivel during the first hot afternoon.
Fix this before the next season by working in 3 to 4 inches of finished compost, breaking up subsoil with a broadfork, and switching to raised beds where drainage is poor. Mid-season, all you can do is mulch heavily and water more often.
Root-Knot Nematodes and Taproot Damage
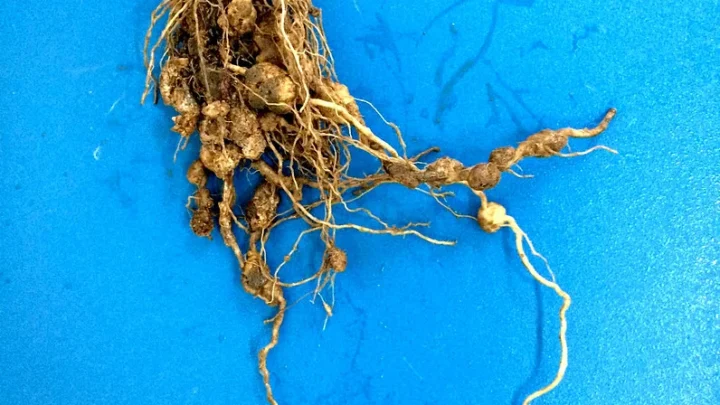
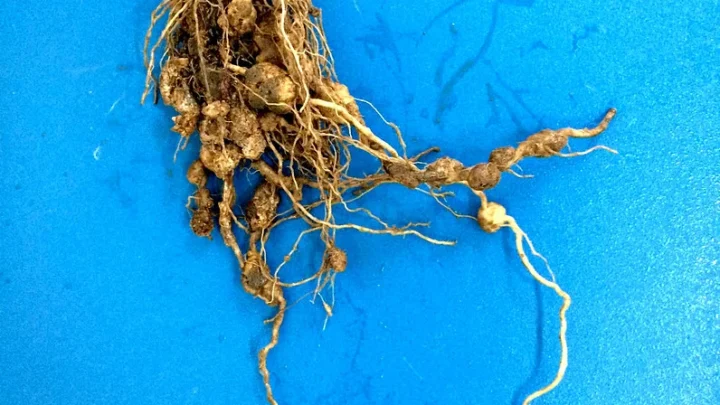
Root-knot nematodes cause knotty galls along the taproot that block water flow. Above ground, the plant looks stunted and yellowed and drops pods without warning. Pull a suspect plant and check the roots for lumpy swellings.
Solarize the bed in summer, plant a cover crop of French marigold or elbon rye, and rotate okra to a fresh bed for 2 to 3 years. Transplant shock also damages taproots, so direct-sow okra whenever possible.
Climate and Timing Factors Working Against You
Sometimes the plant is fine and the calendar is the problem. Okra needs long, warm days to flower well, and production slows once day length drops below 13 hours in late summer.
If pods started strong and are now shrinking as September arrives, the plant is responding to shortening days and cooler nights. Once nighttime temperatures fall below 60°F, flower drop and pod shrivel return for the opposite reason as heat stress. Pollen simply can’t develop in cold flowers.
In USDA Zones 5 and 6, first frost cuts the season short before okra hits full stride. Start seeds indoors 4 weeks before the last frost, transplant carefully to protect the taproot, and use black plastic mulch to warm the soil. In Zones 8 through 11, plan a summer cutback (ratoon) to reset the plant for a strong fall flush.
Your Okra Recovery Workflow: What to Do This Week
Start with a 10-minute plant inspection before touching any inputs. Look at flowers, young pods, leaf color, and soil moisture in that order.
Then work through this sequence:
- Pull every overripe pod off the plant, no exceptions
- Deep-water the root zone with 1 inch of water
- Mulch 3 to 4 inches deep with straw or shredded leaves
- Skip nitrogen for 10 days, side-dress with 5-10-10 instead
- Scout buds for thrips and pods for stink bug damage at dawn
- Deploy shade cloth if the next 5-day forecast tops 95°F
New pods should appear within 7 to 10 days if the plant still has healthy roots and leaves. If nothing changes in 2 weeks, run a soil test and check for root galling.
Mistakes That Keep Okra from Bouncing Back
Most stalled okra plants stay stalled because gardeners double down on the wrong fix. Piling on nitrogen when the real issue is heat just grows more leaves the plant can’t cool.
The recurring mistakes we see in aggregate grower reports:
- Watering daily in small amounts instead of deeply once or twice a week
- Leaving one big pod on the plant while harvesting the smaller ones
- Fertilizing with lawn food (too much nitrogen, no phosphorus balance)
- Transplanting older seedlings and snapping the taproot
- Spraying broad-spectrum insecticide that kills the pollinators too
- Assuming yellowing leaves mean water shortage when roots are drowning
If a fix isn’t working within 2 weeks, stop, reassess the symptom, and move to the next branch of the decision tree.
Expert Tips to Get 12 Weeks of Steady Pod Production
Consistent harvest for 12 weeks comes down to three habits. Pick every 2 to 3 days, water on a schedule, and feed lightly but often.
Grower tips worth stealing:
- Wear long sleeves and gloves during harvest because okra trichomes irritate skin
- Use sharp pruners, not fingers, to avoid tearing the stem
- Cut the plant back by one-third at week 8 for a fresh fall flush (ratooning)
- Interplant with basil or peppers to buffer heat and confuse pests
- Choose short-podded varieties like Baby Bubba for container growing
- Save seed from your best-performing plants for climate-adapted stock
Cutting a tired plant back to 18 inches in mid-August pushes new lateral branches that carry pods deep into fall.
When to Cut Your Losses and Start a Fall Planting
Not every stalled plant is worth saving. If leaves are wilting from vascular disease, roots show heavy nematode galling, or pods keep failing after 3 weeks of correct care, pull the plant and reset.
Fall planting works well in USDA Zones 7 through 11. Direct-sow fresh seed 85 to 95 days before your first expected frost. Warm soil (65°F minimum) germinates okra in 4 to 7 days, and cooler September nights often produce cleaner pollination than August did.
In Zones 5 and 6, a fall replant rarely finishes before frost. Focus instead on soil rebuilding, add compost, plant a cover crop, and start earlier next spring with soil-warming plastic.
Frequently Asked Questions
Why are my okra pods small and drying up on the plant?
Small, drying pods usually mean water stress, low potassium, or heat spikes above 95°F. Check soil moisture 2 inches down, add 3 inches of mulch, and water deeply once or twice a week. If the tips are drying first, potassium deficiency is likely.
A wood ash or potassium sulfate side-dressing fixes it within 10 days.
Can I still eat okra pods that started drying out?
Only if they’re still tender to the touch and easily snapped at the tip. Dried, woody, or ridged pods are too fibrous to eat, but the mature seeds inside can be saved for next year’s planting. Toss unusable pods to keep the plant producing new flowers.
How often should I water okra to prevent pod loss?
Water deeply once or twice a week, delivering 1 to 1.5 inches total. Consistency matters more than frequency because okra hates swings between drought and drench. Mulching heavily buffers the soil and cuts water loss during summer heat waves.
Will my okra come back if I cut it back?
Yes, healthy okra responds well to ratoon pruning. Cut the main stem back to 18 to 24 inches, feed with balanced fertilizer, and water deeply. New lateral branches typically flower within 3 weeks and produce pods for another 6 to 8 weeks in warm climates.
Does removing dried pods help the plant produce more?
Absolutely, and it’s the single fastest fix for stalled production. The plant stops flowering when mature seed pods signal completion. Cutting off every oversized or dried pod resets that hormonal cue, and new flowers usually appear within 5 to 7 days.
Your Decision Guide: Matching the Symptom to the Fix
Use this table as the final call. Match the visible symptom, apply the first fix, and give the plant 7 to 10 days to respond.
| Symptom | Primary Cause | First Fix |
|---|---|---|
| Flowers fall, no pods | Heat above 95°F | Shade cloth, deep evening watering |
| Pods shrivel from tip | Water swings or low potassium | Deep weekly soak, wood ash |
| Twisted, warty pods | Stink bugs | Hand-pick at dawn, spinosad |
| Missing pods, no fallen flowers | Flower thrips | Bud tap test, spinosad at dusk |
| All leaves, no blooms | Nitrogen overload | Stop N, side-dress 5-10-10 |
| Production stops abruptly | Overripe pods on plant | Clip every oversized pod |
| Wilting despite wet soil | Root disease or nematodes | Pull plant, rotate bed |
Work the fork, apply one fix at a time, and the plant tells you which cause was right.

Similar Posts