Why Isn’t My Potato Plant Producing Tubers? 7 Fixes
“Why isn’t my potato plant producing tubers?” is the question most home growers ask when they lift a plant expecting a harvest. They find nothing but pale stringy roots instead. You watered on time.
The foliage looks healthy. Yet the stolons underground never swelled into potatoes.
The good news is that tuberisation follows predictable rules. Research from USDA and university extension programs points to a narrow ideal window. Soil at 15 to 20°C, balanced nutrition, and steady moisture during the 30 to 60 day initiation phase after emergence.
As of 2026, that underlying plant biology hasn’t shifted. Once you know which condition failed, the fix is usually straightforward.
Quick Answer
A potato plant fails to produce tubers when soil temperature, nutrition, water, light, or variety choice pushes the crop out of its narrow tuberisation window. The most common culprit is excess nitrogen driving leafy growth. Heat above 29°C also halts tuber formation.
Wrong variety or a short season can play a role too. Fix the condition that matches your symptoms.
Why Your Potato Plant Has Green Tops but No Tubers Underground
Big healthy foliage with nothing below is the single most common complaint in home potato growing. It looks like the plant is thriving. Under the soil, though, the stolons stayed thin and never bulked up.
That mismatch happens because leaf growth and tuber growth pull energy in opposite directions. When the top of the plant gets too much nitrogen, warmth, or water, it keeps stretching upward. Starch never gets stored below.
Aggregate reports from extension services show this pattern accounts for most “no tuber” complaints each season.
Once you spot the imbalance, the diagnostic path narrows quickly. You’re not hunting for one obscure disease. You’re checking which of six well known conditions tipped the plant off course.
The Fast Diagnosis: 6 Reasons Potatoes Fail to Set Tubers
Before troubleshooting in depth, run through the shortlist. Nine out of ten failed potato crops trace back to one of these:
- Soil temperature above 29°C at tuber depth
- Excess nitrogen from fresh manure, compost, or lawn feed drift
- Wrong variety for the local day length or climate
- Poor hilling, so stolons had nowhere to bury and swell
- Container too small, or ground soil compacted and airless
- Late blight, beetles, or wireworm killing tops before bulking
If two conditions apply, address the biggest first. Most gardens have a single dominant cause rather than a stack of unrelated ones.
How Tuber Formation Actually Works (Stolons, Signals, and Timing)
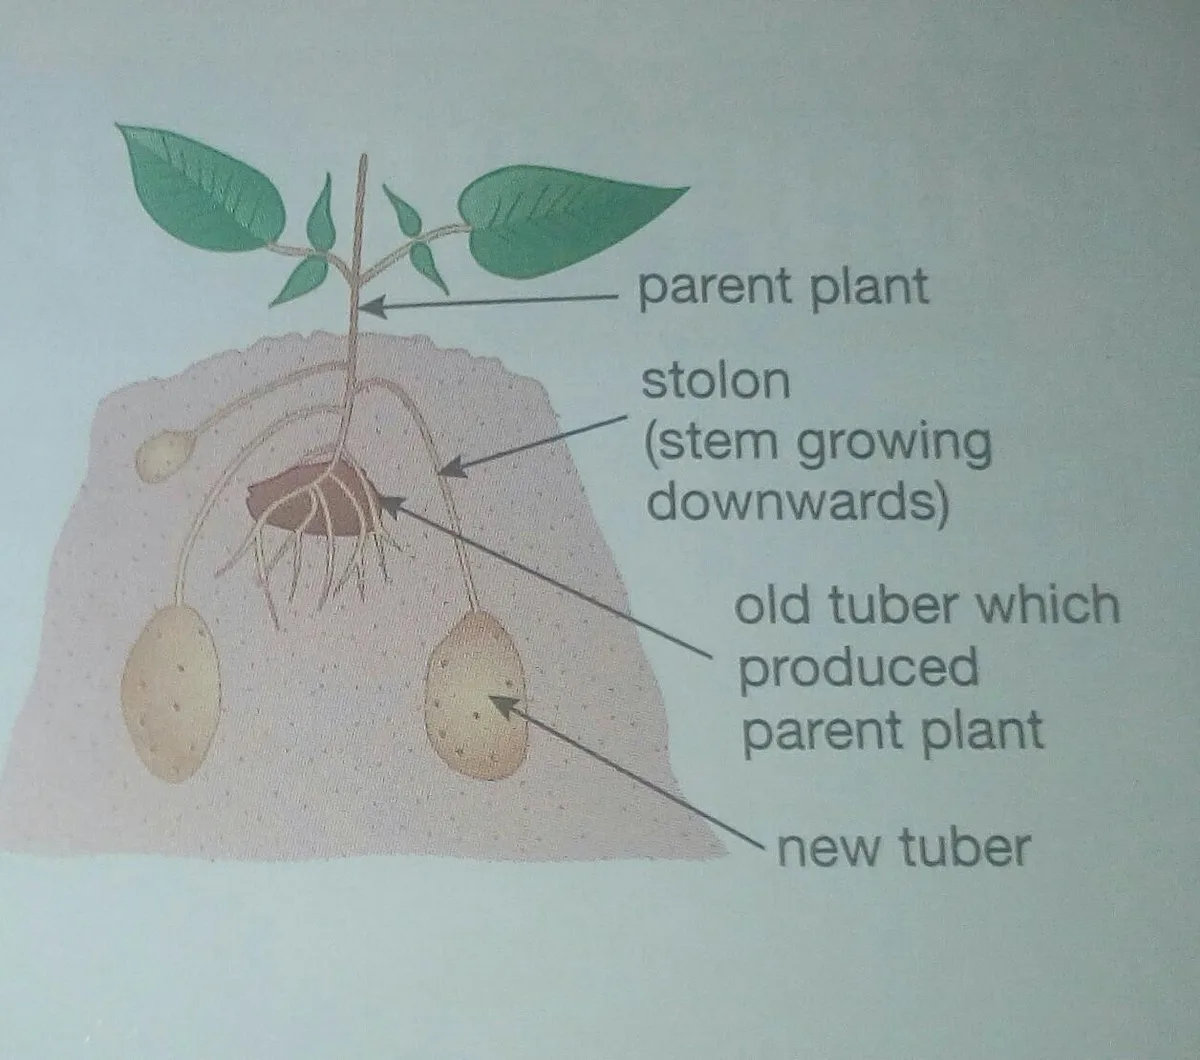
Tubers are not roots. They’re swollen tips of underground stems called stolons. When conditions signal the plant to store starch, those stolon tips stop elongating and start expanding into potatoes.
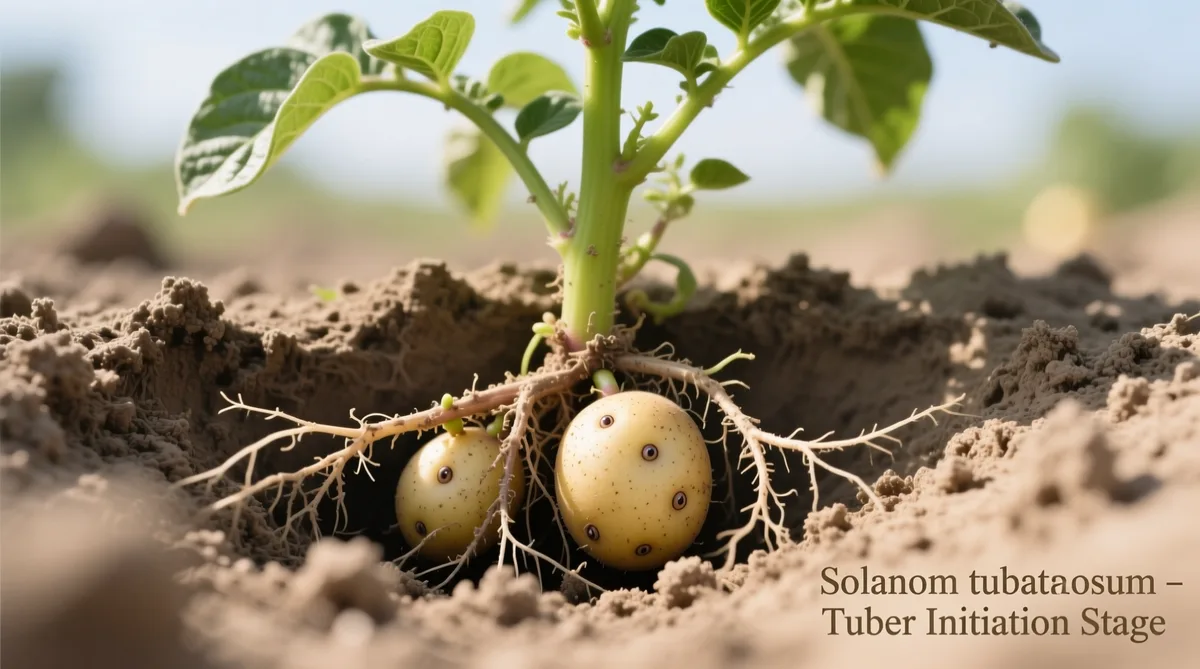
Three signals trigger that switch. Shortening day length in indeterminate varieties, cooler soil in the 15 to 20°C sweet spot, and lower nitrogen availability. Hormones called gibberellins drop off, and starch storage kicks in.
Guidance from the Oregon State University Extension Service puts tuber initiation at roughly 30 to 60 days after emergence for most varieties.
Once tubers begin bulking, they add mass fast if water and potassium keep pace. Miss that window, and the plant just keeps building leaves.
Condition 1: When Soil Temperature Blocks Tuberisation
When soil temperature climbs past 29°C at tuber depth, the plant stops setting new tubers. Existing ones can even reabsorb starch back into the plant. This is the number one cause of failure in hot summer regions and late spring plantings.
The ideal soil temperature for tuberisation sits between 15 and 20°C. Above 25°C, initiation slows. Above 29°C, it usually stops.
| Soil temperature at tuber depth | What happens to the crop |
|---|---|
| 15 to 20°C | Ideal tuber initiation and steady bulking |
| 21 to 25°C | Slower tuberisation, smaller yield per plant |
| 26 to 29°C | Very poor tuber set, misshapen potatoes |
| Above 29°C | Tuberisation halts, existing tubers may shrink |
Check the reading yourself. Push a soil thermometer 10 to 15 cm down at mid afternoon on a hot day. If your reading sits in the red zone, mulch heavily with 10 cm of straw.
Water in the evening to draw heat out of the bed. Plant earlier next season so tubers set before peak summer heat.
Condition 2: Nitrogen Overload and Why Feeding Backfires
Too much nitrogen tells the plant to keep making leaves instead of storing starch. It’s the reason so many first-time growers see gorgeous tops and empty soil below.
Common sources of nitrogen overload:
- Fresh chicken or horse manure worked in at planting
- Lawn fertiliser drift from a nearby lawn or hedge feed
- General purpose plant food heavy in the first NPK number
- Rich compost piled on right before planting
Potatoes want a low nitrogen, higher potassium diet once flowering approaches. Aim for an NPK ratio closer to 5-10-10 or 3-5-8 through the season. Apply nitrogen early during leaf building, then stop.
If you’ve already overfed, cut off further nitrogen at once. Water deeply to leach some through the soil profile. Add sulfate of potash at label rates to push the plant toward tuber storage.
A full recovery is unlikely, but a partial rescue is realistic if flowering has just begun.
Condition 3: Variety Choice and Day Length Traps
Not every potato variety fruits under every set of conditions. Determinate varieties produce a single layer of tubers close to the seed piece. Indeterminate varieties stack tubers up the buried stem as you hill.
Pick the wrong type for your setup, and even a perfect season underperforms.
Day length is the second half of the trap. Some varieties tuberise best under short days (below 12 hours). Others need long days (over 14 hours), and a few are day neutral.
Grow a short-day type in a long-day region, and tuberisation may never trigger.
Quick pairings that tend to work:
- Cool short summers (UK, Pacific Northwest): Charlotte, Rocket, Maris Piper
- Hot regions with autumn planting: Kennebec, Yukon Gold
- Deep hilling or grow bags: indeterminate types like Russet Burbank, King Edward
- Shallow beds or small containers: determinate types like Red Norland
Check the seed potato label for maturity class (first early, second early, or maincrop). Match it to your frost-free window before you buy.
Condition 4: Water, Light, and Hilling Depth
Inconsistent water is a silent tuber killer. Potatoes want around 2.5 cm of water per week during bulking. Swing from bone dry to soaked and you get hollow heart, cracks, or tubers that simply stall.
Light matters at the top of the plant. Fewer than 6 hours of direct sun cuts photosynthesis and starves the developing tubers below. Move containers into full sun if a fence or tree is shading the crop.
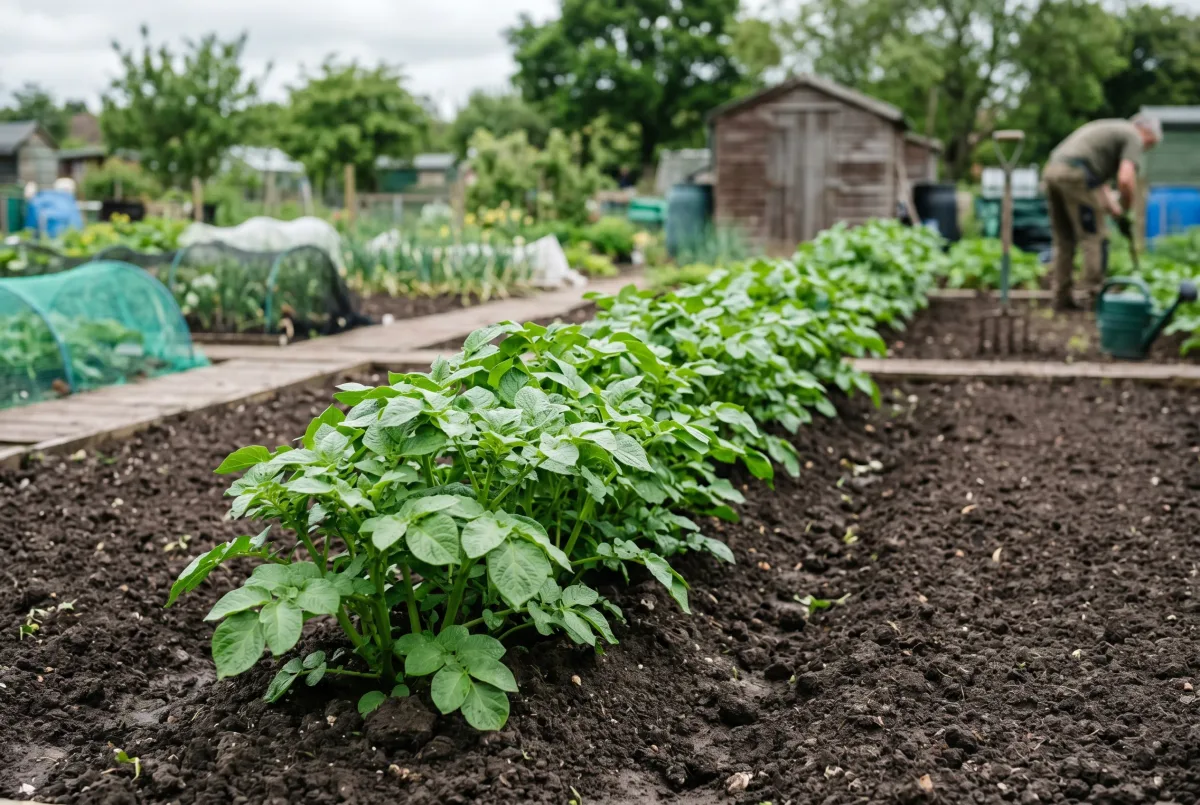
Hilling is where many gardens fall short. Draw soil up around the stems in stages, starting when foliage hits 15 to 20 cm high. Add another 10 to 15 cm at each hilling, two or three times through the season.
Why it works:
- New tubers form above the seed piece, along the buried stem
- Buried stem length drives stolon count, more stolons means more potatoes
- Exposed tubers turn green and produce solanine
Condition 5: Container Size, Soil Compaction, and Root Space
Small containers set small crops. Aim for a minimum of 40 litres (10 gallons) per plant. A single seed potato in a 20 L bucket rarely produces more than a handful of golf-ball tubers.
Compaction is the ground-grown equivalent. Clay soils that set hard after rain restrict stolon expansion. Tubers grow misshapen, small, or stall entirely.
Dig in coarse compost, leaf mould, or aged bark to open the structure before you plant.
Airflow through the root zone matters as much as depth. Fabric grow bags tend to outperform hard plastic pots because they self-prune roots and let air move through the sides. Whatever container you use, check drainage holes.
Waterlogged soil rots stolons before they can even swell.
Condition 6: Pests, Blight, and Early Foliage Loss
Anything that kills the foliage before bulking finishes will shrink your crop. If the tops die at week five, tubers stop at marble size. It really is that simple.
The main threats to watch:
- Late blight (Phytophthora infestans) collapses foliage in humid weather
- Colorado potato beetle strips leaves fast if left unchecked
- Wireworm chews stolons and tubers underground
- Aphids spread viruses that stunt vigour season after season
Prevention beats treatment. Space plants for airflow, water at the base, and rotate away from tomatoes and peppers. For beetles, hand-pick early and check leaf undersides for orange egg clusters.
Wireworm damage often points to recently converted lawn. Skip that plot for potatoes for at least a season.
The Decision Tree: Match Your Symptoms to the Real Cause
Use the branches below to pinpoint your issue in a minute or two.
Lush green foliage, no tubers at all
Excess nitrogen is the top suspect. Check what went into the soil at planting. If the answer includes fresh manure, lawn feed drift, or a heavy compost dressing, that’s your cause.
Stop all nitrogen, add sulfate of potash, and wait to see if flowering starts.
Tiny marble-sized tubers that stopped growing
Heat stress or early foliage loss usually explains this. Check soil temperature 10 to 15 cm down. If it sat above 25°C for weeks, tuberisation stalled.
If the tops died back from blight or beetles, the plant ran out of energy before bulking.
Flowering but nothing developing below
Wrong variety, wrong day length, or shallow hilling. Flowering does not guarantee tubers are forming underneath. Dig gently at the base and look for stolon swellings.
If the stolons are thin and pale, hill higher next time and confirm your variety suits your latitude.
Yellowing tops far too early
Disease or drought are the two branches here. Look closely for blight lesions on leaves and stems. Check soil moisture at 15 cm depth.
Early yellowing with wet soil often means blight. Yellowing with dry soil means the crop ran out of water during bulking.
What to Do Next Based on Your Diagnosis
Once you’ve matched your symptoms to a cause, act inside the current season. Different problems have different windows for a fix.
- Nitrogen overload: cut all feed. Add sulfate of potash. Water to leach the topsoil.
- Heat stress: mulch 10 cm deep with straw. Water at dusk. Shade cloth over the bed at 30 percent.
- Wrong variety: mark the label. Note the season length. Order a matched variety for next year.
- Poor hilling: mound soil now if the plant is still growing. Every extra 10 cm of buried stem adds stolons.
- Small container: repot into 40 L or larger if roots have not yet filled the pot. Otherwise, harvest small and start again.
- Blight or beetle damage: remove damaged foliage, harvest what has formed, and rotate the plot next season.
Move fast. Once tops start dying back, the crop is set.
Mistakes That Quietly Kill Potato Yields
Some errors don’t announce themselves. The plant looks fine until harvest reveals the damage. Verified buyer feedback across gardening forums flags the same handful year after year.
- Planting supermarket potatoes treated with sprout inhibitor
- Cutting seed pieces too small (under 40 g) or with no eyes
- Skipping chitting on maincrop varieties in short seasons
- Watering little and often instead of deeply and less frequently
- Feeding tomato fertiliser on the assumption it suits all fruiting crops
- Harvesting too early because “the plant looks done”
- Reusing soil that carried potatoes or tomatoes the previous year
Fix the habit, not just the symptom. Certified seed potatoes cost more than kitchen scraps but pay back in yield and disease resistance every time.
Container and Grow Bag Fixes for Poor Tuber Set
Container failures almost always trace to volume, drainage, or feeding rhythm. Fix all three at once, and yields jump.
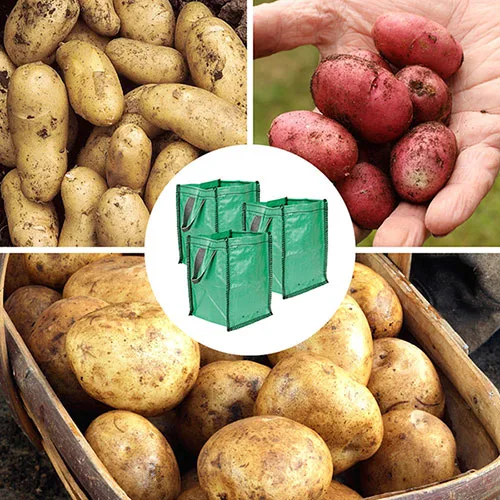
Start with a bag or pot of at least 40 L per seed potato. Use free-draining mix (roughly 60 percent good compost, 30 percent coarse grit or perlite, 10 percent aged bark). Plant the seed piece 15 cm from the bottom, cover with 10 cm of mix, and top up as foliage grows.
Feed lightly with a low-nitrogen tomato food (5-10-10 or similar) once flowering starts. Water when the top 3 cm feel dry. Never let the bag dry out completely during bulking.
Never leave it standing in a saucer of water either.
Recovery Steps if the Season Isn’t Lost Yet
A partial rescue is possible if foliage is still green and healthy. Move quickly through this order.
- Stop nitrogen. No more feed with a first NPK number above 5.
- Apply sulfate of potash at 30 g per square metre. Water it in.
- Hill an extra 10 to 15 cm of soil around the base, right up the stems.
- Mulch on top with straw or dried grass to keep soil temperature down.
- Water deeply once a week, aiming for 2.5 cm total.
- Watch for flowering. Tuberisation follows within 2 to 3 weeks in most varieties.
If foliage has already yellowed and collapsed, the crop is fixed. Dig gently and count what’s there. Small tubers still eat well and store for a few weeks in a cool, dark spot.
Prevention Plan for Next Year’s Crop
Most tuber failures repeat when growers change nothing between seasons. Build the fix into your planting plan.
- Buy certified seed potatoes matched to your climate and day length
- Chit seed potatoes 4 to 6 weeks before planting in a bright, cool spot
- Test soil pH in autumn. Aim for 5.0 to 6.5. Add sulfur if needed.
- Skip fresh manure. Use compost aged at least 6 months.
- Plant when soil at 10 cm depth hits 8 to 10°C consistently
- Rotate potato beds on a 3 to 4 year cycle away from tomatoes, peppers, and aubergines
- Mulch heavily by mid-season in warm regions to keep soil below 25°C
- Record variety, planting date, and yield each year to spot patterns
A soil thermometer, a pH kit, and a garden notebook are the three cheapest tools that improve potato yields more than any fertiliser upgrade.
Frequently Asked Questions
Do potato flowers mean tubers are forming?
Not always. Flowering and tuberisation are driven by separate signals. Many varieties flower without setting a full crop, and some skip flowering entirely yet produce heavy yields.
Dig gently at the base to check for stolon swellings. That’s the only reliable sign tubers have started.
How long after planting should tubers appear?
Tuber initiation usually starts 30 to 60 days after emergence, depending on variety. First earlies can be dug 70 to 90 days from planting. Maincrops need 100 to 120 days.
If it’s past that window and stolons are still bare, a growing condition failed rather than a timing issue.
Can I grow potatoes from supermarket potatoes?
You can, but the odds are poor. Most shop potatoes are treated with a sprout inhibitor like CIPC or 1,4-DMN. Even untreated ones may carry viruses or disease that stunt yield.
Certified seed potatoes cost more and pay back with cleaner, heavier crops.
Why are my potato leaves huge but the plant has no potatoes?
Excess nitrogen is the near-certain cause. The plant reads high nitrogen as a signal to keep building leaves rather than store starch. Stop all feed.
Add sulfate of potash. Cut future compost or manure to a light dressing applied months before planting.
Your Quick Decision Guide: Which Fix Applies to You
Pick the description that matches your plant, then follow the fix.
| Symptom | Most likely cause | Fix now |
|---|---|---|
| Big leaves, no tubers | Excess nitrogen | Stop feed, add potash, hill higher |
| Marble tubers, stalled growth | Heat above 29°C | Mulch thick, water at dusk |
| Flowering but nothing below | Wrong variety or day length | Note for next season, hill more |
| Yellow tops before harvest | Blight or drought | Check foliage, harvest early |
| Tiny crop from a big pot | Container under 40 L or overfed | Upsize next round, low-N feed |
| Green shoulders on tubers | Poor hilling | Bury exposed tubers, cover fully |
Work the fix that matches your strongest symptom first. A single well matched change usually rescues more of the crop than three half measures at once. Log what you did and what you got.
That record makes next year’s plan easier and your harvest bigger.

Similar Posts