Why Do Tomato Leaves Turn Yellow After Watering? Fix It Fast
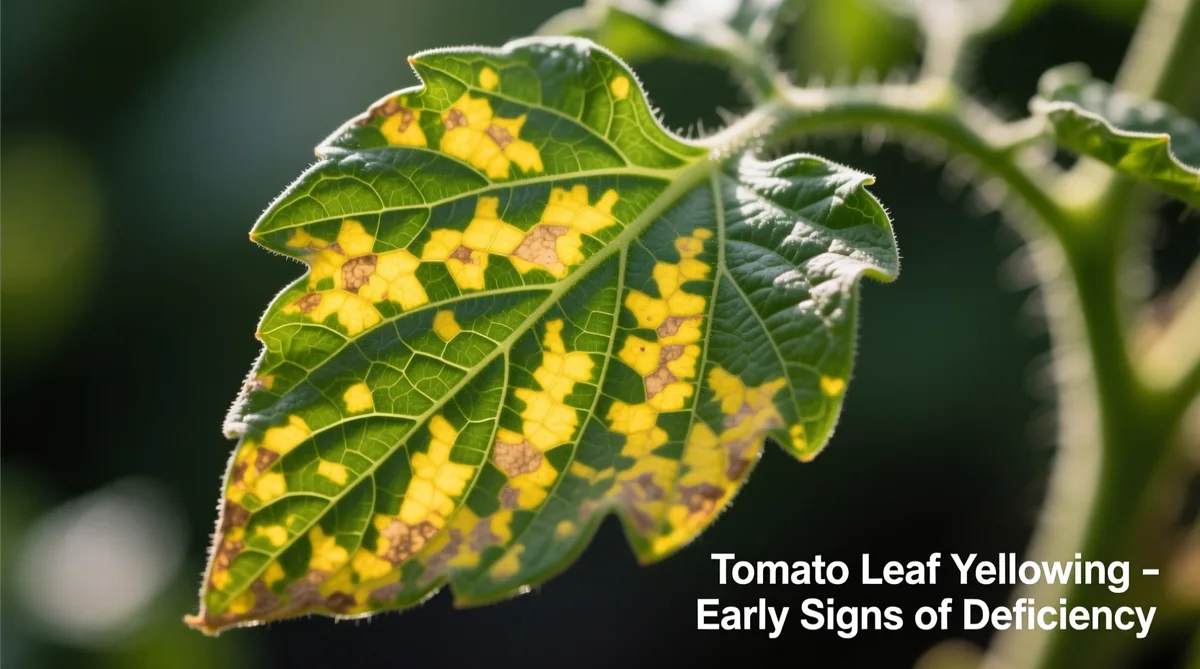
You water your tomatoes carefully, come back the next morning, and half the lower leaves have gone pale yellow. So why do tomato leaves turn yellow after watering? Almost every time, it's a sign that water, oxygen, or nutrients in the root zone have slipped out of balance.
It rarely means your plant is dying.
Healthy tomato roots need soil that sits at roughly 50 to 70 percent of field capacity, with oxygen filling the rest of the pore space. Push that ratio too far toward water and the roots suffocate within hours. As of 2026, land-grant extension services still rank overwatering as the top cause of chlorosis in home-garden tomatoes.
Here's how to read your plant and act fast.
Quick Answer
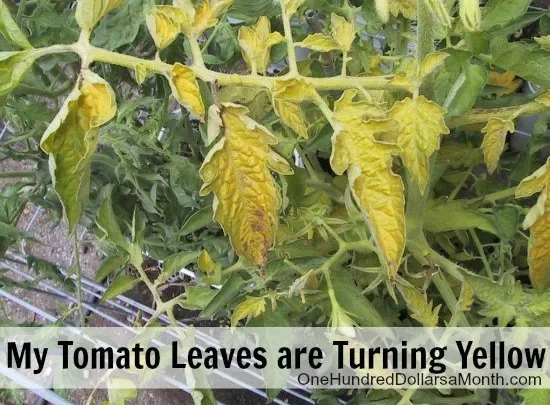
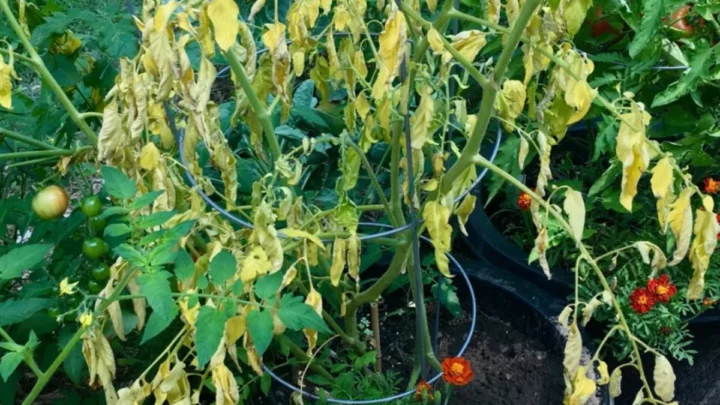
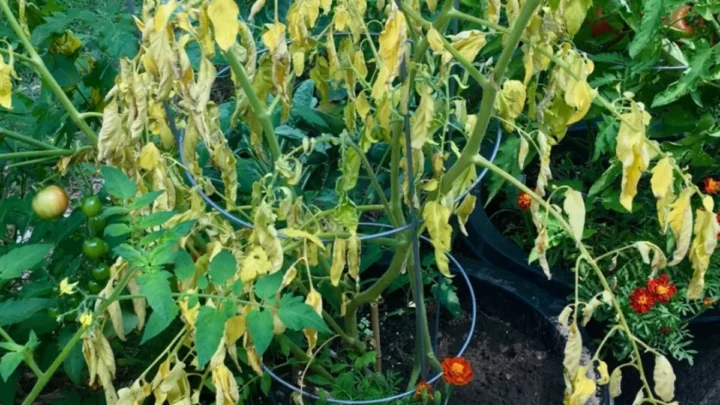
Tomato leaves turn yellow after watering when saturated soil starves roots of oxygen. Without oxygen, roots can't pull up nitrogen, magnesium, or iron. The lower, older leaves yellow first as the plant recycles nutrients upward.
Repeated overwatering also leaches nitrogen straight past the root zone. Fix drainage, space out watering, and new growth should return green.
The Fastest Way to Tell if Watering Is the Real Culprit
Before you fertilize, spray, or repot anything, rule watering in or out. The pattern of yellowing tells you almost everything.
Watering is very likely the cause when:
- Yellowing starts on the lower, older leaves and moves upward
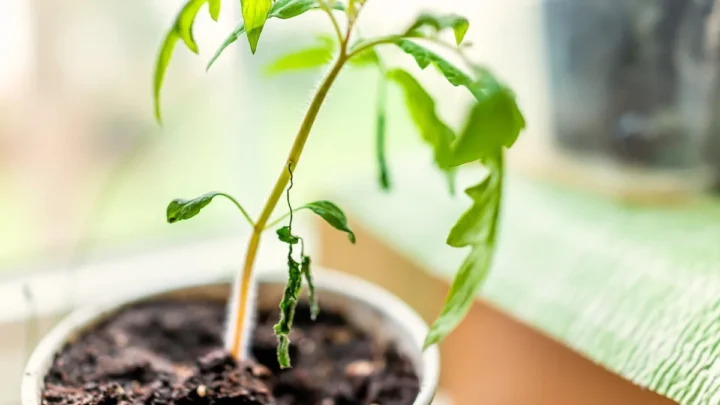
- Leaves feel soft and droopy even though the soil is clearly wet
- The soil smells sour or swampy near the base
- Yellowing shows up within 24 to 72 hours of a deep soak or storm
- Containers feel heavy days after watering
Watering probably isn't the cause when:
- The upper, newer leaves yellow first (points to iron or manganese)
- Yellow patches sit between still-green veins in a clear pattern (magnesium)
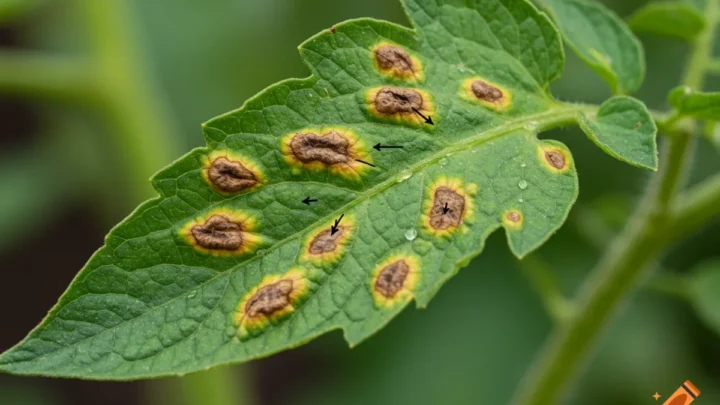
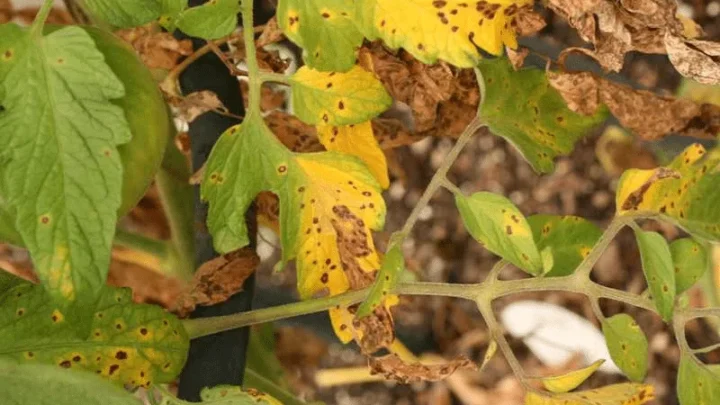
- You see brown spots ringed with yellow halos (fungal leaf disease)
- The soil is dry two inches down and the leaves feel crisp, not limp
The single most reliable check is the finger test. Push a finger two inches into the soil right next to the stem. Cool and wet 24 hours after watering means the root zone is holding too much water.
How Water, Roots, and Oxygen Actually Work Together in Tomato Soil
Tomato roots don't just drink water. They also breathe. The soil around them is a balance of solids, water, and air pockets, and roots need all three to function.
When you water, water pushes air out of those pockets. On well-draining soil, gravity pulls the excess water down within a few hours. Air rushes back in, and roots resume respiration.
On heavy, compacted, or poorly draining soil, water stays put.
Root cells run out of oxygen and stop pulling up nutrients within 12 to 24 hours. That's when yellowing starts. The plant can't move enough nitrogen and magnesium into its foliage, so the oldest leaves get sacrificed first.
Chlorophyll breaks down, the green fades, and you see pale-yellow lower leaves. The University of Minnesota Extension and other land-grant programs describe this exact sequence in their tomato troubleshooting guides.
For reference, ideal tomato soil sits at 50 to 70 percent of field capacity. Aim for pH 6.2 to 6.8 and root-zone temperatures of 60 to 85°F.
The 5 Reasons Tomato Leaves Turn Yellow After Watering
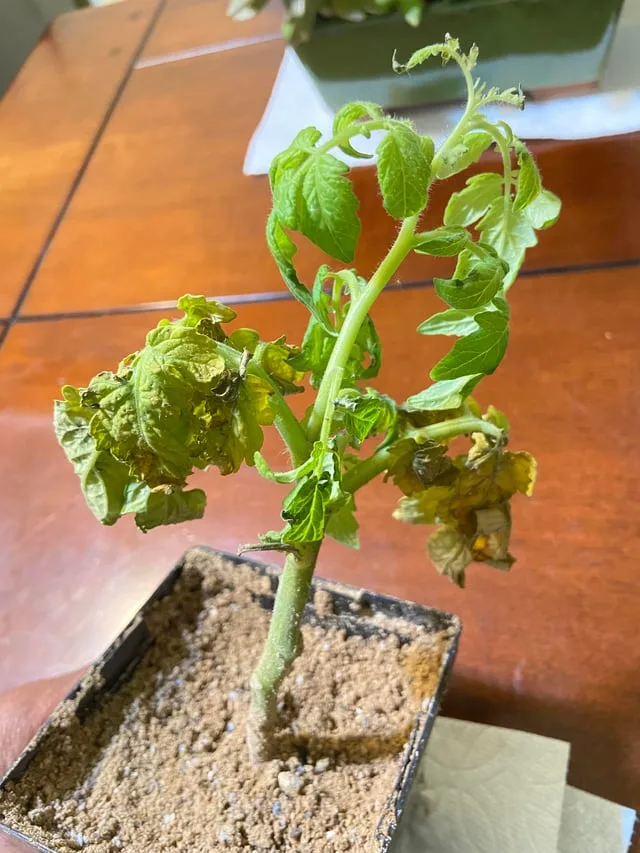
Five root causes, ranked by how often home growers actually run into them.
Overwatering and Root Suffocation
Too much water fills the air pockets in the soil and cuts off root oxygen. Leaves yellow uniformly, starting low, and often droop even when the soil is wet.
Poor Drainage and Waterlogged Soil
Clay beds, compacted mixes, and containers with blocked drainage holes hold water long after you've stopped pouring. Roots sit in stagnant moisture and start to rot from the tips inward.
Nitrogen and Magnesium Leaching
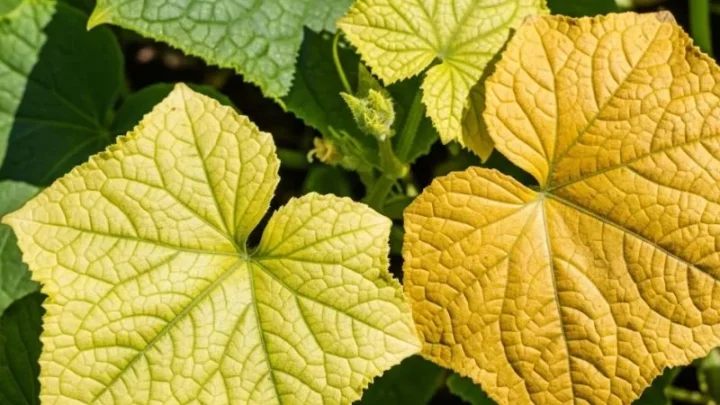
Frequent, heavy watering flushes mobile nutrients past the root zone. Nitrogen loss shows up as a pale, even yellowing on older leaves. Magnesium loss shows the classic interveinal pattern of yellow between green veins.
Fungal Root Rot
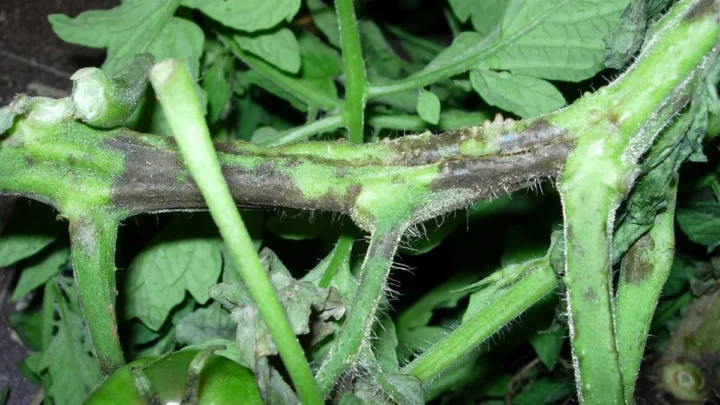
Persistently wet, warm soil is prime habitat for Pythium, Phytophthora, and Fusarium. Roots turn brown and mushy, and their outer layer slips off easily. Foliage yellows, wilts, and doesn't perk back up after watering.
Cold Water Shock or Splash-Borne Leaf Disease
Ice-cold hose water can shock roots, especially in containers on a hot day. Overhead watering also splashes soil onto lower leaves. That spreads early blight and Septoria leaf spot, which start as yellow-ringed brown spots.
Decision Tree: Match Your Symptoms to the Right Cause
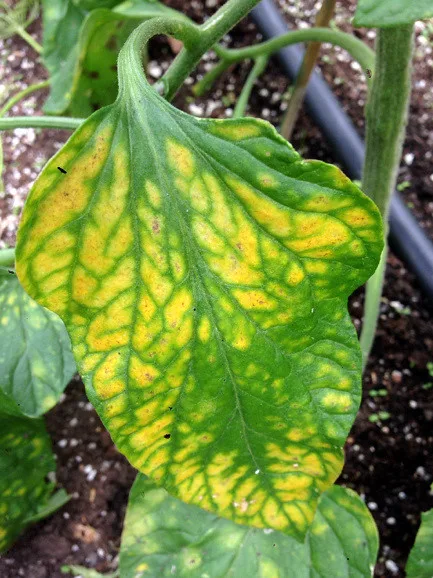
Match what you're seeing to the branch that fits. Then jump to the fix in the sections that follow.
Lower Leaves Yellow vs. Upper Leaves Yellow
If yellowing starts at the bottom and creeps up, think mobile nutrients. Nitrogen loss from leaching or overwatering starves the roots and shows on old leaves first. If yellowing starts at the top on new growth, think iron or manganese.
Those signal a pH or drainage issue, not your watering volume.
Uniform Yellowing vs. Interveinal Yellowing
Uniform pale-yellow leaves point to nitrogen loss or generalized overwatering stress. Yellow between still-green veins points to magnesium deficiency, common after weeks of heavy watering or repeated hard rains.
Yellow and Wilting vs. Yellow and Crisp
Yellow with limp foliage on wet soil almost always means overwatering or early root rot. Yellow and crispy on dry soil means the opposite. You're underwatering, and the plant is shedding leaves to survive.
Yellowing After Rain vs. Yellowing After Hand Watering
Yellowing that only appears after storms points at drainage or soil structure. Yellowing that tracks your own watering schedule points at frequency, volume, or water temperature.
How to Diagnose Your Soil in Under Five Minutes
You don't need a lab kit. Five quick checks tell you nearly everything.
- Finger test. Push a finger two inches into the soil next to the plant. Wet 24 hours after watering means the root zone isn't draining.
- Wooden dowel test. Push a dry wooden skewer six inches down and pull it out. Wet soil sticking to the wood means moisture is deeper than you thought.
- Lift test for containers. Pick up the pot. If it still feels heavy two or three days after watering, the mix isn't drying between waterings.
- Drainage-hole check. Tip the container and inspect the holes. Roots, compacted mix, or a saucer full of standing water all block drainage.
- Smell test. Dig a small hole near the base. A sour, swampy, or rotten-egg odor signals anaerobic soil and likely root damage.
Use this quick reference to score what you find:
| Check | Healthy result | Problem signal |
|---|---|---|
| Finger test at 2 in | Cool, lightly damp 24 hr later | Wet, muddy, or waterlogged |
| Dowel at 6 in | Lightly damp | Soaking wet or bone dry |
| Container lift | Noticeably lighter after 2 days | Still heavy after 3+ days |
| Drainage holes | Clear, water flows freely | Blocked or dripping nonstop |
| Soil smell | Earthy, neutral | Sour, swampy, sulfur-like |
If two or more rows land in the problem column, treat the plant for overwatering before considering nutrients or disease.
What to Do in the First 48 Hours After You Spot Yellow Leaves
Fast action in the first two days often saves the plant. A slow response gives root rot a head start.
Hour 0 to 6:
- Stop watering completely, even if the top of the soil looks dry
- Pull mulch back from the stem base to help the surface breathe
- Move containers out of pooled water and off saucers
- Snip off leaves that are more than 50 percent yellow to reduce load
Hour 6 to 24:
- Improve drainage by poking deep holes around the plant with a chopstick or dowel
- Check root color if a container plant looks limp. White roots are healthy, brown or mushy roots need trimming
- Add airflow. A gentle fan speeds surface drying for patio or greenhouse plants
Hour 24 to 48:
- Water only when the top two inches feel dry. Then water deeply
- Skip fertilizer for now. Feeding stressed roots can burn them
- Watch new growth at the top of the plant. Fresh green shoots mean the roots are recovering
If the plant droops harder after 48 hours despite dry soil, suspect root rot and jump to the disease section below.
Fixing Container Tomatoes vs. In-Ground Tomatoes
The cause looks similar, but the fix is very different.
Container plants have a small root zone and no groundwater to buffer mistakes. In-ground plants have a wider root system and slower moisture swings. Container yellowing usually needs a repot.
In-ground yellowing usually needs a drainage or watering-schedule change.
| Issue | Container fix | In-ground fix |
|---|---|---|
| Waterlogged soil | Repot into fresh, well-draining mix in a 5 to 10 gallon pot | Fork the bed to break compaction, add compost, mulch lightly |
| Nutrient leaching | Side-dress with balanced fertilizer at half strength once new growth appears | Top-dress with compost and a slow-release 5-10-10 |
| Root rot | Trim mushy roots, repot in sterile mix, drench with a labeled biofungicide | Pull the plant if more than half the roots are gone, replant elsewhere |
| Poor drainage | Confirm drainage holes are open, add perlite or bark to the mix | Build a raised mound or raised bed for next season |
Fabric grow bags dry faster than plastic pots and rarely waterlog. If you keep losing container tomatoes to yellowing, switch materials before switching soil.
The Right Way to Water Tomatoes (Frequency, Volume, Timing)
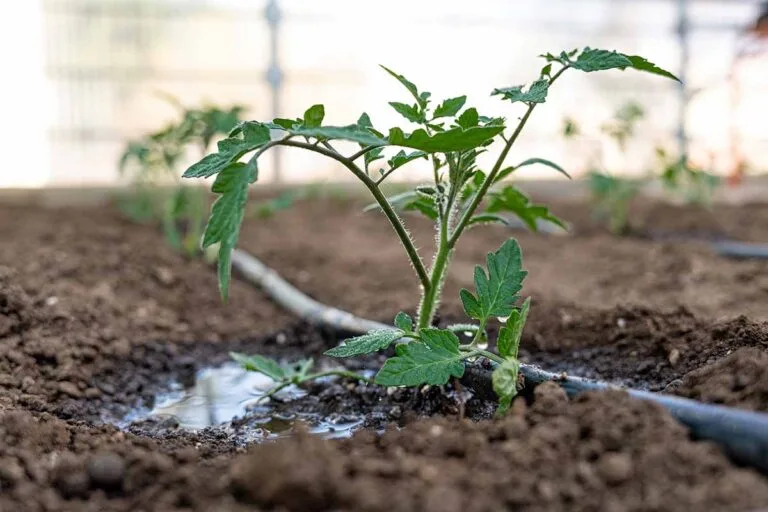
Deep and infrequent beats shallow and daily. Aim for 1 to 2 inches of water per week during peak season, adjusted for heat, rain, and container size.
Frequency by setup:
- In-ground with mulch: deep soak every 4 to 7 days
- In-ground without mulch: deep soak every 2 to 4 days
- Raised bed: every 2 to 3 days in summer
- 5 to 10 gallon container: every 1 to 2 days in hot weather
- Fabric grow bag: daily in summer, sometimes twice
Volume rule of thumb: water until you see drainage from the bottom of the pot, or until the top 8 to 12 inches of ground soil feel evenly damp.
Timing:
- Water in the early morning. Foliage dries by mid-day, cutting disease risk
- Avoid evening watering. Wet leaves overnight invite Septoria and blight
- Water at the base with a soaker hose, drip line, or wand held near the soil
- Skip overhead sprinklers on established tomatoes
Water temperature matters more than most guides admit. Let hose water sit in a bucket for 30 minutes before watering containers on a cold morning. Root shock from icy water is a common overlooked trigger of yellowing.
Common Watering Mistakes That Keep Turning Leaves Yellow
Most yellowing that keeps coming back traces to one of these habits. Fixing them permanently is faster than treating the symptoms.
- Daily light watering. Trains roots to stay shallow and leaves the plant weak between drinks
- Watering on a fixed calendar. Soil dries at different speeds after rain, heat, or humidity swings
- Watering the leaves, not the soil. Splashed soil carries fungal spores upward
- Ignoring drainage holes. A single blocked hole turns a good pot into a swamp
- Reusing old, compacted potting mix. Broken-down peat holds water like a sponge
- Adding saucers under containers and never emptying them
- Overfertilizing after a heavy watering, which stresses roots already low on oxygen
- Using cold tap water on hot afternoons
- Mulching too thick against the stem, which traps moisture and invites stem rot
If two or more of these describe your routine, expect the yellowing to return until the routine changes. Fix the habit before you fix the leaf.
When Yellow Leaves Mean Disease, Not Watering
Some yellowing has nothing to do with how much you water. Recognizing disease early stops it from spreading through the whole bed.
Septoria leaf spot shows small brown spots with yellow halos, mostly on lower leaves. Early blight begins as concentric brown rings surrounded by yellow tissue. Fusarium wilt often yellows one side of a leaf or one branch first, then the whole plant collapses.
Verticillium wilt shows V-shaped yellow patches at the leaf tip.
Bacterial and viral issues like tomato mosaic virus and tomato spotted wilt virus usually mottle the leaf with yellow and green streaks. They often distort new growth too. These are not fixable.
Pull and destroy the plant, and don't compost it.
Quick disease vs. watering check:
- Watering issue: yellowing is soft, uniform, and follows a soak
- Fungal issue: yellowing surrounds distinct spots or rings
- Wilt disease: yellowing is one-sided or branch-specific, plant wilts and doesn't recover
- Viral issue: mottled color pattern, twisted or stunted new leaves
When in doubt, submit a leaf sample to your local Cooperative Extension diagnostic lab. Most land-grant universities offer this service for a small fee, and the answer is far more reliable than guessing.
Recovery Timeline: What Healthy Regrowth Should Look Like
Recovery from watering damage runs on a predictable clock. Track these milestones so you know if the plant is bouncing back or heading downhill.
Days 1 to 3: wilting eases, the top inch of soil starts to dry, no fresh yellow leaves appear. Days 3 to 7: no new yellowing on lower foliage, and existing yellow leaves can be pruned off cleanly. Week 2: bright green growth pushes from the top nodes.
That's a clear sign roots are respiring again.
Weeks 3 to 4: flowering resumes and fruit set restarts. If two weeks pass with no new green growth, the roots likely didn't survive. Check the base for firm white roots.
Soft brown roots or a hollow stem base mean it's time to replant.
Pro Tips from Experienced Tomato Growers
Small habit changes solve most repeat yellowing. These are the moves aggregate grower forums and extension bulletins highlight most often.
- Mulch 2 to 3 inches deep, but keep it an inch away from the stem
- Bottom-water containers by setting them in a shallow tray for 20 minutes, then draining
- Add a handful of perlite or coarse sand to any potting mix that stays soggy
- Check moisture at the same time each morning to build a rhythm
- Feed with a low-nitrogen, higher-potassium blend once fruit sets
- Rotate tomato beds every 2 to 3 years to break soil disease cycles
- Water with rainwater or bucket-warmed tap water on cold mornings
- Prune the lowest branches once plants hit 18 inches to cut splash-borne disease risk
Frequently Asked Questions
Should I remove yellow leaves from my tomato plant?
Yes, remove leaves that are more than half yellow. They're already sacrificed and no longer feed the plant. Snip them at the base with clean shears and dispose of any that show disease spots.
Leaving them attached invites fungal spread and wastes plant energy that could go into fruit.
Can a tomato plant recover from overwatering?
Yes, if you catch it in the first few days. Stop watering, improve drainage, and let the top two inches dry before the next soak. New green growth within 7 to 14 days signals the roots survived.
If leaves keep yellowing after two weeks of good conditions, the root system is likely too damaged.
How often should I water tomatoes in hot weather?
In peak summer, deep-water in-ground tomatoes every 2 to 4 days and container tomatoes every 1 to 2 days. Fabric grow bags may need daily watering. Aim for 1 to 2 inches of water per week overall.
Always check soil moisture with a finger test before watering, not the calendar.
Why do only the bottom leaves turn yellow after watering?
Lower leaves yellow first because tomatoes pull mobile nutrients like nitrogen and magnesium from old growth to feed new growth. When overwatering blocks nutrient uptake, or heavy watering leaches nutrients, the plant strips the oldest leaves first. Upper leaves stay green longer as the plant protects new growth.
Is it better to underwater or overwater tomatoes?
Slight underwatering is safer than overwatering. Tomato roots recover quickly from a missed watering, but drown fast in saturated soil. Underwatered plants wilt and revive after a good soak.
Overwatered plants develop root rot that often cannot be reversed. When unsure, wait a day and check the soil.
Your Quick Decision Guide: Save the Plant or Start Over
Use this final check to decide next steps in under a minute.
Save the plant if:
- Yellowing is limited to lower leaves and hasn't reached the top third
- The stem base is firm and green under the surface
- Roots in containers still show white tips
- New green growth appears within 7 to 14 days of correcting watering
Start over if:
- More than half the foliage has yellowed or wilted
- The stem base is soft, brown, or hollow
- Roots smell sour and slide out of their outer sheath
- Two weeks pass with zero new green growth
For salvageable plants, correct the watering routine, improve drainage, and hold off on fertilizer until fresh growth shows. For lost plants, remove them fully and refresh the soil or mix. Rotate to a different bed next season to break any disease cycle in the root zone.

Similar Posts