How to Repair a Garden Hose Fast and Easy
If you've been asking how do I repair a garden hose, the answer depends on one thing: where the damage actually is. Most people reach for tape, but that's rarely the right move. Once you identify the damage type correctly, the repair is fast, cheap, and needs no special skills.
Most repair kits cost between $3 and $20 as of 2026, and the whole job takes under 15 minutes for a standard split or coupling failure. The key is matching the repair method to the specific problem.
Quick Answer
You can repair a garden hose in three main ways. Replace the rubber washer to fix a dripping end coupling. Install a barbed hose mender fitting to fix a split in the hose body.
Wrap self-fusing silicone tape tightly over a pinhole for a quick seal. Match the repair type to the damage and you'll restore full water pressure.
Before You Fix Anything: How to Find and Read the Damage
Turn the water on fully and run your hand slowly along the entire hose length. Don't just check where you first saw the spray. Water travels inside the hose under pressure and can exit far from the actual damage point.
Once you find the source, shut off the water and dry the area with a rag. A dry surface gives you a clear view of the damage and matters for any tape-based repair later.
Pinhole or split in the hose body
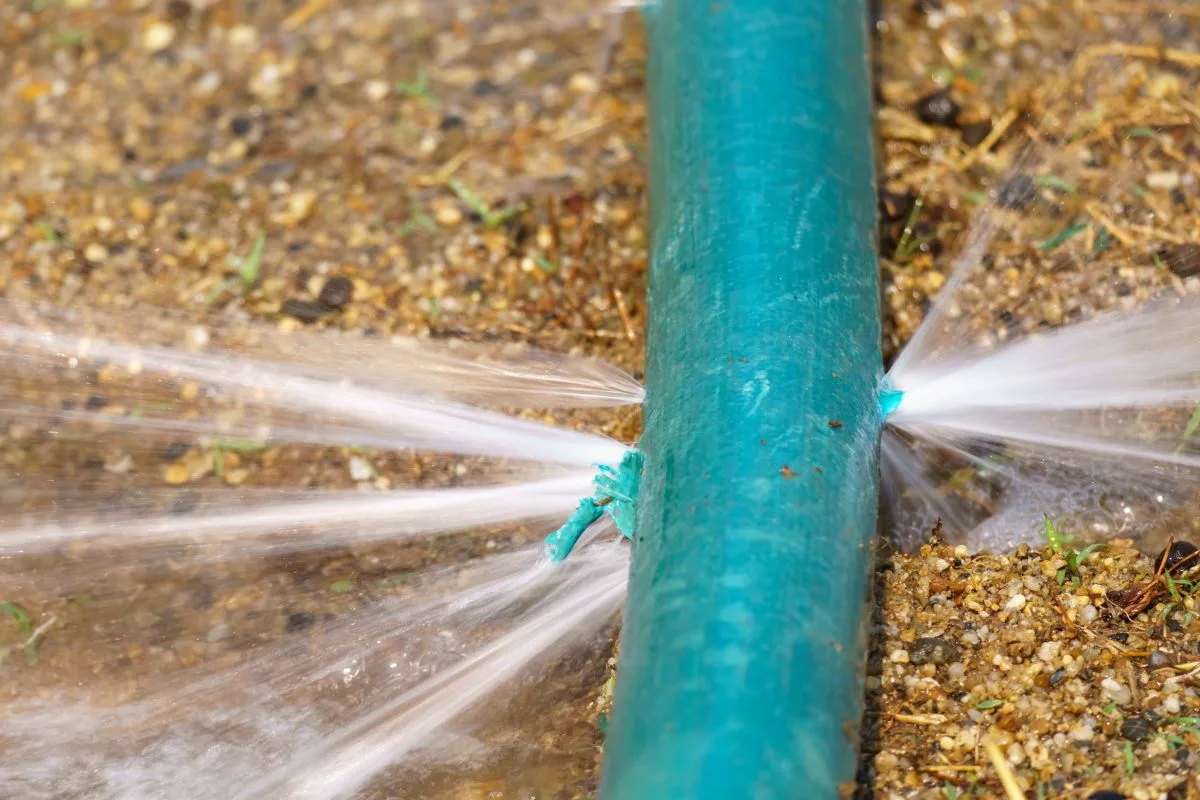
A pinhole leak produces a thin, sharp jet of water under pressure. A split or crack opens wider when the water is on and appears to close once you shut it off, as the hose walls relax when pressure drops. That behavior makes splits easy to miss on a dry inspection, so always check under full pressure first.
Look for bulging or soft spots along the hose body too. A section that swells under pressure but feels normal when dry often has internal wall damage even when the outer casing looks intact.
Leak at the end coupling or fitting
The coupling is the threaded connector at each hose end. If water weeps or drips right where the hose meets a faucet or nozzle, this is almost always a worn rubber washer. The washer inside the female coupling compresses over time and stops forming a clean seal.
This is the most common garden hose failure and also the fastest to fix.
Cracked or broken end fitting
Grip the fitting with both hands and try rotating it against the hose body. If it spins freely or feels loose, the fitting itself has failed. Visible cracks in the collar, broken threads, or a fitting that still leaks after a fresh washer all point to a coupling that needs full replacement rather than a simple washer swap.
The Three Damage Types That Cover 95% of All Hose Failures
Identifying your damage type before buying any parts saves time and avoids the frustration of a repair that fails the moment you test it.
| Damage Type | What It Looks Like | Most Common Cause |
|---|---|---|
| Leaking end coupling | Water weeps at the threaded fitting | Worn or missing rubber washer |
| Split or crack in hose body | Water sprays sideways from hose wall | Freeze damage, kinking, UV degradation |
| Pinhole puncture | Thin pressurized jet from the hose wall | Sharp object, rodent damage, material age |
Freeze damage is the leading cause of mid-hose splits in cold climates. Water expands by approximately 9% when it freezes, and a hose left outside through a hard winter with water trapped inside can split along its length with no external sign until you run it under pressure in spring.
UV degradation drives a large share of failures in hot, sunny climates. Prolonged sun exposure makes rubber and PVC hose materials brittle over time. Micro-cracks form gradually and eventually open under pressure.
End coupling failures are the most common type overall and the fastest to resolve. The Irrigation Association, which publishes standards for residential irrigation components, consistently identifies improper winterization and mechanical stress at connection points as the top two causes of residential hose damage.
What You'll Need: Tools and Repair Parts Matched to Your Damage Type
Identify your damage type before buying anything. Most hardware stores sell hose repair components individually, and buying only what you need keeps costs down.
| Repair Type | Tools Needed | Parts Needed |
|---|---|---|
| Leaking coupling (washer) | Flathead screwdriver or none | ¾" rubber garden hose washer |
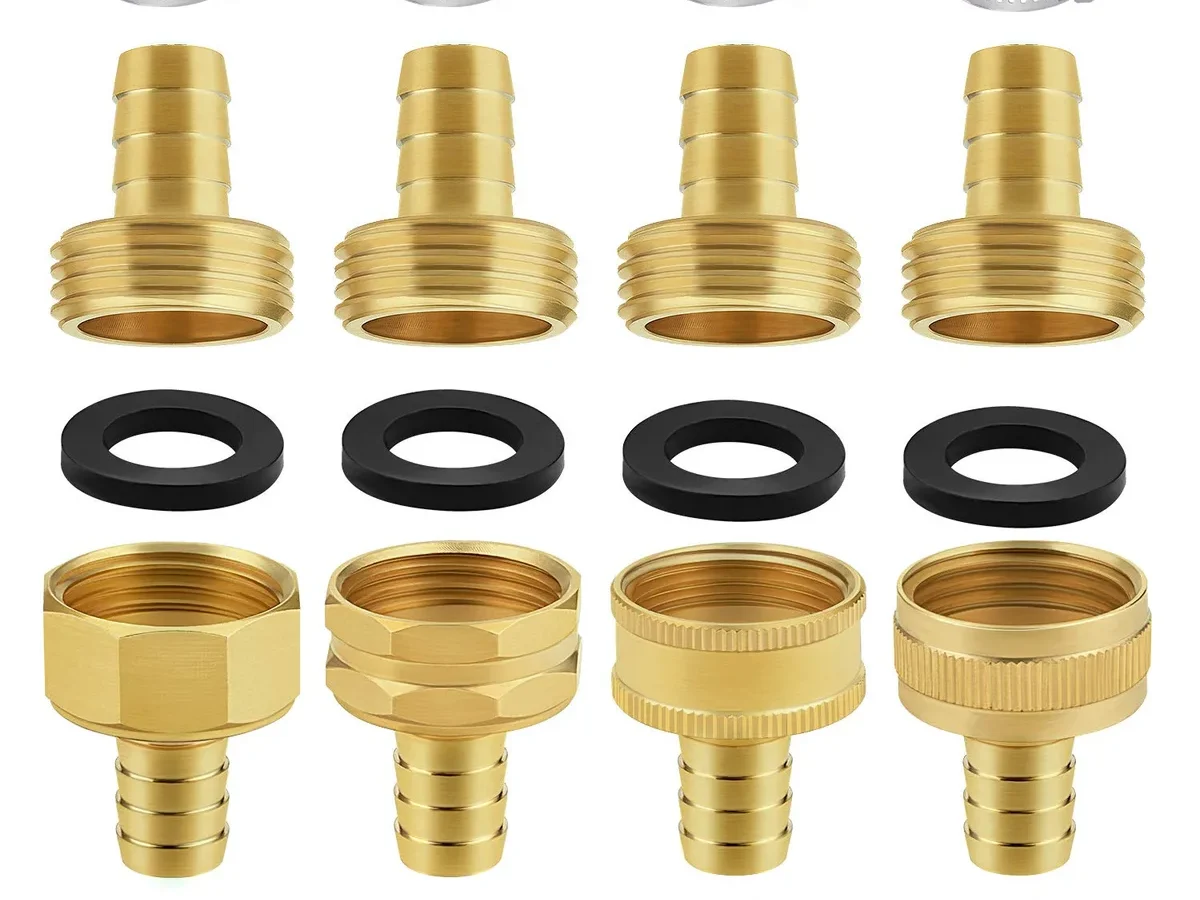
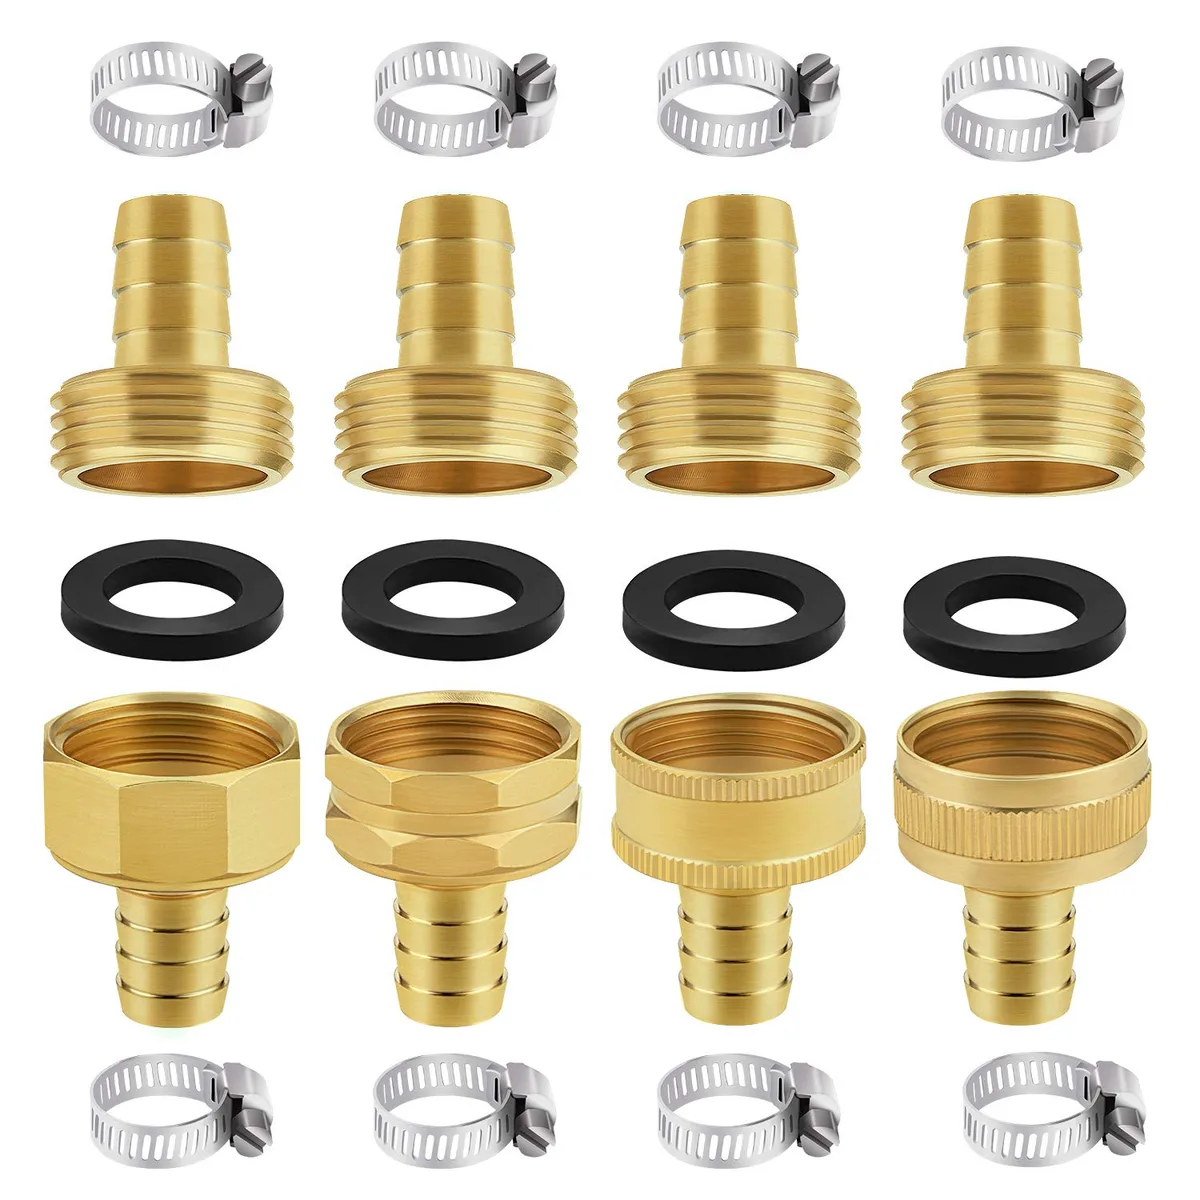
| Split or cut in hose body | Utility knife, screwdriver | Barbed hose mender fitting, 2 hose clamps |
| Pinhole leak | Dry rag, scissors | Self-fusing silicone tape roll |
| Broken end fitting | Utility knife, screwdriver | Hose end repair fitting with clamp |
The most important spec to confirm before buying a barbed fitting is your hose's internal diameter. Most residential garden hoses run at ⅝-inch ID, but ½-inch and ¾-inch are also common. A mismatched barb won't seat properly and will leak under pressure regardless of clamp tension.
For self-fusing silicone tape, quality options are rated to 70 to 100 PSI when stretched and wrapped with proper overlap. Standard household faucet pressure typically runs between 40 and 80 PSI, per EPA WaterSense program guidelines, which puts a correctly applied tape repair within the safe operating range for a temporary or low-demand fix.
How to Fix a Leaking Hose Coupling (The Rubber Washer Is Almost Always the Problem)
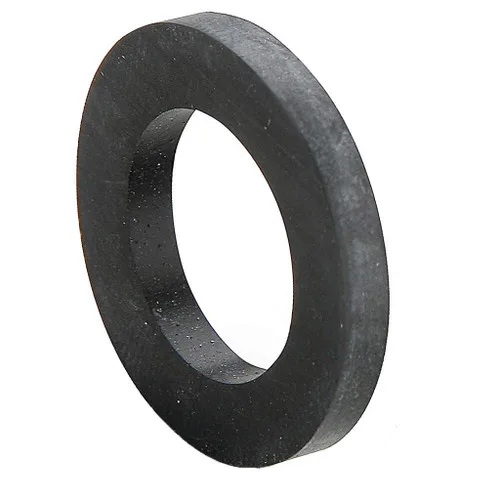
The rubber washer inside a female hose coupling sits in a shallow recessed groove just behind the threaded opening. Its job is to form a watertight seal when you tighten the coupling onto a faucet or nozzle. Over time it compresses flat, cracks, or falls out entirely, causing a steady drip at the connection point even when everything is fully screwed on.
This repair costs under a dollar and takes about 3 to 5 minutes.
Step 1: Unscrew the female coupling from the faucet or nozzle.
Step 2: Look inside the threaded end. You'll see a shallow groove near the opening where the washer sits.
Step 3: Remove the old washer with a flathead screwdriver tip or your fingernail. If it's compressed flat and stuck, a small pick helps work it free.
Step 4: Press a new ¾" rubber garden hose washer firmly into the groove. It should sit flat and flush without bunching.
Step 5: Screw the coupling back on by hand until snug, then add a quarter turn with pliers.
Step 6: Turn the water on and check the connection under full pressure for a few minutes.
If the drip continues after installing a new washer, grip the coupling and check whether it rotates or wobbles against the hose body. If it does, the coupling has failed structurally and the fitting itself needs to come off.
If the coupling has seized and won't unscrew, apply penetrating lubricant at the threads and use rubber-coated pliers for a firm grip. The same technique works for a fitting stuck on the spigot and handles most seized couplings without damage.
How to Repair a Split or Cut in the Middle of the Hose
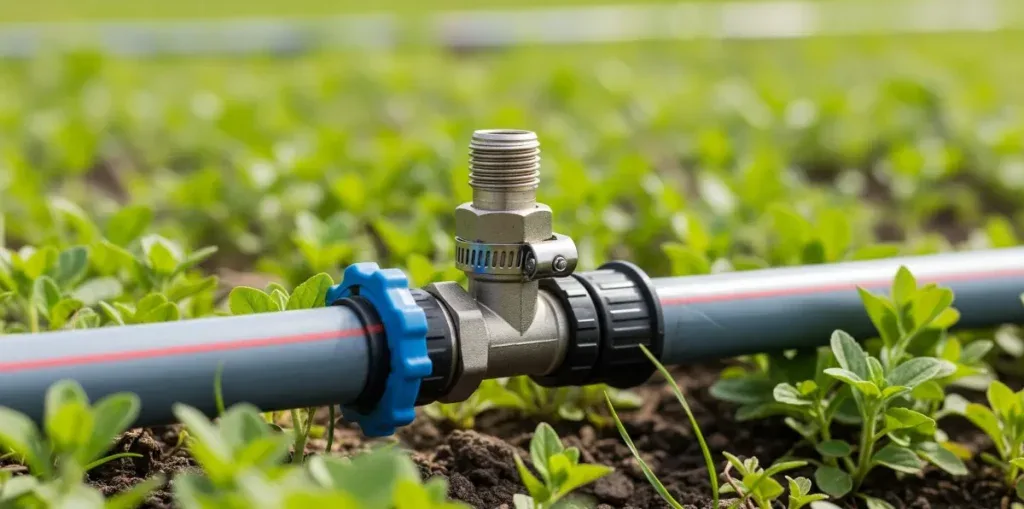
A barbed hose mender fitting, also called a hose splicer or hose connector, bridges a damaged section by cutting it out and joining the two clean ends. This is the right repair for any split, crack, or physical cut in the hose body. Self-fusing tape alone won't hold a split reliably under full water pressure.
You'll lose 2 to 4 inches of total hose length, but the repair restores full flow and is permanent when done correctly.
Step 1: Mark both sides of the damaged section, extending roughly 1 inch past the visible damage on each side.
Step 2: Cut straight through the hose at both marks with a sharp utility knife. Cuts must be perpendicular to the hose. A diagonal cut won't seat cleanly on the barb.
Step 3: Slide a hose clamp over each cut end before pushing the fitting on. This is the step most people forget, and fixing it means cutting the hose again.
Step 4: If the hose is stiff, soak each cut end in hot water for 1 to 2 minutes to soften it. Older rubber hoses especially need this before pushing onto the barbs.
Step 5: Push each hose end firmly onto the barbed fitting until it butts up against the fitting shoulder. No barb should be visible past the hose edge.
Step 6: Slide each clamp over the barbed section and tighten. Finger-tight plus a firm quarter turn is enough.
Step 7: Turn the water on slowly and hold pressure across both joints for 5 minutes before considering the repair done.
If you plan to connect the repaired hose to a pressure washer, verify the fitting's rated PSI first. Standard garden repair connectors may not handle pressure washer output. Confirm whether your hose is pressure-washer compatible before attaching it.
How to Patch a Pinhole Leak with Self-Fusing Silicone Tape
Self-fusing silicone tape bonds to itself under tension rather than using adhesive. That's what makes it work on a wet, rounded surface where standard tape fails within minutes. Applied correctly, it seals a small puncture well enough for regular garden use.
Step 1: Dry the damaged area thoroughly. Moisture under the tape prevents proper fusing.
Step 2: Start wrapping 2 inches before the puncture. Stretch the tape to roughly double its length as you wrap. Fifty percent stretch is the minimum for a solid bond.
Step 3: Overlap each pass by half the tape width and extend 2 inches past the puncture on the far side.
Step 4: Press the tail end firmly against itself for 30 seconds to finish the bond.
This repair handles a small, isolated pinhole well. For any split longer than about half an inch, use the barbed mender method instead. Tape won't hold a split under sustained pressure.
How to Replace a Cracked or Broken End Fitting
A hose end repair fitting is the right fix when the coupling body itself is cracked, stripped at the threads, or spinning freely on the hose. These fittings come in male and female versions, so confirm which end you're replacing before buying.
Step 1: Cut cleanly through the hose 1 to 2 inches from the damaged end. Make the cut straight, not diagonal.
Step 2: Slide the included hose clamp over the cut end before fitting anything on.
Step 3: Push or thread the new fitting onto the hose end until it seats fully.
Step 4: Position the clamp over the fitting's barbed section and tighten until snug.
Most US hose end repair fittings use GHT (Garden Hose Thread), the standard for residential faucets and nozzles. NPT (National Pipe Thread) fittings look similar but won't connect to standard garden hardware. Confirm the box says GHT before buying.
If you've had trouble with a fitting that won't release from a pressure washer, a thread-type mismatch is often the cause.
Brass vs. Plastic Repair Fittings: Which One Should You Buy
Both materials work, but they suit different hoses and conditions.
| Feature | Brass Fittings | Plastic Fittings |
|---|---|---|
| Durability | High, resists corrosion and cracking | Moderate, can crack if overtightened |
| Price | $8 to $20 per kit | $3 to $10 per kit |
| Best for | Daily use, pressure washer setups | Light garden use, mild climates |
| Freeze tolerance | Good | Poor in hard freeze conditions |
Brass is worth the extra cost for a hose in regular use or one that connects to a pressure washer. Aggregate buyer feedback consistently flags plastic fittings cracking at the barb in freeze-thaw climates or when over-clamped. For a light-use hose in a mild climate, plastic does the job at a lower price.
Getting the Right Diameter: Why ½", ⅝", and ¾" Are Not Interchangeable
A barbed fitting that doesn't match your hose's internal diameter (ID) will either not seat or will leak regardless of clamp tension. To check your hose ID, cut the end cleanly and measure the inside opening with a ruler or calipers.
| Hose ID | Common Use |
|---|---|
| ½ inch | Light watering, drip irrigation systems |
| ⅝ inch | Standard residential garden hose |
| ¾ inch | High-volume watering, long hose runs |
If you're unsure of your size, take a short cut section of hose to the hardware store. Holding it against a fitting before buying takes 10 seconds and saves a wasted trip.
How to Test Your Repair Under Full Water Pressure
A repair can hold at low pressure and fail once the line fully pressurizes. Turn the water on slowly and let pressure build over 20 to 30 seconds. Watch the repair joint closely for the first minute before stepping away.
If no leak appears, keep it running at full pressure for 5 more minutes. Run your hand lightly over each clamp joint and the tape wrap. You're checking for moisture, not just visible sprays.
A joint that weeps slightly often just needs the clamp tightened a quarter turn. If it leaks freely, the barb isn't seated fully against the fitting shoulder. Shut the water off, cut the hose end back half an inch to expose fresh wall material, and reseat it.
Mistakes That Make Garden Hose Repairs Fail
Most failed repairs trace back to the same handful of errors.
- Wrong fitting diameter. A mismatched barb won't seal under pressure regardless of clamp tension.
- Forgetting to pre-load the clamp. Sliding the clamp on after the fitting is already seated means cutting the hose again.
- Diagonal cut. An angled cut leaves a gap at the barb shoulder. Always cut straight across.
- Tape without enough stretch. Self-fusing tape not pulled taut as you wrap won't fuse and peels under pressure.
- Overtightening on plastic fittings. A cracked plastic barb is the most common reason a repair fails the pressure test.
When Repair Isn't Worth It: Signs Your Hose Is Done
Replace rather than repair if the outer casing has gone stiff and brittle along most of its length. Multiple cracks or soft spots appearing within a few feet of each other point to full material breakdown, not isolated damage. A collapsed inner lining that restricts flow tells the same story.
Expandable hoses with failed internal bladders can't be fixed with standard methods. The inner latex tube holds pressure and can't be reached from outside. If the hose is beyond saving, check whether the rubber material can be recycled before binning it.
How to Store and Maintain Your Hose So It Doesn't Split Again
Drain the hose completely before any cold spell. Raise the nozzle end above the faucet end and walk the length to push remaining water out. Coil it loosely and store indoors or in a shaded spot.
A dedicated hose reel keeps coils even and prevents the tight kinks that weaken the hose wall over time.
Don't leave the hose pressurized in direct sun. Water inside a sealed hose expands under heat, and repeated pressure cycles accelerate wear at the couplings.
Frequently Asked Questions
Can I use duct tape to fix a garden hose?
No. Duct tape loses adhesion on wet surfaces and can't hold against water pressure. Self-fusing silicone tape is the only tape-based repair that works reliably on a pressurized hose.
How long does a barbed hose mender repair last?
A brass barbed fitting with properly tightened clamps is a permanent repair under normal garden use. Plastic fittings typically last 1 to 3 seasons before showing wear, especially in freeze-thaw climates.
Can I repair an expandable garden hose the same way?
Standard repair methods don't work on expandable hoses. The inner latex bladder holds pressure and can't be reached from outside. Minor coupling leaks can still be fixed with a new washer, but a split bladder means the hose needs replacing.
Is there a hose repair safe for drinking water use?
Standard repair fittings aren't certified for drinking water contact. If you're supplying an RV or filling a potable water container, you need NSF/ANSI 61-certified components. Check whether your hose meets RV potable water standards before using it for that purpose.

Similar Posts