How to Fix a Hole in a Garden Hose Fast
A leaking garden hose doesn't always mean you need a new one. How do you fix a hole in a garden hose? The answer depends entirely on the type of damage you're dealing with.
A pinhole needs a different approach than a mid-hose split or a cracked end connector.
Most garden hoses handle household water pressure between 40 and 80 PSI, per standard residential plumbing specifications. Any repair that can't hold that range is just a temporary delay. What follows covers each damage type, the right fix for each, and why repairs fail.
Quick Answer
How do you fix a hole in a garden hose? It comes down to the damage type. A pinhole needs self-fusing silicone tape wrapped tightly around it.
A mid-hose split needs a hose mender connector and clamps. A cracked end fitting needs a new end connector installed.
That Leaky Hose Doesn't Have to Be a Death Sentence
A basic repair kit runs $5 to $10 and fixes most holes in under 15 minutes. Done right, the repair holds for years. Most people don't realize that until after they've already bought a replacement.
The common mistake is grabbing the nearest tape. Duct tape, electrical tape, and generic waterproof tape aren't rated for sustained water pressure. You're not fixing the leak.
You're covering it until it fails again, usually within a couple of days.
There are four repair methods that actually work, and each one targets a different type of damage. Match the method to the situation, and the repair holds.
The Answer Depends on These Four Things
Before picking up any repair kit, answer these four questions. They determine which fix path makes sense.
1. How big is the hole?
A pinhole or puncture under about 1/4 inch across works well with self-fusing silicone tape. Anything larger needs a hose mender connector that physically bridges the gap. Tape alone can't maintain a reliable seal over wide damage under household water pressure.
2. Where is the damage?
Mid-hose damage and end-fitting damage need completely different fixes. A hole more than 3 inches from a fitting is a candidate for tape or a mender connector. Damage closer to a fitting often means cutting back the hose and attaching a new end connector, especially if the fitting itself has cracked.
If you're unsure whether the end fitting can simply be replaced, that's worth knowing before you start cutting.
3. What material is the hose?
Standard rubber and reinforced vinyl hoses are compatible with all four repair methods. Expandable latex hoses are a different problem. Their outer fabric sleeve and inner latex tube make tape repairs unreliable and hose menders nearly impossible to seal.
If you have an expandable hose with a hole, replacement is almost always the better call. Many of these hoses also can't be processed through standard recycling, so knowing your disposal options matters.
4. How old is the hose?
If the hose wall feels stiff, chalky, or is cracked in multiple spots, one hole is probably not the only weak point. Check the full length under pressure before committing to a repair. A single patch on an end-of-life hose often just shifts the next failure point down the line.
| Situation | Best Fix |
|---|---|
| Small pinhole or puncture, mid-hose | Self-fusing silicone tape |
| Large split or blowout, mid-hose | Hose mender connector + clamps |
| Cracked or broken end fitting | Replacement end connector |
| Multiple holes or brittle walls | Replace the hose |
Step 1: Find the Hole and Understand What You're Dealing With
How to Locate a Pinhole You Can't See
Pinholes spray such a fine mist that you can feel them before you see them. Turn the water on fully and run your hand slowly along the hose body. Feel for a cool jet of air or a damp patch on your palm.
If it's still hard to locate, lay the hose flat on dry concrete in direct sunlight. A wet patch appears quickly, even from a tiny hole. Mark the spot with chalk or a strip of tape while the water is still running.
Pinholes are surprisingly easy to lose once the hose drains and dries.
How to Assess Hole Size and Location
Turn off the water and let the hose drain completely. Then examine the hole while the hose is relaxed and unpressurized. Holes look smaller under pressure, so draining first gives a more accurate read.
A clean, circular hole typically means a sharp object punctured the wall. Stretched or split edges point to a blowout from freeze damage or UV degradation. Leaving a garden hose outside through winter without draining it is one of the most common causes of this kind of damage.
Note the distance from the nearest fitting. If the hole sits within 2 to 3 inches of the threads, a mender connector repair might bring you right up to the fitting, which changes your approach.
The Four Types of Garden Hose Damage (and Why Each Needs a Different Fix)
Understanding what caused the damage helps predict which repair will hold.
Pinhole puncture: Caused by a nail, rock, or garden fork that pierced the hose wall. The surrounding material is intact, so the damage is contained. Tape-based repairs work well here because the solid hose wall gives you something firm to wrap against.
Split or blowout: A wider tear from water freezing inside the hose, UV degradation weakening the wall over time, or a kinked section held under full pressure. Tape alone can't bridge this width reliably. A hose mender connector is the right tool.
Fitting crack or connector failure: End fittings take more mechanical stress than the hose body. They crack from overtightening, freeze cycles, or age. These repairs need a new end connector, not tape.
General wall degradation: Widespread cracking, a chalky surface, or stiffness across a section of hose is end-of-life material failure. Patching one spot on degraded material rarely holds, since the next weak point usually fails within a season.
Fix #1: Pinhole or Small Puncture — Self-Fusing Silicone Tape
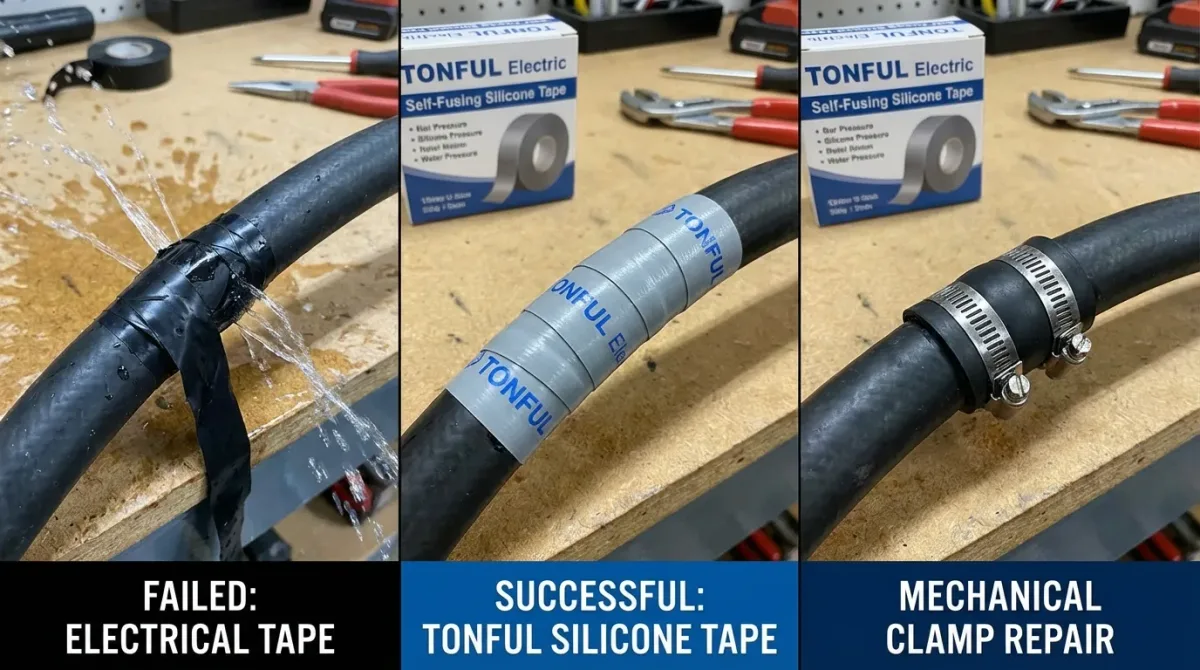
Self-fusing silicone tape, also called rescue tape or self-amalgamating tape, is the fastest fix for a small hole in an otherwise healthy hose. It works without adhesive. The silicone bonds to itself when stretched and wrapped under tension, forming a waterproof, rubber-like seal.
Manufacturer specifications for most self-fusing silicone tape products rate the bonded seal to 70 PSI or higher. That's within the typical range of household water pressure, which makes this a genuine long-term repair when applied correctly.
What You Need
- 1 roll of self-fusing silicone tape ($6 to $15)
- A dry cloth or paper towels
- The chalk mark or tape flag from Step 1
No tools, no clamps, and no special skills required.
Step-by-Step: How to Apply Self-Fusing Tape Correctly
1. Dry the hose surface completely. Moisture stops the silicone from fusing to itself. Wipe the area and let it air dry for 2 to 3 minutes.
This is the most skipped step, and it's why most tape repairs fail.
2. Start 2 inches before the hole. Begin wrapping the tape 2 full inches before the damaged spot. Starting away from the hole builds structural support around the repair zone.
3. Stretch as you wrap. Pull the tape to roughly 50 to 75% of its elastic stretch while applying it. That tension activates the self-fusing bond.
4. Overlap each wrap by 50%. Each pass of tape should cover half the previous layer. This closes gaps and builds even thickness across the repair.
5. Continue 2 inches past the hole. Keep wrapping until you're at least 2 full inches beyond the damage on the far side.
6. Apply at least 3 to 4 full layers. Three layers is the minimum. Four is safer for hoses running at full household pressure.
Each additional layer adds burst strength.
7. Press the tape end firmly for 30 seconds. Hold the tail down to set the final bond before moving the hose.
8. Re-pressurize slowly. Turn the water on at low flow first. If you see seepage around the tape edges, turn the water off, dry the area again, and add two more layers.
One note on safety: if your hose is used for vegetable garden irrigation or any water you'll consume, check the product label before using the repair. Per NSF International's NSF/ANSI 61 standard, components that contact drinking water must meet specific certification requirements. Not all self-fusing tape products carry that certification.
Fix #2: Mid-Hose Split or Large Hole — Hose Mender Connector
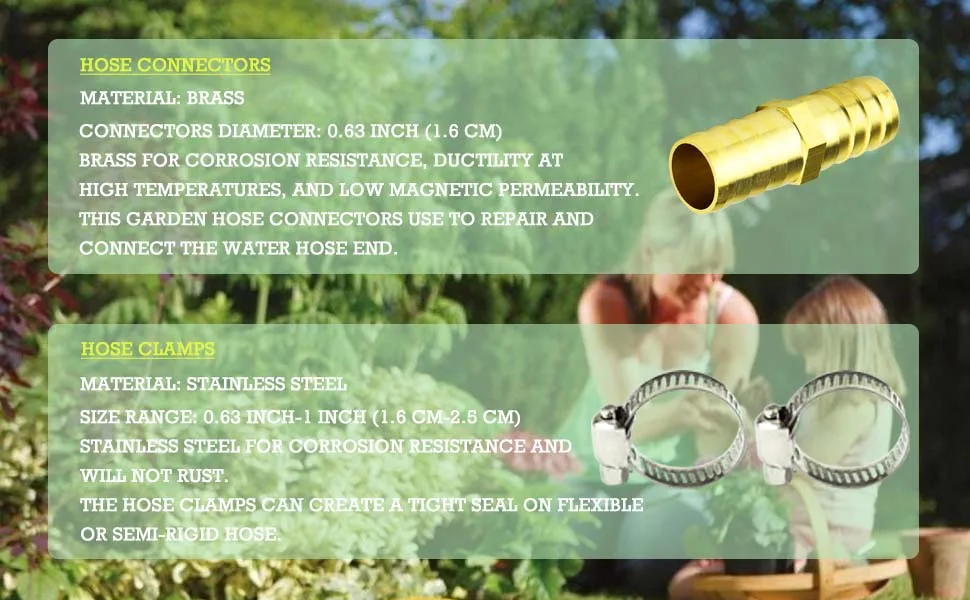
A hose mender connector is a short tube, either barbed or push-fit, that bridges a cut section of hose. You remove the damaged section, push the connector into both ends, and clamp it down. The result is a permanent join that holds full household water pressure.
Mender connectors come in the three standard garden hose sizes: 1/2 inch, 5/8 inch (the most common), and 3/4 inch. Matching the connector to your hose's internal diameter is critical. The wrong size either won't push in or won't create a reliable seal.
What You Need
- Barbed hose mender connector (matched to hose inner diameter)
- 2 worm-gear hose clamps
- A utility knife or sharp scissors
- A flat-head screwdriver
Step-by-Step: Cutting Out the Damage and Installing the Mender
1. Turn off the water and drain the hose fully.
2. Cut out the damaged section with two clean, straight cuts, one on each side of the hole. Perpendicular cuts seat the mender better than angled ones.
3. Slide a clamp onto each hose end before inserting the mender. Adding clamps after is awkward and usually results in a crooked fit.
4. Twist and push the barbed mender fully into each hose end. The barbs should sit inside the hose, not visible at the cut edge.
5. Slide each clamp over the barbed section and tighten. Firm pressure is what you're after, but don't overtighten on vinyl hose walls or you'll cut into the material.
6. Test under full pressure for 2 to 3 minutes. A weeping joint usually just needs a quarter-turn more on the clamp.
Fix #3: Cracked or Broken End Fitting — Hose End Replacement Connector
End fittings crack from overtightening, freeze cycles, and age. Tape won't hold at the threads. The connection needs a clamped, solid join to maintain pressure.
The fix is to cut the hose 2 to 3 inches back from the damaged fitting and attach a replacement end connector. These come in male (spigot end) and female (nozzle end) versions. Match the type before you buy.
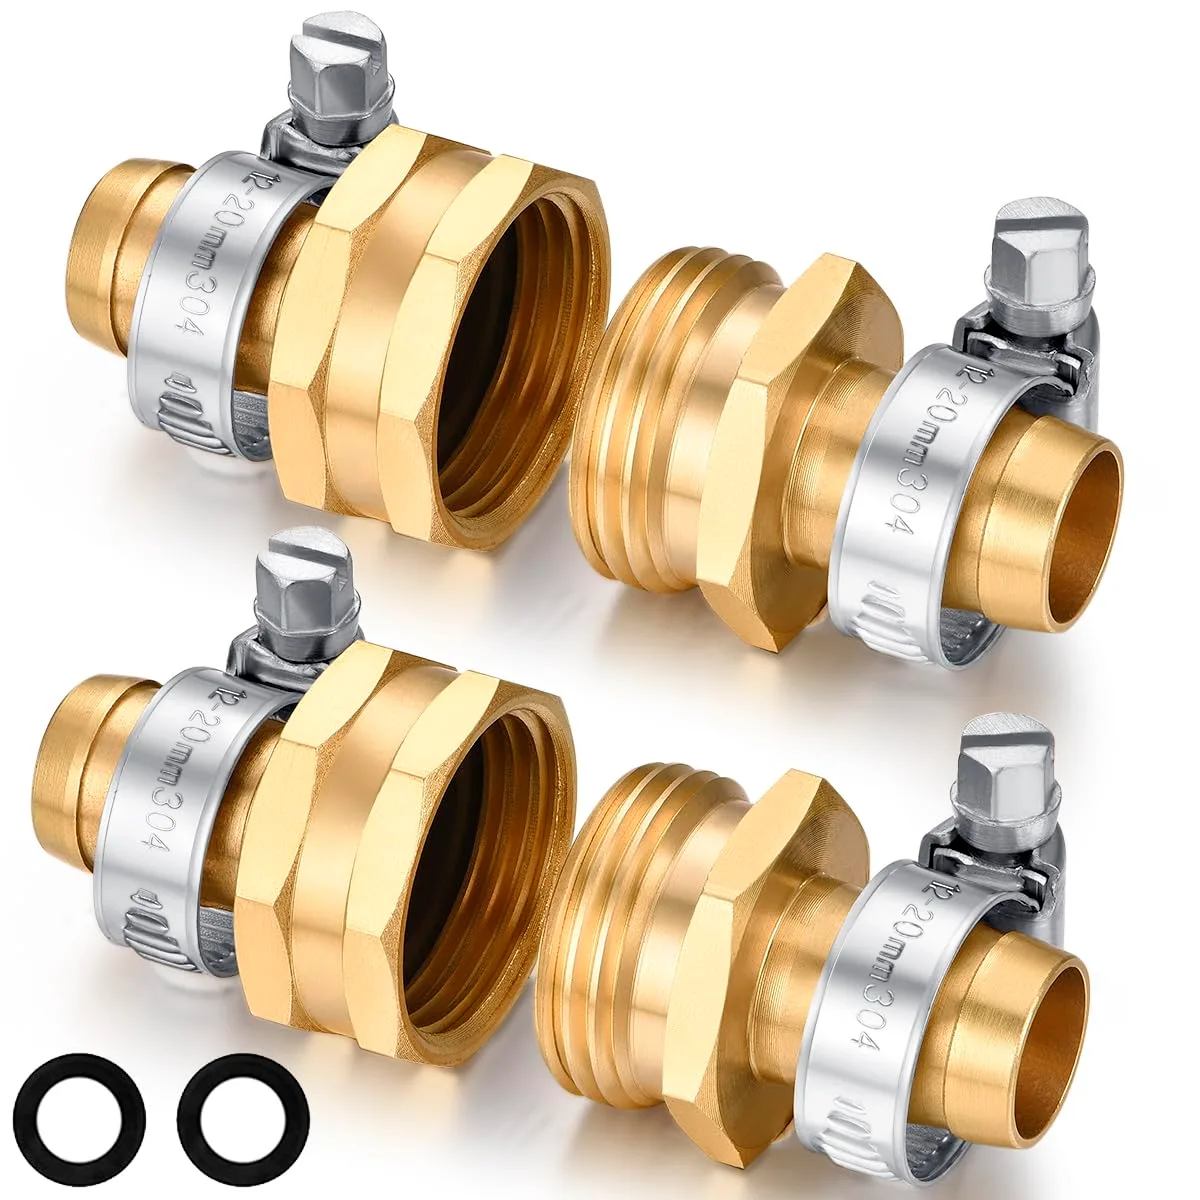
Step-by-Step: Cutting Back and Fitting a New End Connector
1. Cut the hose cleanly 2 to 3 inches from the damaged fitting. This removes any stressed hose material near the failure point.
2. Slide the clamp onto the cut end, then twist and push the replacement connector's barb fully into the hose.
3. Slide the clamp over the barbed section and tighten, positioned roughly 1/4 inch from the hose end.
4. Reconnect and test under full pressure. A weeping connection usually means the clamp needs another half-turn.
If your hose repeatedly fails at the same fitting, check whether a stuck connection at the tap is putting torque stress on the connector every time you disconnect it. Fixing that root cause prevents the same failure from coming back.
Fix #4: Multiple Holes or a Brittle Hose — When Repair Isn't Worth It
If your hose has more than two or three holes, or the wall is cracked, chalky, and stiff throughout, no single repair will hold for long. The material itself has failed.
A practical rule: if the hose would need two repairs in one season, a replacement at $25 to $60 for a mid-range 50-foot model is already a better investment. Aggregate buyer feedback consistently shows that budget vinyl hoses reach end-of-life within 2 to 3 seasons of regular use. Before tossing it, check whether your old rubber hose can be recycled locally rather than sending it straight to landfill.
Which Repair Method Is Right for Your Situation? (Quick-Decision Table)
Use this before buying anything. If you're still unsure, go back to Step 1 and assess the hose fully drained.
| Damage | Hole Size | Location | Fix | Time |
|---|---|---|---|---|
| Pinhole puncture | Under 1/4 inch | Mid-hose | Self-fusing silicone tape | 5 to 10 min |
| Split or blowout | Larger than 1/4 inch | Mid-hose | Hose mender + clamps | 10 to 15 min |
| Cracked fitting | Any size | At hose end | End replacement connector | 10 to 15 min |
| Multiple holes or brittle wall | Multiple | Anywhere | Replace the hose | N/A |
What It Actually Costs: Repair vs. Replace
Repair wins on cost in the short term, almost every time. Here's what you're looking at as of 2026.
| Item | Typical Cost |
|---|---|
| Self-fusing silicone tape (1 roll) | $6 to $15 |
| Hose mender kit with clamps | $5 to $12 |
| End replacement connector kit | $6 to $15 |
| Mid-range replacement hose (50 ft.) | $25 to $60 |
| Premium rubber hose (50 ft.) | $50 to $100 |
A tape repair costs under $10 and takes under 10 minutes. A mender connector repair runs about the same but typically lasts 3 to 5 years with normal use.
The math shifts toward replacement when the hose is over 5 to 7 years old, shows widespread wall degradation, or needs more than one repair per season. If you use the hose for demanding work like connecting to a pressure washer, a quality rubber hose at $40 to $60 will outlast two or three budget vinyl models easily. The same logic applies if you're running it as a supply line for drip irrigation.
Mistakes That Make the Repair Fail
- Applying tape to a wet surface. Moisture kills the silicone bond. Dry the hose for 2 to 3 minutes first.
- Using duct or electrical tape. Neither holds under water pressure outdoors. Both fail within days.
- Wrong connector size. A mender that doesn't match your hose's inner diameter will leak at the join point.
- Overtightening clamps on vinyl. Excess pressure cuts into the hose wall and creates a new leak right beside the repair.
- Skipping the pressure test. Always run the hose at full pressure for 2 to 3 minutes before putting it back in regular use.
Potable Water Warning: Not All Repairs Are Drinking-Water Safe
Every repair method in this guide uses components that may not be certified for drinking water contact. This applies to self-fusing tape, hose mender connectors, and end replacement connectors alike.
If your hose supplies a vegetable garden, an RV water line, or any water that people or animals consume, verify that all repair parts carry NSF/ANSI 61 certification. The label will state it clearly. When in doubt, keep the repaired hose for non-potable tasks and run a separate certified line for anything consumed.
How to Make Any Repair Last Longer
Drain the hose fully after every use. Water sitting inside under UV heat degrades the wall material faster, especially around repair zones where the material has already been stressed.
Store the hose coiled loosely in a shaded spot. Tight kinks near a tape wrap or mender connector create repeated stress that shortens any repair's lifespan.
In cold climates, drain and bring the hose inside before the first frost. Freeze damage near a recent repair is one of the most common causes of the same hose failing twice in one season.
Frequently Asked Questions
Can duct tape fix a garden hose?
No. Duct tape isn't waterproof under sustained water pressure. It typically holds for a few hours before the adhesive lifts and the leak returns.
Self-fusing silicone tape is the right choice, since it bonds to itself rather than relying on an adhesive that fails when wet.
How long does a self-fusing tape repair last?
Applied correctly to a dry hose with 3 to 4 full layers, a silicone tape repair typically holds for one to two full seasons. That's usually long enough to decide whether the hose is worth keeping or replacing at season's end.
Can you repair an expandable garden hose?
Rarely, and not reliably. The inner latex tube and outer fabric sleeve make it nearly impossible to seal with tape or a standard mender connector. Aggregate verified buyer feedback for expandable hose repairs consistently reports failure within a few weeks.
Replacement is almost always the better call.
Is a mender connector repair as strong as the original hose?
Yes, when done correctly. Most barbed hose mender connectors are rated to 100 PSI or higher, which exceeds standard household water pressure. A properly clamped repair is often stronger than the surrounding aged hose wall at that point.
The connector itself is rarely the first thing to fail after a solid install.
The Bottom Line: Match the Fix to the Damage
Every repair comes down to the same principle: identify the damage first, then choose the method. A pinhole takes tape. A mid-hose split takes a mender connector.
A cracked fitting takes a new end connector.
Get the match right, and a $5 to $10 repair holds for years. Get it wrong, and you're back to the same problem within days.

Similar Posts